Repair | P 16 / 22 |
<15 > Assembling swash bearing section
(1)Apply grease to the parts of swash bearing section referring to "< 2 > Lubrication to the machine parts" in page 3.
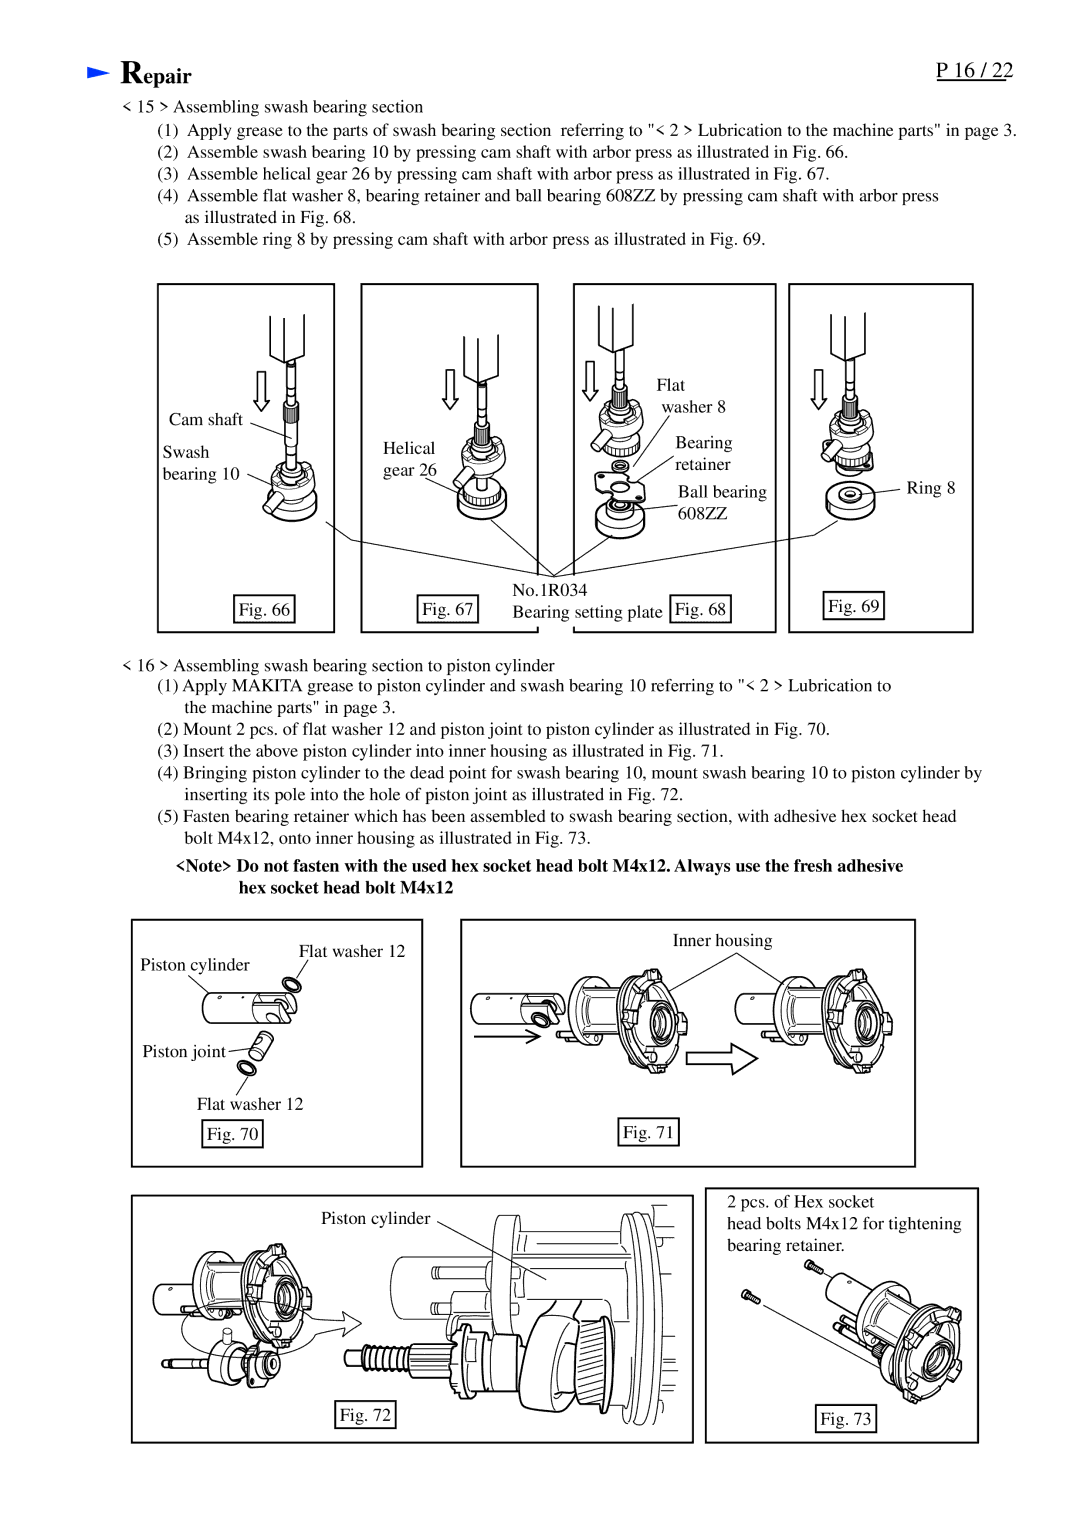
(2)Assemble swash bearing 10 by pressing cam shaft with arbor press as illustrated in Fig. 66.
(3)Assemble helical gear 26 by pressing cam shaft with arbor press as illustrated in Fig. 67.
(4)Assemble flat washer 8, bearing retainer and ball bearing 608ZZ by pressing cam shaft with arbor press
as illustrated in Fig. 68.
(5) Assemble ring 8 by pressing cam shaft with arbor press as illustrated in Fig. 69.
|
| Flat |
| |
Cam shaft |
| washer 8 |
| |
|
|
| ||
Swash | Helical | Bearing |
| |
retainer |
| |||
bearing 10 | gear 26 |
| ||
Ball bearing | Ring 8 | |||
|
| |||
|
| 608ZZ |
| |
|
| No.1R034 | Fig. 69 | |
Fig. 66 | Fig. 67 | Bearing setting plate Fig. 68 |
<16 > Assembling swash bearing section to piston cylinder
(1)Apply MAKITA grease to piston cylinder and swash bearing 10 referring to "< 2 > Lubrication to the machine parts" in page 3.
(2)Mount 2 pcs. of flat washer 12 and piston joint to piston cylinder as illustrated in Fig. 70.
(3)Insert the above piston cylinder into inner housing as illustrated in Fig. 71.
(4)Bringing piston cylinder to the dead point for swash bearing 10, mount swash bearing 10 to piston cylinder by inserting its pole into the hole of piston joint as illustrated in Fig. 72.
(5)Fasten bearing retainer which has been assembled to swash bearing section, with adhesive hex socket head bolt M4x12, onto inner housing as illustrated in Fig. 73.
<Note> Do not fasten with the used hex socket head bolt M4x12. Always use the fresh adhesive hex socket head bolt M4x12
Flat washer 12
Piston cylinder
Piston joint ![]()
Flat washer 12
Fig. 70
Inner housing |
Fig. 71 |
Piston cylinder |
Fig. 72 |
2 pcs. of Hex socket
head bolts M4x12 for tightening bearing retainer.
Fig. 73