Repair | P 14 / 22 |
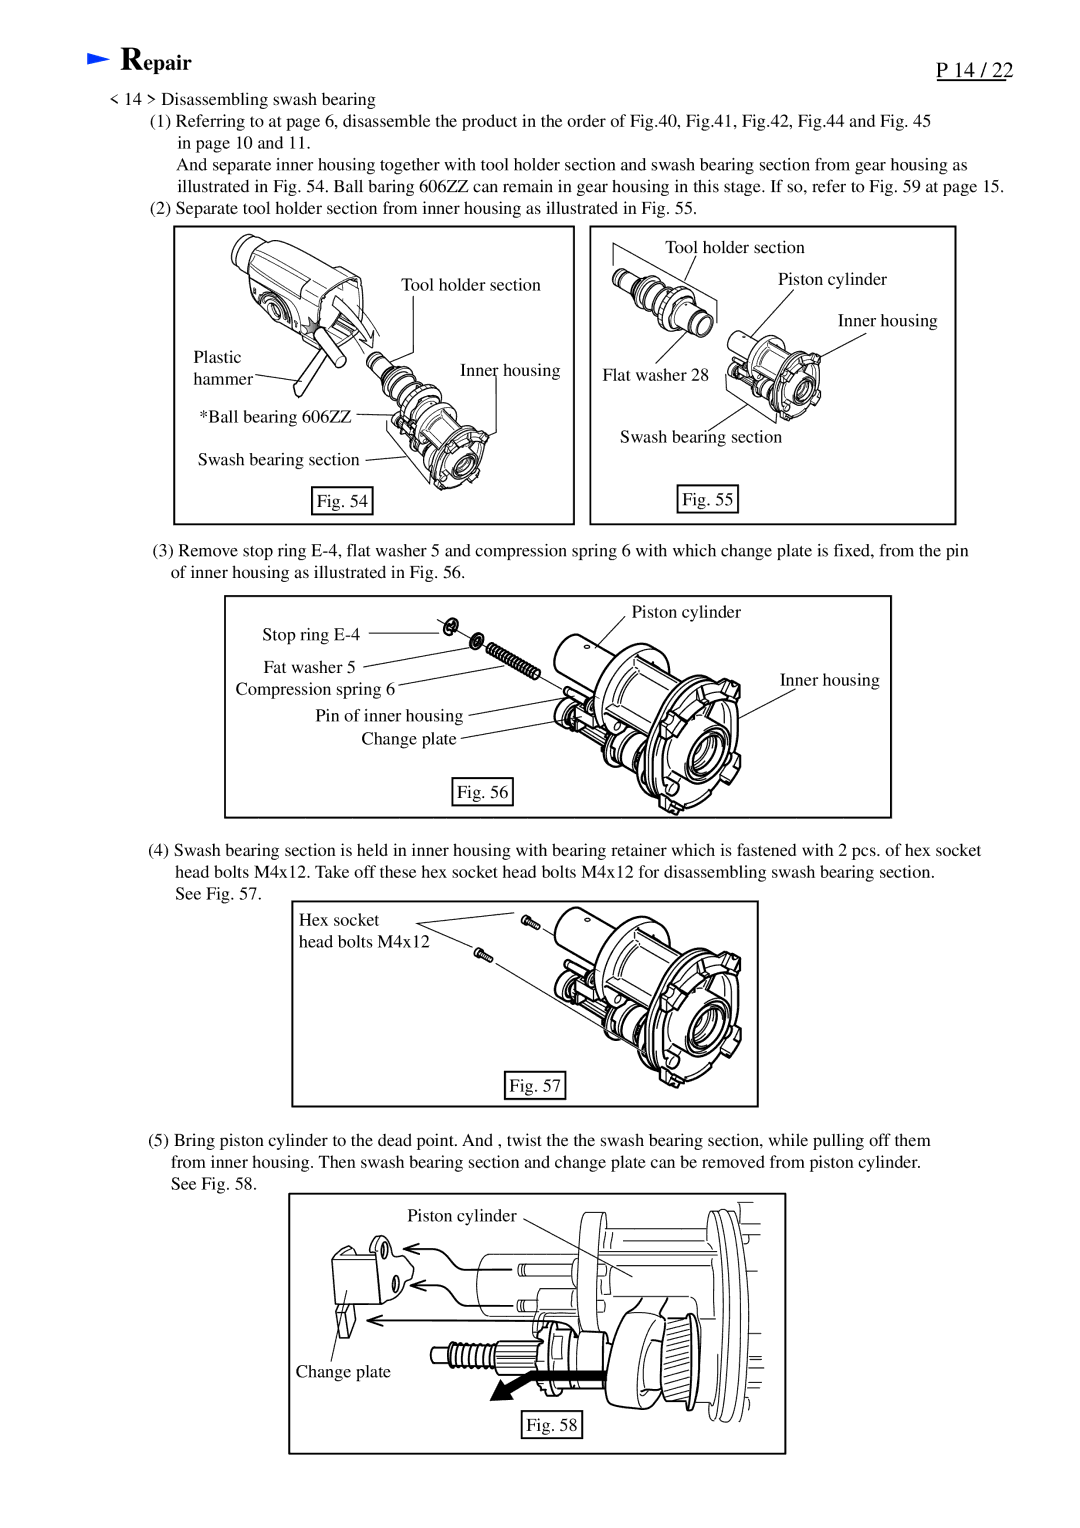
<14 > Disassembling swash bearing
(1)Referring to at page 6, disassemble the product in the order of Fig.40, Fig.41, Fig.42, Fig.44 and Fig. 45 in page 10 and 11.
And separate inner housing together with tool holder section and swash bearing section from gear housing as illustrated in Fig. 54. Ball baring 606ZZ can remain in gear housing in this stage. If so, refer to Fig. 59 at page 15.
(2)Separate tool holder section from inner housing as illustrated in Fig. 55.
| Tool holder section | |
Plastic | Inner housing | |
hammer | ||
|
*Ball bearing 606ZZ |
Swash bearing section ![]()
Fig. 54
Tool holder section
Piston cylinder
Inner housing
Flat washer 28
Swash bearing section
Fig. 55
(3)Remove stop ring
| Piston cylinder | |
Stop ring |
| |
Fat washer 5 | Inner housing | |
Compression spring 6 | ||
| ||
Pin of inner housing |
| |
Change plate |
| |
Fig. 56 |
|
(4)Swash bearing section is held in inner housing with bearing retainer which is fastened with 2 pcs. of hex socket head bolts M4x12. Take off these hex socket head bolts M4x12 for disassembling swash bearing section.
See Fig. 57.
Hex socket
head bolts M4x12
Fig. 57
(5)Bring piston cylinder to the dead point. And , twist the the swash bearing section, while pulling off them from inner housing. Then swash bearing section and change plate can be removed from piston cylinder. See Fig. 58.
Piston cylinder |
Change plate |
Fig. 58 |