Bit angle
(when chipping, scaling or demolishing)
| 1. Change lever |
1 | 2. Pointer |
| |
2 |
|
014090 |
|
The bit can be secured at 24 different angles. To change the bit angle, rotate the change lever so that the pointer points to the ![]() symbol. Turn the bit to the desired angle.
symbol. Turn the bit to the desired angle.
| 1. Change lever |
1 | 2. Pointer |
| |
2 |
|
014091 |
|
Rotate the change lever so that the pointer points to the ![]() symbol. Then make sure that the bit is securely held in place by turning it slightly.
symbol. Then make sure that the bit is securely held in place by turning it slightly.
Depth gauge
2 | 1. | Depth gauge |
2. | Lock button | |
1 |
|
|
014033 |
|
|
The depth gauge is convenient for drilling holes of uniform depth.
Press and hold the lock button, and insert the depth gauge into the hex hole.
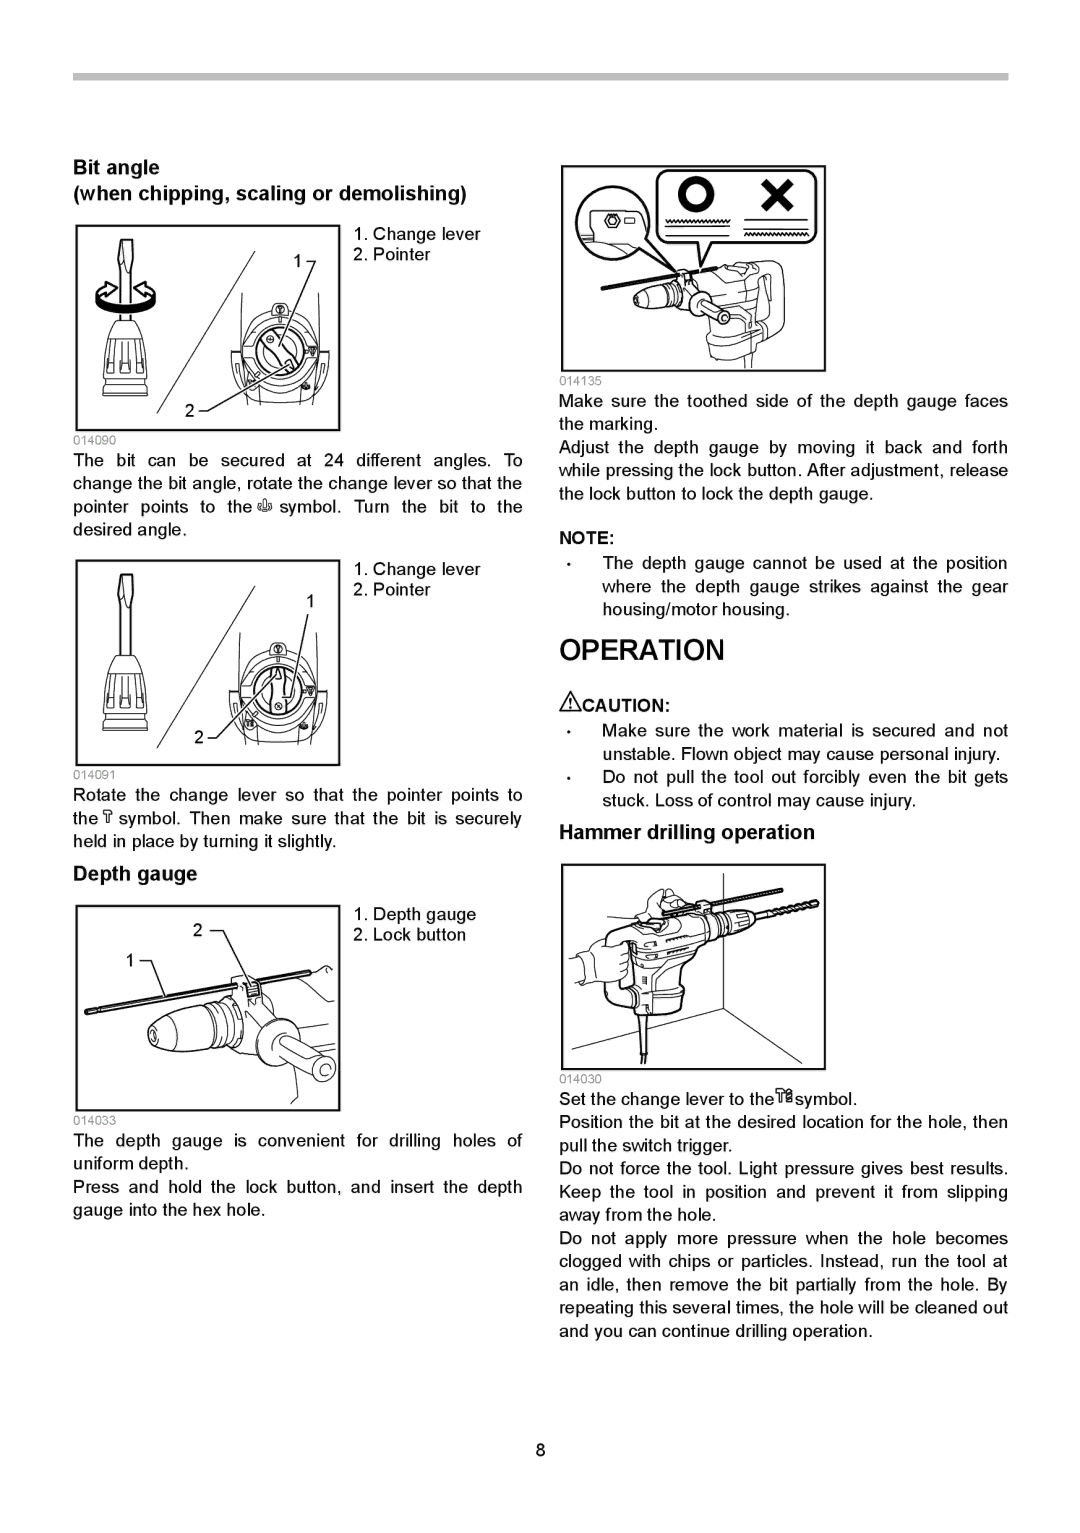
014135 |
Make sure the toothed side of the depth gauge faces the marking.
Adjust the depth gauge by moving it back and forth while pressing the lock button. After adjustment, release the lock button to lock the depth gauge.
NOTE:
•The depth gauge cannot be used at the position where the depth gauge strikes against the gear housing/motor housing.
OPERATION
![]() CAUTION:
CAUTION:
•Make sure the work material is secured and not unstable. Flown object may cause personal injury.
•Do not pull the tool out forcibly even the bit gets stuck. Loss of control may cause injury.
Hammer drilling operation
014030 |
Set the change lever to the![]() symbol.
symbol.
Position the bit at the desired location for the hole, then pull the switch trigger.
Do not force the tool. Light pressure gives best results. Keep the tool in position and prevent it from slipping away from the hole.
Do not apply more pressure when the hole becomes clogged with chips or particles. Instead, run the tool at an idle, then remove the bit partially from the hole. By repeating this several times, the hole will be cleaned out and you can continue drilling operation.
8
