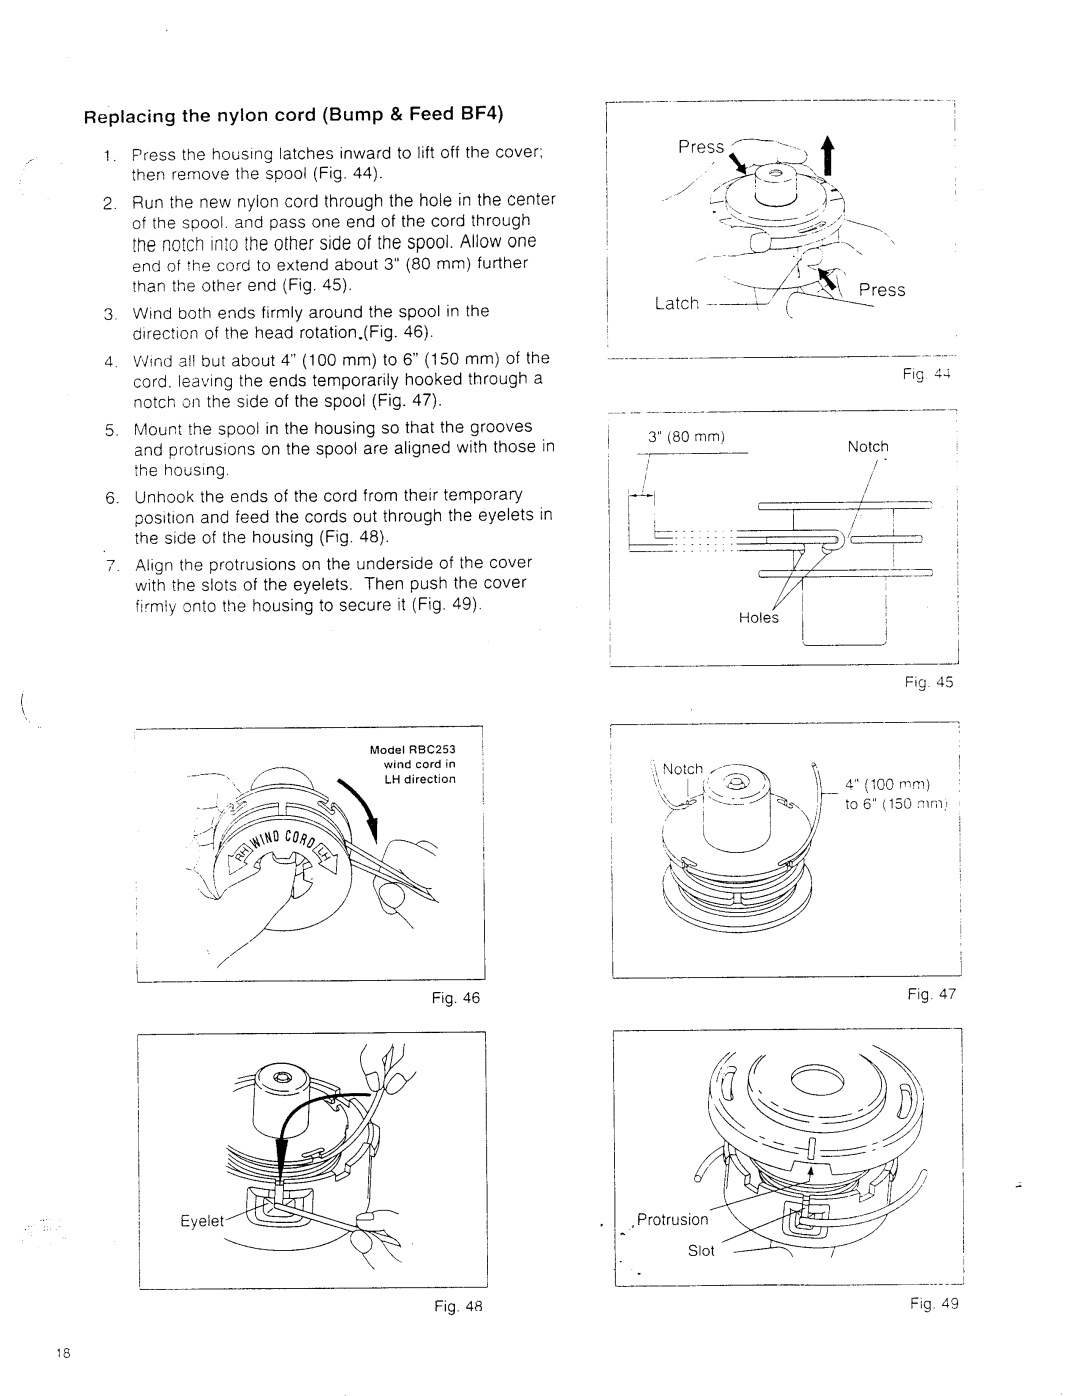
Replacing the nylon cord (Bump & Feed BF4)
1 . Press the homing latches inward to lift off the cover; then remove the spool (Fig. 44).
2. R u n the new nylon cord through the hole in the center of the spool. and pass one end of the cord through
[he notch into the other side of the spool. Allow one
end of the cord to extend about 3" (80 mm) further than the other end (Fig. 45).
3.Wind both ends firmly around the spool in the direction of the head rotation.(Fig. 46).
4.Wind all but about 4" (100 mm) to 6" (150 mm) of the cord, leaving the ends temporarily hooked through a notch on the side of the spool (Fig. 47).
5.Mount the spool in the housing so that the grooves and protrusions on the spool are aligned with those in the housing.
6 . Unhook the ends of the cord from their temporary position and feed the cords out through the eyelets in the side of the housing (Fig. 48).
7 . Align the protrusions on the underside of the cover with the slots of the eyelets. Then push the cover firmly onto the housing to secure it (Fig. 49).
i
1
Model RBC253
wind cord in LH direction
| / | I |
I | /' | |
|
| Fig. 46 |
Fig. 48
13" (80 mm)
-
1I1
E
i
,Protri
~~~
Fig $4
Notch
I
i
i I
1
I
Fig 45
4" (100 mm)
to 6" i 15G mi;?!
i
Fig. 47
1
Fig 49
18