ASSEMBLY INSTRUCTIONS FOR
STRING TRIMMER (Model RBC253)
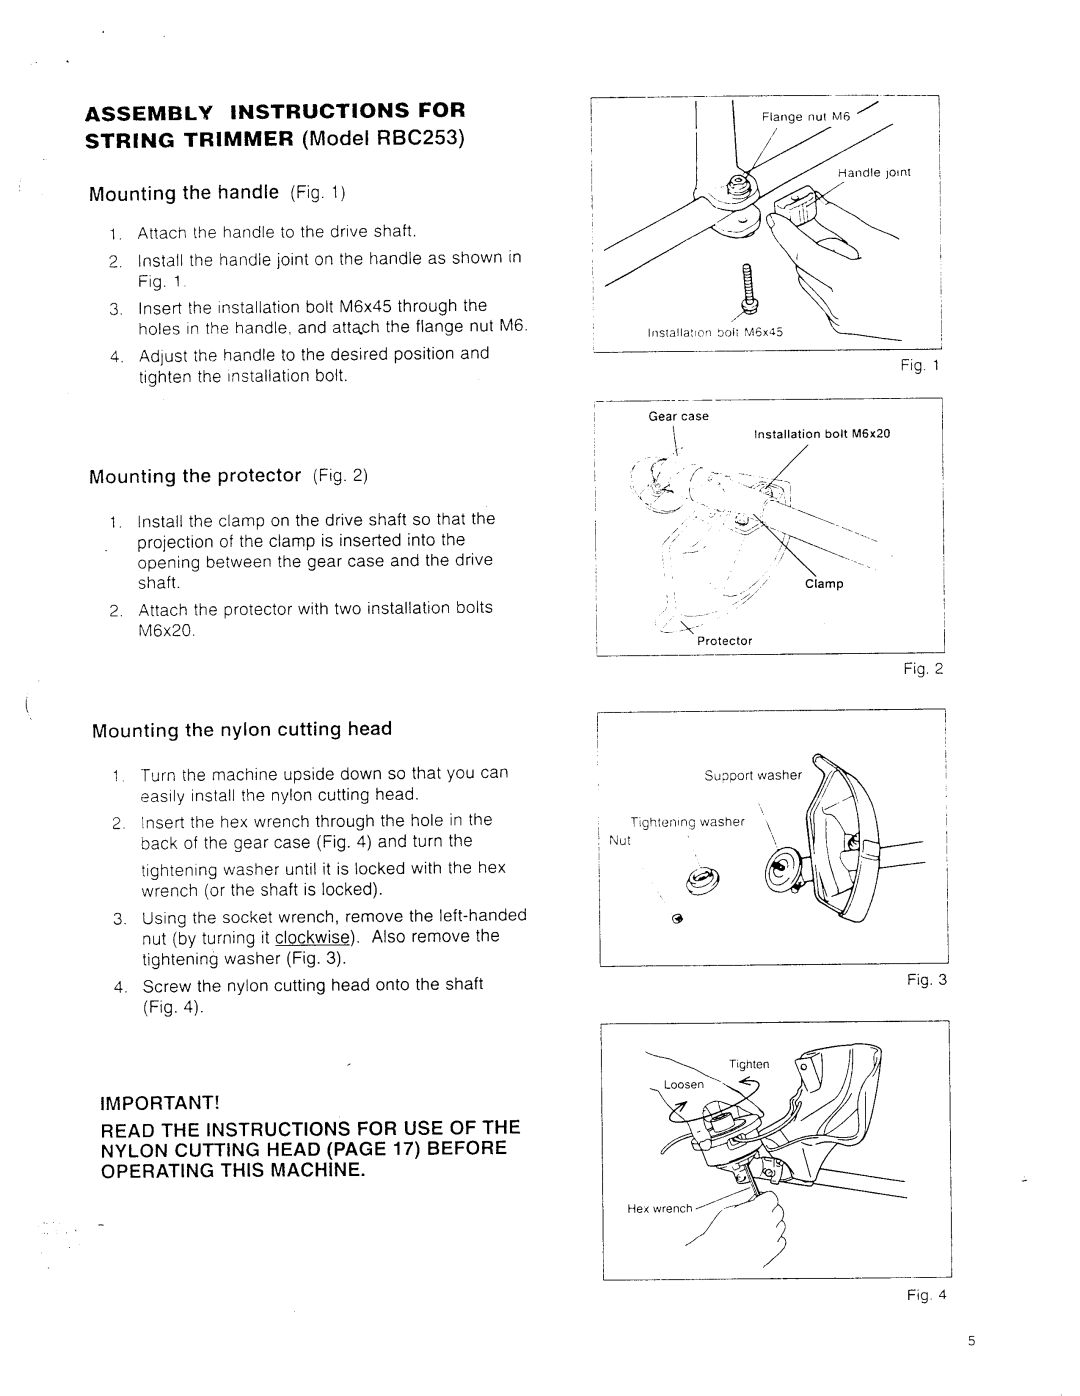
Mounting the handle (Fig. 1 )
1Attach the handle to the drive shaft
2Install the handle joint on the handle as shown in Fig 1
3Insert the installation bolt M6x45 through the holes in the handle and attach the flange nut M 6
4Adjust the handle to the desired position and tighten the installation bolt
Mounting the protector (Fig. 2)
1 . Install the clamp on the drive shaft so that the
,projection of the clamp is inserted into the opening between the gear case and the drive shaft.
2.Attach the protector with two installation bolts M6x20.
i
Mounting the nylon cutting head
1Turn the machine upside down so that you can easily install the nylon cutting head.
2. Insert the hex wrench through the hole in the back of the gear case (Fig. 4) and turn the
tightening washer until it is locked with the hex wrench (or the shaft is locked).
3.Using the socket wrench, remove the
4.Screw the nylon cutting head onto the shaft (Fig. 4).
IMPORTANT!
READ THE INSTRUCTIONS FOR USE OF THE NYLON CUTTING HEAD (PAGE 17) BEFORE OPERATING THIS MACHINE.
| - | Fig 1 |
|
| |
- | ... - |
|
, | Gear case |
|
| I | Installation bolt M6x20 |
Ciamp
, | Protector | |
I | ||
|
Fig. 2
Fig. 3
Fig. 4
5
