turns. Place the removed cover in a safe place for possible future use.
3. The inner circumference of the Lens Holder is threaded to accept the Lens. It is ex- tremely important not to cross thread the Lens or Lens Holder when start- ing the fastening process and do not over tighten.
Refer to figure 23.
4. Orient the Lens Holder/Lens over the end of Lens Holder Mounting Post as illustrated in figures 24 and 25. Lower the Lens Holder/Lens onto the top of the post and insert the previously removed
Locking Ring in between the two ring type parts of the Lens Holder as it is lowered onto the post.
5. While holding the Lens Holder/Lens about two
Lens Holder
Mounting Post
Locking
Ring
Figure 24 | Figure 25 |
inches from the top on Lens Holder Post, insert the previously removed screw in the center of the Locking Ring and tighten. Also tighten the other two screws located either side of the center screw on the Lock Ring. Refer to figure 26.
Note: At this time, do not be overly concerned about the exact position of the Lens. The final Lens position will be set during the Lens Alignment procedure.
6.Remove the large Lens Cover from the front of the Lens by grasping both sides of the cover and pull- ing straight forward. Refer to figure 27.
7.Proceed to “Connecting the LN9101M”.
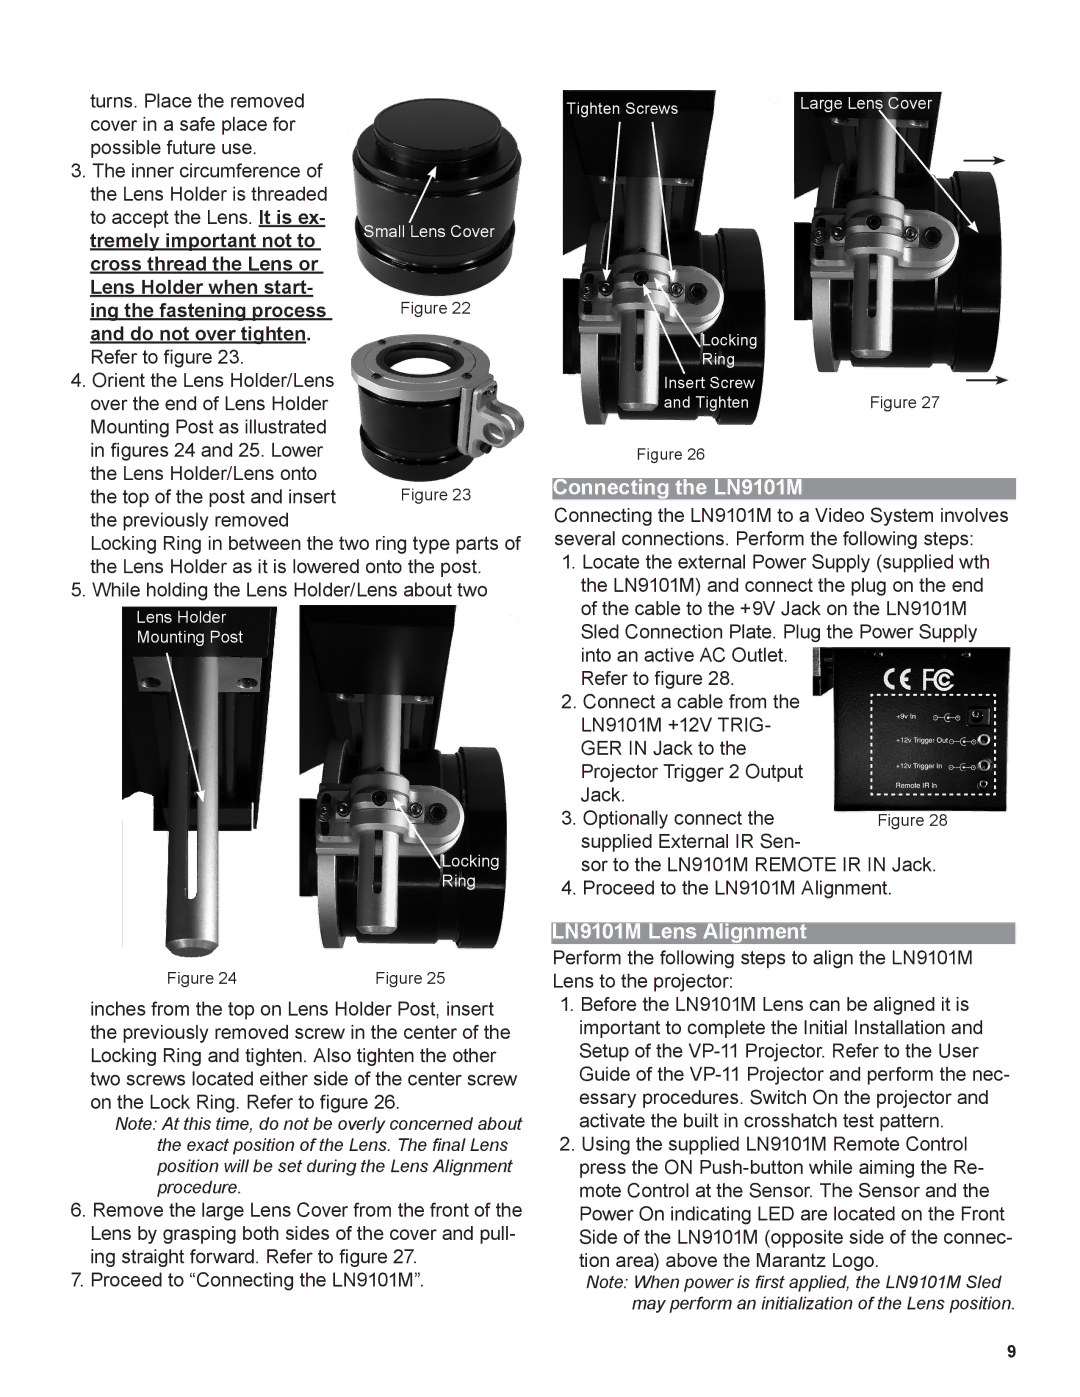
Tighten Screws | Large Lens Cover |
Locking
Ring
Insert Screw |
|
|
| |
Figure 27 | ||||
and Tighten | ||||
Figure 26 |
|
|
| |
|
|
|
| |
Connecting the LN9101M |
|
|
| |
Connecting the LN9101M to a Video System involves several connections. Perform the following steps:
1.Locate the external Power Supply (supplied wth the LN9101M) and connect the plug on the end of the cable to the +9V Jack on the LN9101M Sled Connection Plate. Plug the Power Supply into an active AC Outlet.
Refer to figure 28.
2.Connect a cable from the
LN9101M +12V TRIG- GER IN Jack to the Projector Trigger 2 Output Jack.
3. Optionally connect the supplied External IR Sen-
sor to the LN9101M REMOTE IR IN Jack.
4. Proceed to the LN9101M Alignment.
LN9101M Lens Alignment
Perform the following steps to align the LN9101M Lens to the projector:
1.Before the LN9101M Lens can be aligned it is important to complete the Initial Installation and Setup of the
2.Using the supplied LN9101M Remote Control press the ON
Note: When power is first applied, the LN9101M Sled may perform an initialization of the Lens position.
9