MEMORY FUNCTIONS
The avarage of the stored result in the selected bank is displayed.
The latest result stored is displayed when there is only a single result and the clock display remains when there are no results stored. The indication at the top of the display alternately changes from memory data number to date and to time.
The memory data is displayed for approximately 30 seconds. Approximately 30 seconds after MEMORY BUTTON is released, the apparatus will turn off.
2Press MEMORY BUTTON to move to next data.
The memory data number 1 is the latest among the stored data in the selected memory bank.
3Every depression of the key switches among the memory data.
As MEMORY BUTTON is pressed, the memory data number increases; the bigger the number, the older the result.
4 Press ON/OFF BUTTON 2 and turn off the unit.
Refer to "PARTS NAMES AND PRODUCT COMPONENTS" on page 2 for circled numbers: 1 ~ 14
CARE AND MAINTENANCE
the batteries out of reach of children.
We suggest that you have your blood pressure monitor checked every 2 years. This operation may only be performed by the manufacturer or by firms authorized by the manufacturer.
Do not inflate the cuff when it is not wrapped around your arm.
Do not disassemble or modify the unit.
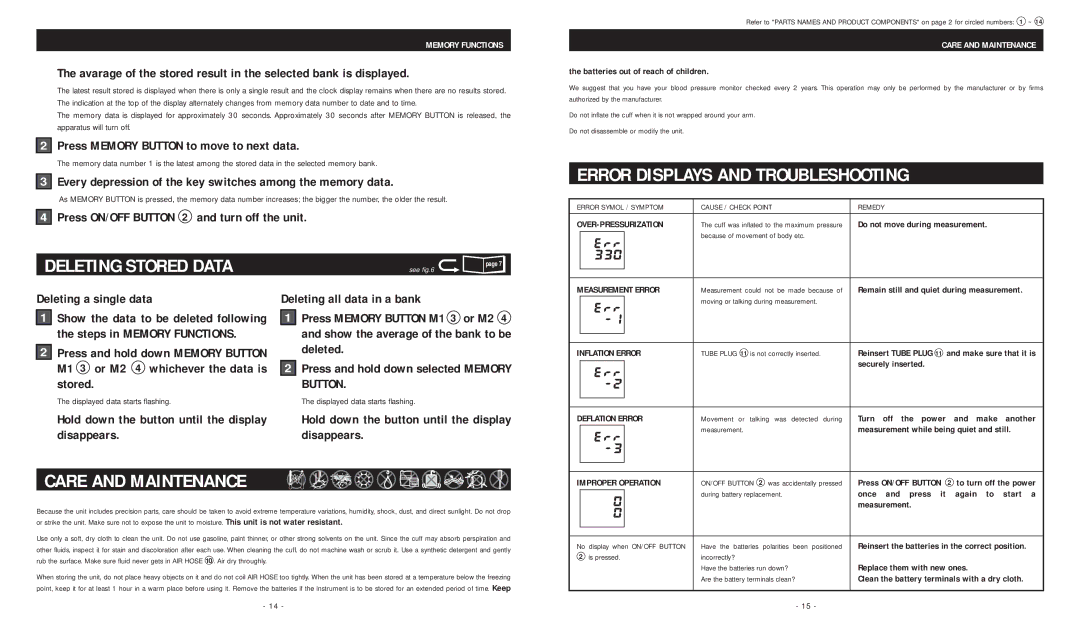
ERROR DISPLAYS AND TROUBLESHOOTING
ERROR SYMOL / SYMPTOM | CAUSE / CHECK POINT | REMEDY | ||
The cuff was inflated to the maximum pressure | Do not move during measurement. | |||
|
|
| because of movement of body etc. |
|
|
|
|
| |
DELETING STORED DATA
Deleting a single data
1Show the data to be deleted following the steps in MEMORY FUNCTIONS.
2Press and hold down MEMORY BUTTON M1 3 or M2 4 whichever the data is stored.
The displayed data starts flashing.
see fig.6 | page 7 |
|
Deleting all data in a bank
1Press MEMORY BUTTON M1 3 or M2 4 and show the average of the bank to be deleted.
2Press and hold down selected MEMORY BUTTON.
The displayed data starts flashing.
MEASUREMENT ERROR | Measurement could not be made because of | Remain still and quiet during measurement. | ||
|
|
| moving or talking during measurement. |
|
|
|
|
|
|
|
|
|
|
|
INFLATION ERROR | TUBE PLUG 11 is not correctly inserted. | Reinsert TUBE PLUG 11 and make sure that it is | ||
|
|
|
| securely inserted. |
|
|
|
| |
|
|
|
|
|
Hold down the button until the display | Hold down the button until the display |
disappears. | disappears. |
CARE AND MAINTENANCE | GASOLINE |
| PAINT |
| THINNER |
Because the unit includes precision parts, care should be taken to avoid extreme temperature variations, humidity, shock, dust, and direct sunlight. Do not drop or strike the unit. Make sure not to expose the unit to moisture. This unit is not water resistant.
Use only a soft, dry cloth to clean the unit. Do not use gasoline, paint thinner, or other strong solvents on the unit. Since the cuff may absorb perspiration and other fluids, inspect it for stain and discoloration after each use. When cleaning the cuff, do not machine wash or scrub it. Use a synthetic detergent and gently rub the surface. Make sure fluid never gets in AIR HOSE 10 . Air dry throughly.
When storing the unit, do not place heavy objects on it and do not coil AIR HOSE too tightly. When the unit has been stored at a temperature below the freezing point, keep it for at least 1 hour in a warm place before using it. Remove the batteries if the instrument is to be stored for an extended period of time. Keep
DEFLATION ERROR | Movement or talking was detected during | Turn off the power and make another | ||
|
|
| measurement. | measurement while being quiet and still. |
|
|
|
|
|
|
|
|
|
|
IMPROPER OPERATION | ON/OFF BUTTON 2 was accidentally pressed | Press ON/OFF BUTTON 2 to turn off the power | ||
|
|
| during battery replacement. | once and press it again to start a |
|
|
| ||
|
|
|
| measurement. |
|
|
|
|
|
|
|
|
|
|
No display when ON/OFF BUTTON | Have the batteries polarities been positioned | Reinsert the batteries in the correct position. | ||
2 is pressed. | incorrectly? |
| ||
|
|
| Have the batteries run down? | Replace them with new ones. |
|
|
| Are the battery terminals clean? | Clean the battery terminals with a dry cloth. |
- 14 - | - 15 - |
