LP Cylinder Leak Test For Your Safety
ATTENTION: Leak Test must be repeated each time the LP cylinder is exchanged or refilled.
•Do not smoke during leak test.
•Do not use an open flame to check for gas leaks
• BBQ must be leak tested outdoors in a well ventilated area, away from ignition sources such as gas fired electrical appliances. During leak test, keep your BBQ away from open flames or sparks.
ºUse a clean paint brush and a 50/50 mild soap and water mixture.
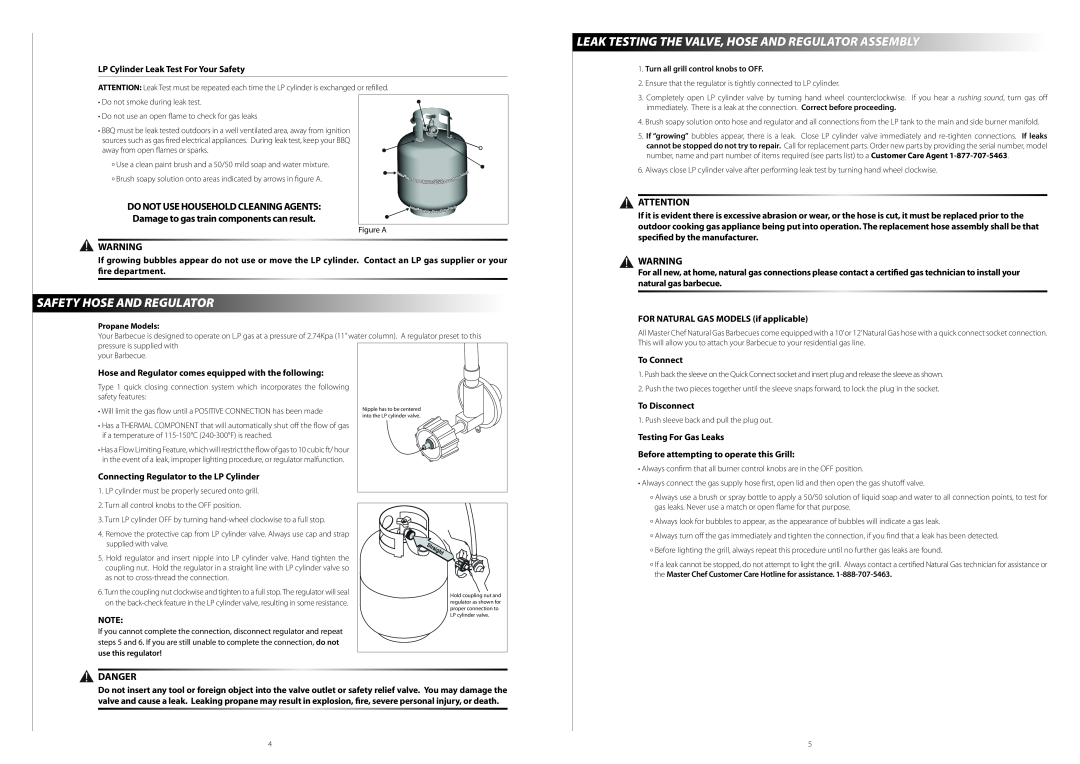
º Brush soapy solution onto areas indicated by arrows in figure A.
DO NOT USE HOUSEHOLD CLEANING AGENTS:
Damage to gas train components can result.
Figure A
![]() WARNING
WARNING
If growing bubbles appear do not use or move the LP cylinder. Contact an LP gas supplier or your fire department.
SAFETY HOSE AND REGULATOR
Propane Models:
Your Barbecue is designed to operate on L.P gas at a pressure of 2.74Kpa (11” water column). A regulator preset to this pressure is supplied with
your Barbecue.
Hose and Regulator comes equipped with the following: |
| |
Type 1 quick closing connection system which incorporates the following |
| |
safety features: |
| |
• Will limit the gas flow until a POSITIVE CONNECTION has been made | Nipple has to be centered | |
into the LP cylinder valve. | ||
| ||
• Has a THERMAL COMPONENT that will automatically shut off the flow of gas |
| |
if a temperature of |
| |
• Has a Flow Limiting Feature, which will restrict the flow of gas to 10 cubic ft/ hour |
| |
in the event of a leak, improper lighting procedure, or regulator malfunction. |
| |
Connecting Regulator to the LP Cylinder |
| |
1. LP cylinder must be properly secured onto grill. |
| |
2. Turn all control knobs to the OFF position. |
| |
3. Turn LP cylinder OFF by turning |
| |
4. Remove the protective cap from LP cylinder valve. Always use cap and strap |
| |
supplied with valve. |
| |
5. Hold regulator and insert nipple into LP cylinder valve. Hand tighten the |
| |
coupling nut. Hold the regulator in a straight line with LP cylinder valve so |
| |
as not to |
| |
6. Turn the coupling nut clockwise and tighten to a full stop. The regulator will seal | Hold coupling nut and | |
on the | ||
regulator as shown for | ||
| proper connection to | |
NOTE: | LP cylinder valve. | |
| ||
If you cannot complete the connection, disconnect regulator and repeat |
| |
steps 5 and 6. If you are still unable to complete the connection, do not |
| |
use this regulator! |
|
 DANGER
Do not insert any tool or foreign object into the valve outlet or safety relief valve. You may damage the valve and cause a leak. Leaking propane may result in explosion, fire, severe personal injury, or death.
LEAK TESTING THE VALVE, HOSE AND REGULATOR ASSEMBLY
1.Turn all grill control knobs to OFF.
2.Ensure that the regulator is tightly connected to LP cylinder.
3.Completely open LP cylinder valve by turning hand wheel counterclockwise. If you hear a rushing sound, turn gas off immediately. There is a leak at the connection. Correct before proceeding.
4.Brush soapy solution onto hose and regulator and all connections from the LP tank to the main and side burner manifold.
5.If “growing” bubbles appear, there is a leak. Close LP cylinder valve immediately and
6.Always close LP cylinder valve after performing leak test by turning hand wheel clockwise.
![]() ATTENTION
ATTENTION
If it is evident there is excessive abrasion or wear, or the hose is cut, it must be replaced prior to the outdoor cooking gas appliance being put into operation. The replacement hose assembly shall be that specified by the manufacturer.
WARNING
For all new, at home, natural gas connections please contact a certified gas technician to install your natural gas barbecue.
FOR NATURAL GAS MODELS (if applicable)
All Master Chef Natural Gas Barbecues come equipped with a 10’or 12’Natural Gas hose with a quick connect socket connection. This will allow you to attach your Barbecue to your residential gas line.
To Connect
1.Push back the sleeve on the Quick Connect socket and insert plug and release the sleeve as shown.
2.Push the two pieces together until the sleeve snaps forward, to lock the plug in the socket.
To Disconnect
1.Push sleeve back and pull the plug out.
Testing For Gas Leaks
Before attempting to operate this Grill:
•Always confirm that all burner control knobs are in the OFF position.
•Always connect the gas supply hose first, open lid and then open the gas shutoff valve.
ºAlways use a brush or spray bottle to apply a 50/50 solution of liquid soap and water to all connection points, to test for gas leaks. Never use a match or open flame for that purpose.
ºAlways look for bubbles to appear, as the appearance of bubbles will indicate a gas leak.
º Always turn off the gas immediately and tighten the connection, if you find that a leak has been detected.
ºBefore lighting the grill, always repeat this procedure until no further gas leaks are found.
ºIf a leak cannot be stopped, do not attempt to light the grill. Always contact a certified Natural Gas technician for assistance or the Master Chef Customer Care Hotline for assistance.
4 | 5 |