•This gas barbecue has a 12,000 BTU infrared rear burner. The rear burner is designed to be used in conjunction with the
Centro Rotisserie Kit. See the Rotisserie Kit for usage and assembly instructions.
•Place the prepared spit rod across the hangers inside the grill.
•Install motor.
•Place a shallow cooking pan underneath meat. Adding water, beer, wine or consommé for added flavour. This dish is used to collect drippings for fast basting and naturally delicious gravy, and keeps your appliance clean.
•Basting liquid should be added as required and should never be allowed to evaporate.
•To seal in juices, and for the best cooking results, ensure that the BBQ lid remains closed and the burner temperature ad- justed when needed.
•Always begin by searing meat uncovered on HIGH. Covering meat with aluminum foil and adjusting temperature if necessary.
![]() DO NOT OPERATE REAR BURNER AT THE SAME TIME AS THE MAIN BURNERS
DO NOT OPERATE REAR BURNER AT THE SAME TIME AS THE MAIN BURNERS
Regulator Flow Limiting Device
If you are experiencing any of the following performance issues you may have activated the flow limiting feature in your regulator:
•Burners not getting hot enough
•Low or incomplete burner flames
•Low gas pressure
•Burners not staying lit
Resetting the Regulator Flow Limiting feature
1.With all control knobs and the gas source in the OFF position, Open the BBQ lid
2.Disconnect the hose and regulator from the Propane tank
3.Turn all BBQ control knobs to the “Hi” position
4.Let stand for
5.Turn all BBQ control knobs back to the “OFF” position
6.With the BBQ lid still OPEN, reconnect the hose and regulator to the propane tank- Do not cross thread the connection.
7.
8.Check all hose connections to ensure that a positive seal has been made.
9.Slowly turn ON the propane gas supply, ¼ to ½ a turn.
10.Wait approximately 5 seconds for the hose and regulator pressure to stabilize (to prevent the flow limiting device feature from being
11.Turn the selected burner control knob, to the “Hi” position
12.Press the Electronic ignition button, or use the match and match
holder, or a BBQ lighter to ignite the selected burner.
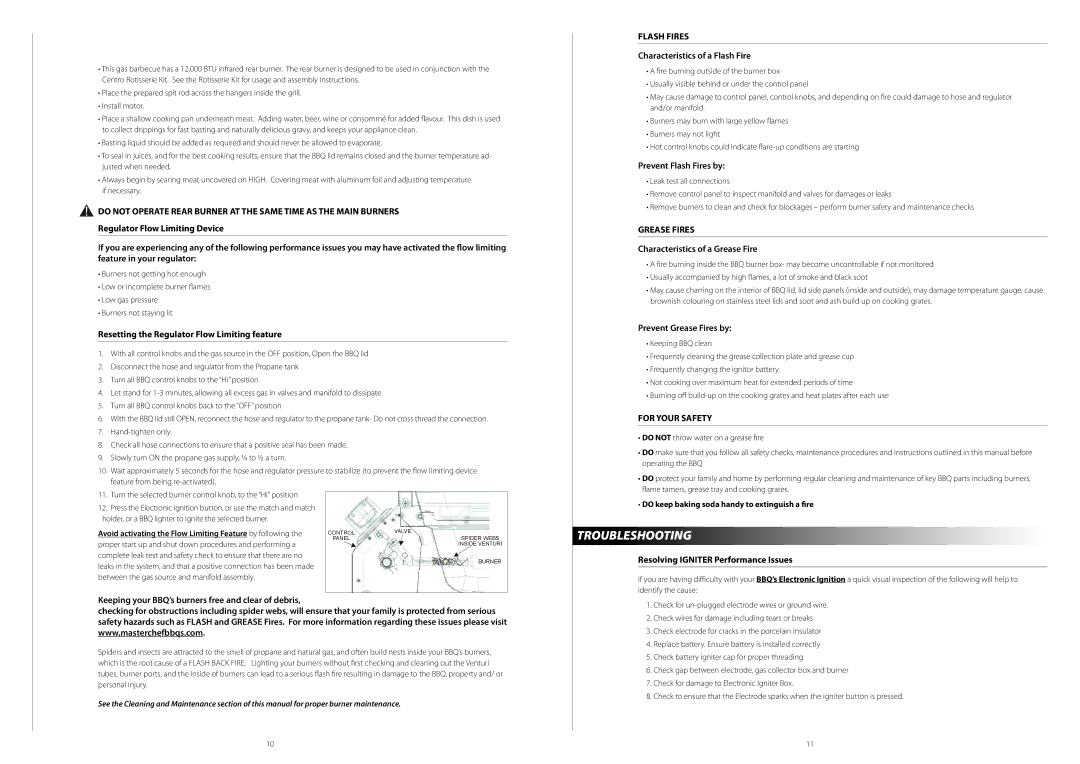
Avoid activating the Flow Limiting Feature by following the | CONTROL | VALVE | |
SPIDER WEBS | |||
proper start up and shut down procedures and performing a | PANEL | ||
| INSIDE VENTURI | ||
complete leak test and safety check to ensure that there are no |
| BURNER | |
leaks in the system, and that a positive connection has been made |
| ||
|
| ||
between the gas source and manifold assembly. |
|
|
Keeping your BBQ’s burners free and clear of debris,
checking for obstructions including spider webs, will ensure that your family is protected from serious safety hazards such as FLASH and GREASE Fires. For more information regarding these issues please visit www.masterchefbbqs.com.
Spiders and insects are attracted to the smell of propane and natural gas, and often build nests inside your BBQ’s burners, which is the root cause of a FLASH BACK FIRE. Lighting your burners without first checking and cleaning out the Venturi tubes, burner ports, and the inside of burners can lead to a serious flash fire resulting in damage to the BBQ, property and/ or personal injury.
See the Cleaning and Maintenance section of this manual for proper burner maintenance.
FLASH FIRES
Characteristics of a Flash Fire
•A fire burning outside of the burner box
•Usually visible behind or under the control panel
•May cause damage to control panel, control knobs, and depending on fire could damage to hose and regulator and/or manifold.
•Burners may burn with large yellow flames
•Burners may not light
•Hot control knobs could indicate
Prevent Flash Fires by:
•Leak test all connections
•Remove control panel to inspect manifold and valves for damages or leaks
•Remove burners to clean and check for blockages – perform burner safety and maintenance checks
GREASE FIRES
Characteristics of a Grease Fire
•A fire burning inside the BBQ burner box- may become uncontrollable if not monitored
•Usually accompanied by high flames, a lot of smoke and black soot
•May cause charring on the interior of BBQ lid, lid side panels (inside and outside), may damage temperature gauge, cause brownish colouring on stainless steel lids and soot and ash build up on cooking grates.
Prevent Grease Fires by:
•Keeping BBQ clean
•Frequently cleaning the grease collection plate and grease cup
•Frequently changing the ignitor battery.
•Not cooking over maximum heat for extended periods of time
•Burning off
FOR YOUR SAFETY
•DO NOT throw water on a grease fire
•DO make sure that you follow all safety checks, maintenance procedures and instructions outlined in this manual before operating the BBQ
•DO protect your family and home by performing regular cleaning and maintenance of key BBQ parts including burners, flame tamers, grease tray and cooking grates.
•DO keep baking soda handy to extinguish a fire
TROUBLESHOOTING
Resolving IGNITER Performance Issues
If you are having difficulty with your BBQ’s Electronic Ignition a quick visual inspection of the following will help to identify the cause:
1.Check for
2.Check wires for damage including tears or breaks
3.Check electrode for cracks in the porcelain insulator
4.Replace battery. Ensure battery is installed correctly
5.Check battery igniter cap for proper threading
6.Check gap between electrode, gas collector box and burner
7.Check for damage to Electronic Igniter Box.
8.Check to ensure that the Electrode sparks when the igniter button is pressed.
10 | 11 |