INSTRUCTION MANUAL FOR MODEL ET.1 REMOTE CIIEKil
Introduction
Congratulationson your purchase of the Remote ChekN. a programmable radio frequency food thermometer and timer. You uill nor bc able to remotely monitor the time and temperatureof food cooking outdoors frorn anywhere in your home.
Components
l.I - silver receiverunit
2. I - black transmitter unit
3. 2 - detachablestainlesssteelprobe sensors
4. 2 - A{and 2 - AAA batteries
Receiver Features
'/""cLlP
@
@
@
52(Direct
Plugin)
,^, |
| TAND |
\\ | ||
|
|
Maviii* tncusrestnc. Eorsonrl | |
- | |
| M e d en C hn a |
| P a l e nPl e n d i n O |
BATTER-\T-
COMPARTMENT
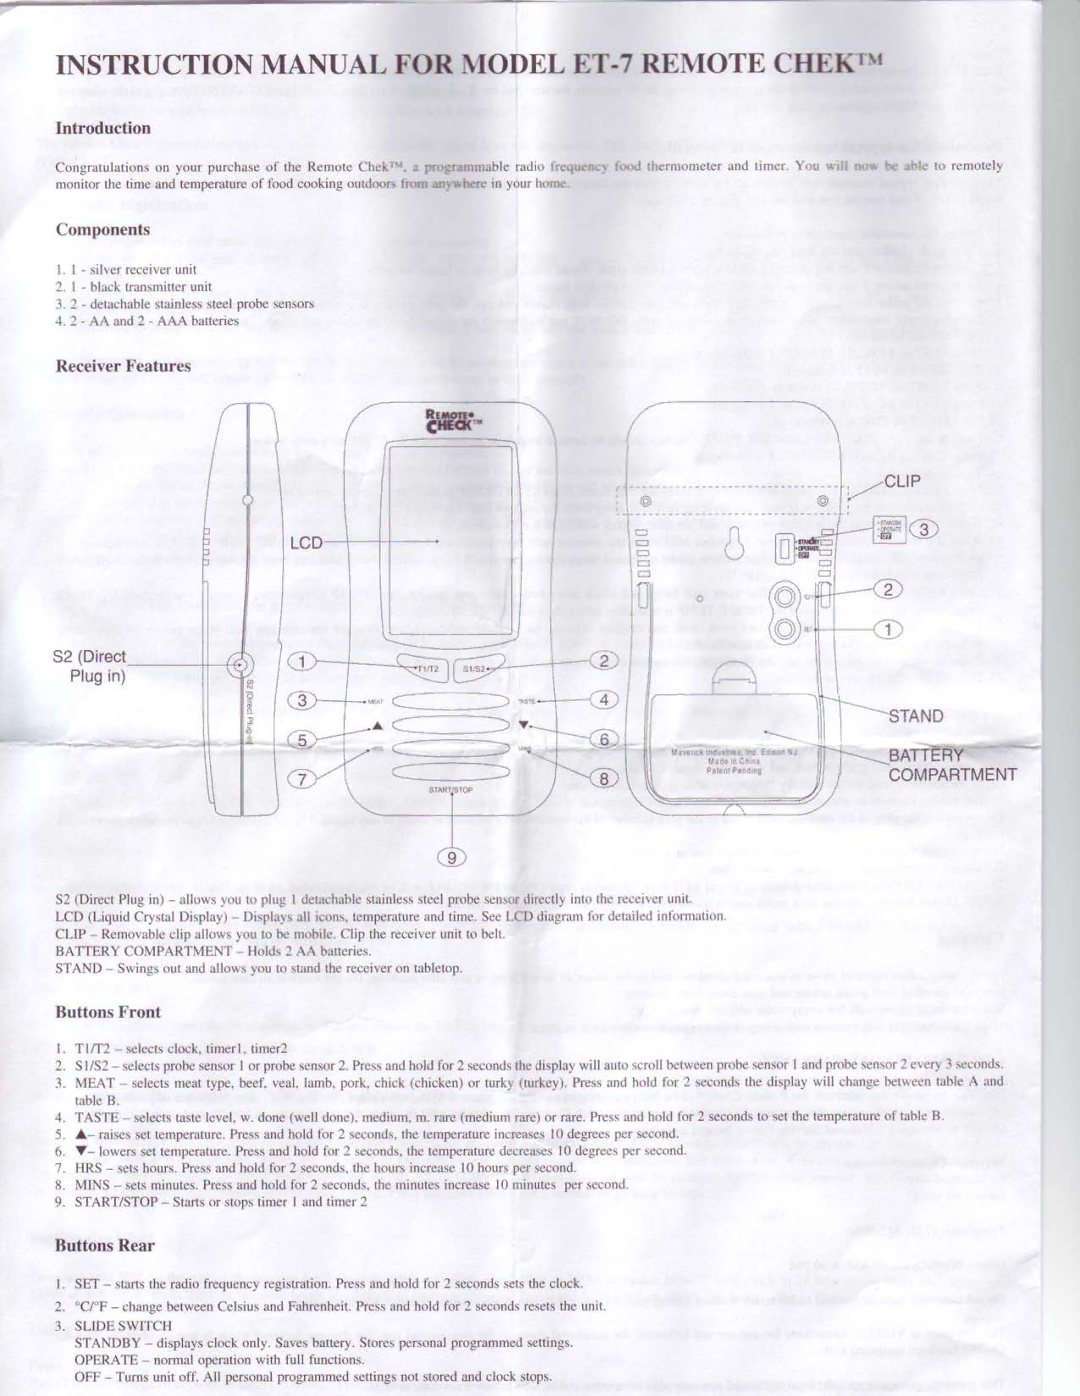
52 (Direct Plug in) - allows you to plug I detachablestainlesssteelprobe sensordirectly into the receiverunit.
LCD (Liquid Crystal Display) - Displaysall icons,temperatureand time. SeeLCD diagramfor detailedinformation. CLIP - Removableclip allows you to be mobile. Clip the receiverunit to belt.
BATTERY COMPARTMENT - Holds 2 AA batteries.
STAND - Swings out and allows you to stand the receiver on tabletop.
ButtonsFront
l. T1n2 - selectsclock, timerl, timer2
2.S1/S2- selectsprobe sensor I or probe sensor2. Pressand hold for 2 secondsthe display will auto scroll betweenprobe sensor 1 and probe sensor2 every 3 seconds.
3.MEAT - selectsmeat type, beef, veal, lamb, pork, chick (chicken) or turky (turkey). Press and hold for 2 secondsthe display will change between table A and table B.
4.TASTE - selectstaste level, w. done (well done), medium, m. rare (medium rare) or rare. Pressand hold for 2 secondsto set the temperatureof table B.
5.A- raises set temperature.Pressand hold for 2 seconds,the temperatureincreases10 degreesper second.
6.V- lowers set temperature.Pressand hold for 2 seconds,the temperaturedecreases10 degreesper second.
7.HRS - setshours. Pressand hold for 2 seconds,the hours increase l0 hours per second.
8.MINS - setsminutes. Pressand hold for 2 seconds,the minutes increase 10 minutes per second.
9.START/STOP - Starts or stoDstimer I and timer 2
ButtonsRear
1.SET - startsthe radio frequency registration. Pressand hold for 2 secondssetsthe clock.
2.'CfF - changebetween Celsius and Fahrenheit. Pressand hold for 2 secondsresetsthe unit.
3.SLIDE SWITCH
STANDBY - displays clock only. Savesbattery. Storespersonal programmed settings. OPERATE - normal operation with full functions.
OFF Tums unit off. All personal programmed settingsnot stored and clock stops.