INSTALLATION
INSTALL DRYER UNIT AND STAND
The dryer and stand are installed first. With the connections prepared for exhausting, electric power and gas (if gas stacked washer/dryer, see page 9), the dryer and stand are moved to the location.
NOTE: When moving the dryer and stand on an appliance hand truck, it is recommended that the dryer and stand be trucked upside down. Protective padding should be used to avoid damage to the cabinet finish.
1.Grasp the dryer and stand. Pull away from washer and off of shipping base. Install vinyl feet; in Accessory Package located in Washer. Move dryer and stand to location. Level by adjusting leveling legs.
NOTE: The rear legs are “washer” legs and use the larger feet.
2.GAS MODELS - Connect gas line using pipe joint compound on male threads, see page 9 for GAS CONNECTION.
ELECTRIC MODELS - Install electric power cord (U.L. Approved). NOTE: Power cord provided with Canadian models.
Make appropriate external ground connection.
See DETAILED Installation Instructions for
ELECTRICAL REQUIREMENTS AND GROUNDING (pages
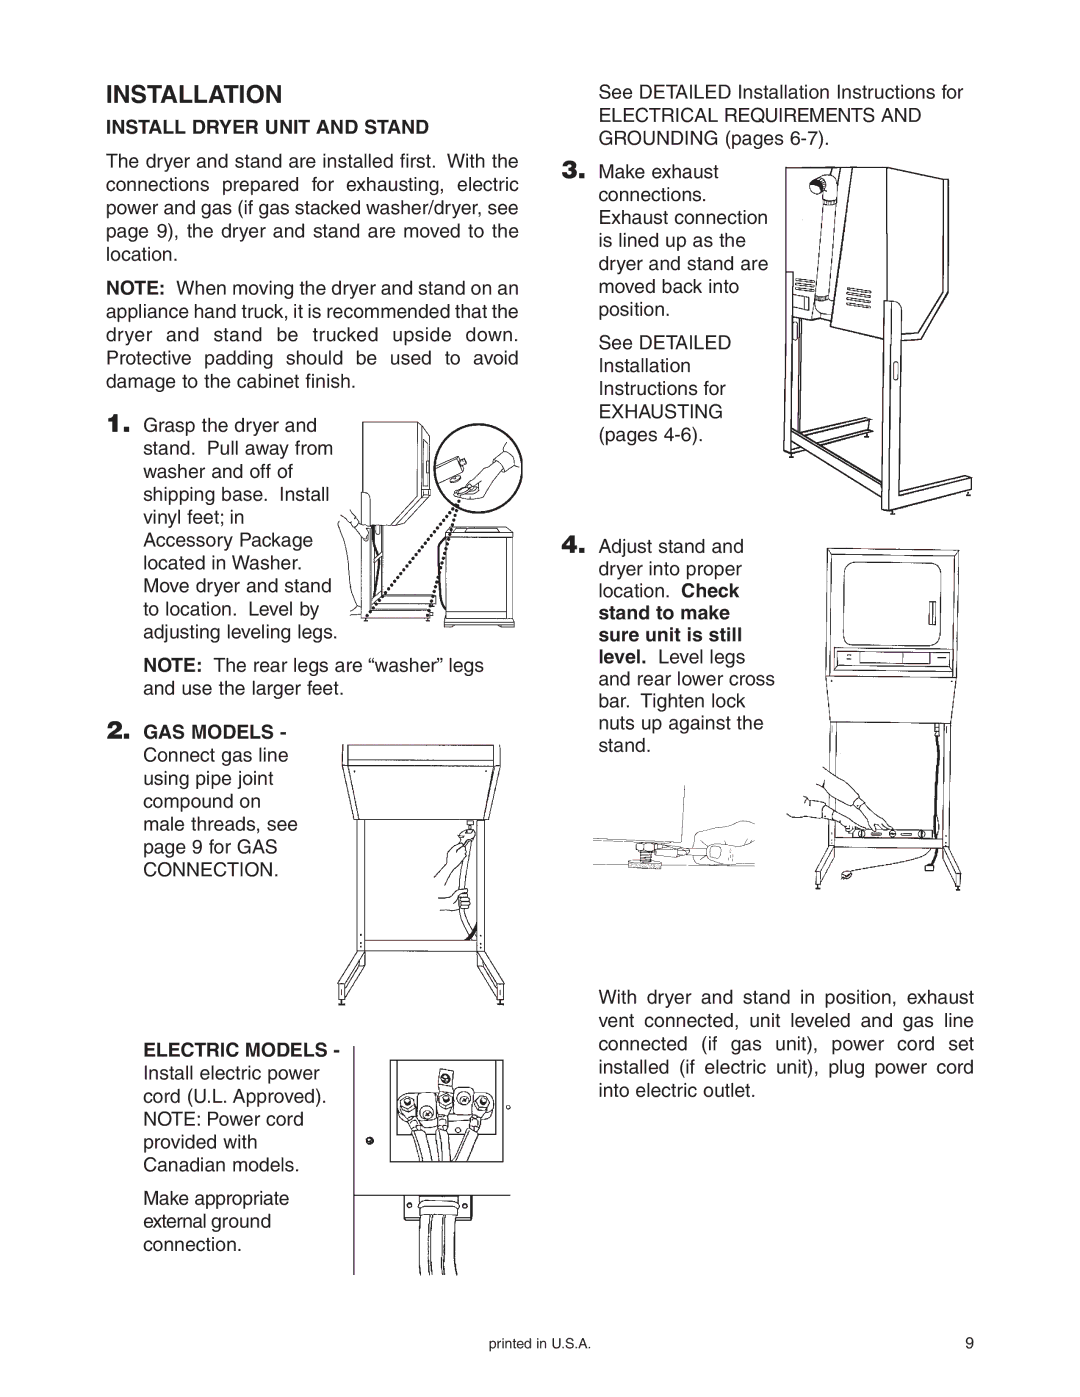
3.Make exhaust connections. Exhaust connection is lined up as the dryer and stand are moved back into position.
See DETAILED Installation Instructions for
EXHAUSTING (pages
4.Adjust stand and dryer into proper location. Check stand to make sure unit is still level. Level legs and rear lower cross bar. Tighten lock nuts up against the stand.
With dryer and stand in position, exhaust vent connected, unit leveled and gas line connected (if gas unit), power cord set installed (if electric unit), plug power cord into electric outlet.
printed in U.S.A. | 9 |