
MC2102 specifications
The McIntosh MC2102 is a standout amplifier that has earned a place of distinction in the world of high-fidelity audio. Renowned for its classic design and modern engineering, the MC2102 is often a critical component in high-end audio systems, beloved by audiophiles and collectors alike.One of the most notable features of the MC2102 is its power output, delivering an impressive 100 watts per channel into 4 or 8-ohm loads. This robust power ensures dynamic performance, allowing listeners to experience their music with clarity and depth. The amp employs a push-pull design using a combination of vacuum tubes and solid-state technology, resulting in a warm and rich sound that is characteristic of tube amplification while maintaining the reliability and efficiency of transistors.
The MC2102 also showcases McIntosh’s signature technologies, such as the Power Guard circuit. This innovative feature prevents clipping that can damage speakers and delivers a clean, distortion-free sound even at high volumes. Coupled with the Sentry Monitor, which provides thermal protection, the MC2102 ensures that users can enjoy long listening sessions without worry, making it an exceptionally reliable choice for any audio setup.
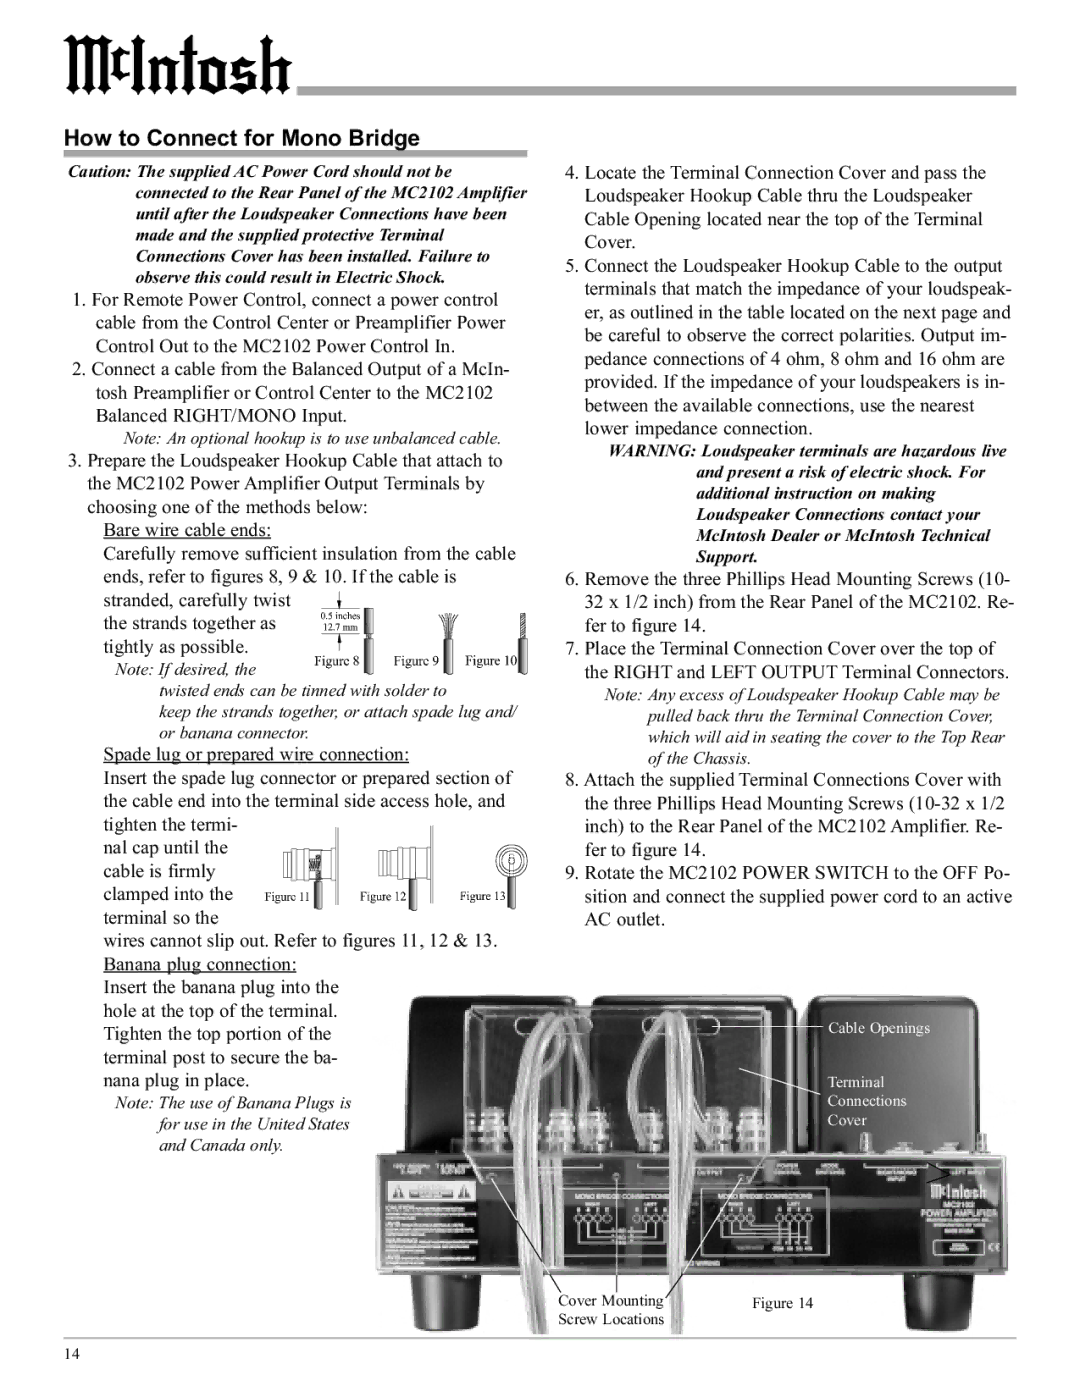
Its aesthetic appeal is undeniable, featuring the classic McIntosh glass front panel and illuminated blue watt meters. The build quality is exceptional, with a sturdy chassis and premium components that contribute to its durability and longevity. The MC2102 also offers multiple input options, including balanced and unbalanced inputs, allowing easy integration into various audio systems.
Furthermore, the amplifier is equipped with a meaningful output transformer design, providing a neutral frequency response across a broad spectrum. This characteristic allows users to enjoy fine details and nuances in their favorite recordings, enhancing the overall listening experience.
In conclusion, the McIntosh MC2102 is a remarkable blend of classic design and innovative technology. With its powerful performance, reliability, and distinctive aesthetic, it remains a highly sought-after component for audiophiles looking to elevate their audio experience. Whether used in a dedicated listening room or as part of a more extensive system, the MC2102 guarantees a captivating and immersive sound journey.