|
|
|
|
| How to Replace the Fuses |
|
|
|
|
|
|
How to Replace the Fuses |
|
|
| RemoveTopCoverScrews | |
|
|
|
| ||
If the MCC602TM produces no sound, no Meter |
|
|
| ||
Illumination, the power control and the power |
|
|
| ||
supply connections seem secure, one or more | Figure7 |
| |||
of the Amplifier Fuse(s) may have failed. |
|
| |||
Under normal operating conditions your |
|
| |||
amplifier’s fuses should not fail. Failure of a |
|
| |||
fuse is usually an indication of a problem. |
|
| |||
Replacing the fuse, if there is problem in the |
|
| |||
amplifier, may incur a risk of further damage. |
| RemoveTopCoverScrews | |||
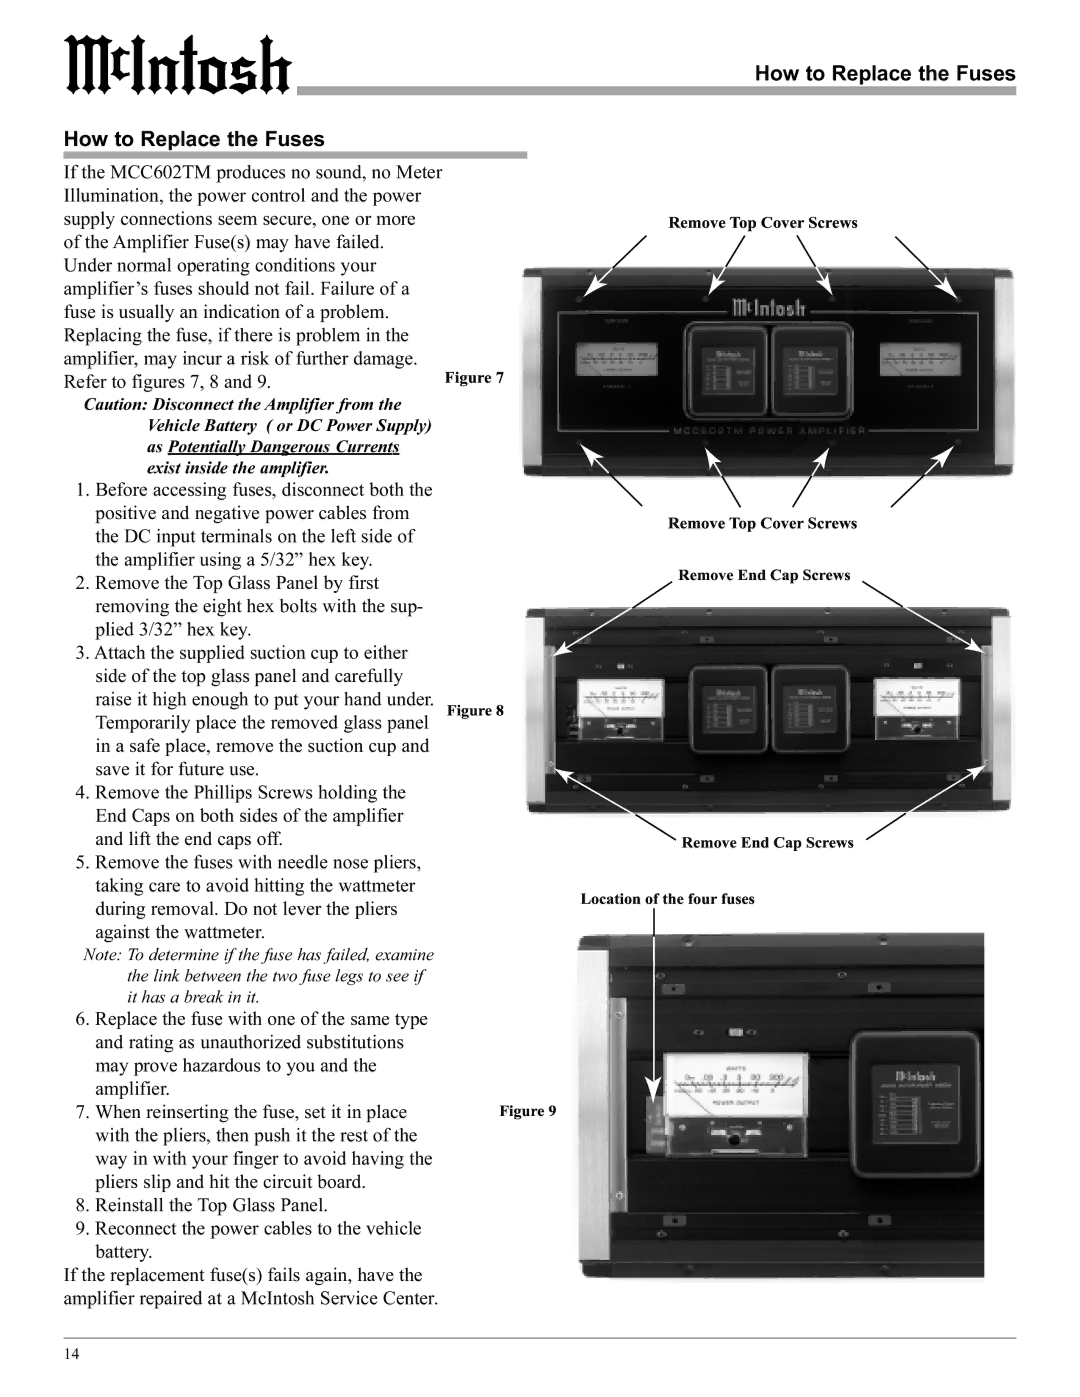
Refer to figures 7, 8 and 9. |
|
|
| ||
Caution: Disconnect the Amplifier from the |
|
|
| ||
Vehicle Battery ( or DC Power Supply) |
|
|
| ||
as Potentially Dangerous Currents |
|
|
| ||
exist inside the amplifier. |
|
|
| ||
1. Before accessing fuses, disconnect both the |
|
|
| ||
positive and negative power cables from |
|
|
| ||
the DC input terminals on the left side of |
|
|
| RemoveEndCapScrews | |
the amplifier using a 5/32” hex key. | Figure8 |
| |||
2. Remove the Top Glass Panel by first |
|
| |||
removing the eight hex bolts with the sup- |
|
| |||
plied 3/32” hex key. |
|
| |||
3. Attach the supplied suction cup to either |
|
| |||
side of the top glass panel and carefully |
|
| |||
raise it high enough to put your hand under. |
| RemoveEndCapScrews | |||
and lift the end caps off. |
| ||||
Temporarily place the removed glass panel |
|
| |||
in a safe place, remove the suction cup and |
|
| Locationofthefourfuses | ||
save it for future use. |
|
| |||
4. Remove the Phillips Screws holding the |
|
| |||
End Caps on both sides of the amplifier |
|
| |||
5. Remove the fuses with needle nose pliers, |
|
| |||
taking care to avoid hitting the wattmeter |
|
| |||
during removal. Do not lever the pliers |
|
| |||
|
|
|
| ||
against the wattmeter. |
|
|
|
| |
|
|
|
| ||
Note: To determine if the fuse has failed, examine | Figure9 |
|
| ||
the link between the two fuse legs to see if |
|
| |||
it has a break in it. |
|
| |||
6. Replace the fuse with one of the same type |
|
| |||
and rating as unauthorized substitutions |
|
| |||
may prove hazardous to you and the |
|
| |||
amplifier. |
|
| |||
7. When reinserting the fuse, set it in place |
|
| |||
with the pliers, then push it the rest of the |
|
|
|
| |
way in with your finger to avoid having the |
|
|
|
| |
pliers slip and hit the circuit board. |
|
|
|
| |
8. Reinstall the Top Glass Panel. |
|
|
|
| |
9. Reconnect the power cables to the vehicle |
|
|
|
| |
battery. |
|
|
|
| |
If the replacement fuse(s) fails again, have the |
|
|
|
| |
amplifier repaired at a McIntosh Service Center. |
|
|
|
| |
|
|
|
|
|
|
14 |
|
|
|
|
|
