Installation, con’t
are four pins on each side). Carefully push down to secure the Grille to the Loudspeaker until it is firmly seated.
Horizontal
The supplied Horizontal
1. Remove the four screws securing the Stabilizer Bar to the back of the XR27 Loud-
speaker System. Refer to fig- ure 14.
Note: Save the just removed
Stabilizer Bar and screws for possible future use.
2. Using the supplied Allen Wrench and hardware, install
four Allen Head 10/32 - 3/4 inch Screws into the openings
vacated by the removal of the Stabilizer Bar.
3. Remove both of the center screws from both ends of the Loudspeaker.
Refer to figure 18. Note: Save the just
removed screws for possible future use.
4.Attach the Wall Hanger Bracket to the Loudspeaker us-
ing the supplied mounting screws
(1/4 x
lock washers, making sure the large rectangular open- ing on the bracket lines up with the Loudspeaker hookup terminal connections. Refer to figure 19.
Note: The Loudspeaker may be mounted closer and parallel to the wall by using the two additional openings on the Wall Hanger Bracket instead of the openings allowing rotation of the Loudspeaker.
5.Use a suitable wall stud finder to verify a proper mounting location for the Loudspeaker on the wall.
6.Attach the Wall Bracket to the wall studs using the sup- plied mounting screws (8 x
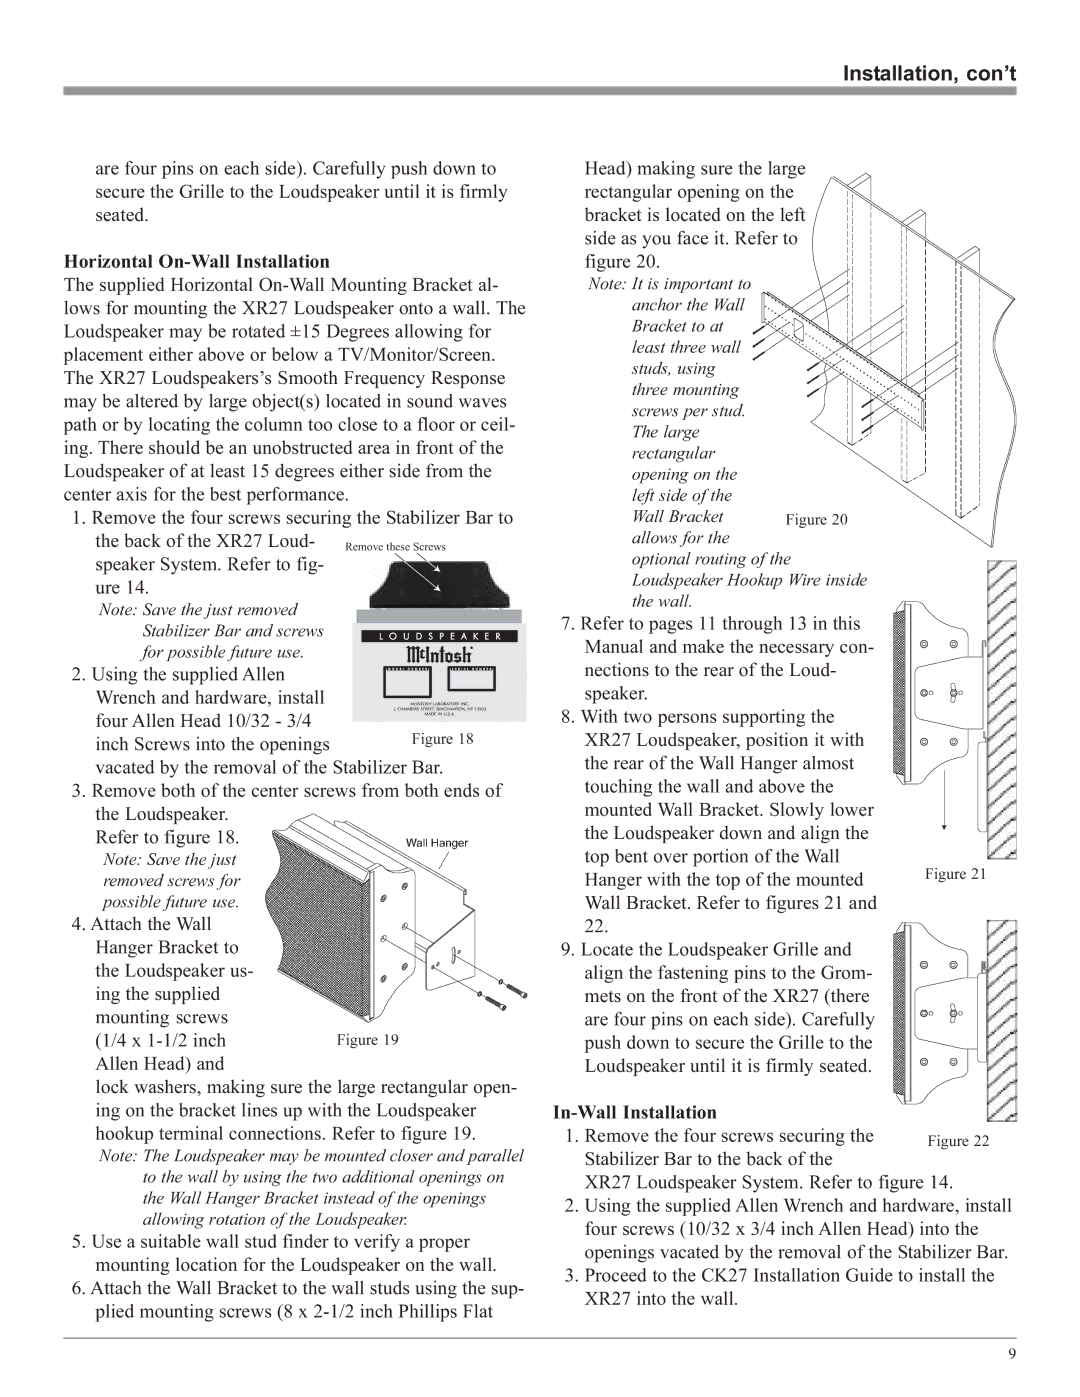
Head) making sure the large rectangular opening on the bracket is located on the left side as you face it. Refer to figure 20.
Note: It is important to anchor the Wall Bracket to at ![]() least three wall
least three wall ![]() studs, using three mounting screws per stud. The large rectangular
studs, using three mounting screws per stud. The large rectangular
opening on the left side of the Wall Bracket allows for the optional routing of the Loudspeaker Hookup Wire inside the wall.
7.Refer to pages 11 through 13 in this Manual and make the necessary con- nections to the rear of the Loud- speaker.
8.With two persons supporting the XR27 Loudspeaker, position it with the rear of the Wall Hanger almost touching the wall and above the
mounted Wall Bracket. Slowly lower the Loudspeaker down and align the top bent over portion of the Wall Hanger with the top of the mounted Wall Bracket. Refer to figures 21 and 22.
9. Locate the Loudspeaker Grille and align the fastening pins to the Grom- mets on the front of the XR27 (there are four pins on each side). Carefully push down to secure the Grille to the Loudspeaker until it is firmly seated.
1. Remove the four screws securing the Stabilizer Bar to the back of the
XR27 Loudspeaker System. Refer to figure 14.
2.Using the supplied Allen Wrench and hardware, install four screws (10/32 x 3/4 inch Allen Head) into the openings vacated by the removal of the Stabilizer Bar.
3.Proceed to the CK27 Installation Guide to install the XR27 into the wall.
9