- 7 -
4. Primary Mirror Adjustments
If the secondary mirror and the reflection of the primary mirror (1), Fig. 8, appear centered within the drawtube (2), Fig. 8, but the reflection of your eye (3), Fig. 8, appears
THE VIEWFINDER
The Starfinder telescope, as with almost all astronomical telescopes, presents a fairly narrow field of view to the observer. As a result, it is sometimes difficult to locate and center objects in the telescope’s field of view .
The viewfinder, by contrast, is a
2
1
3
4
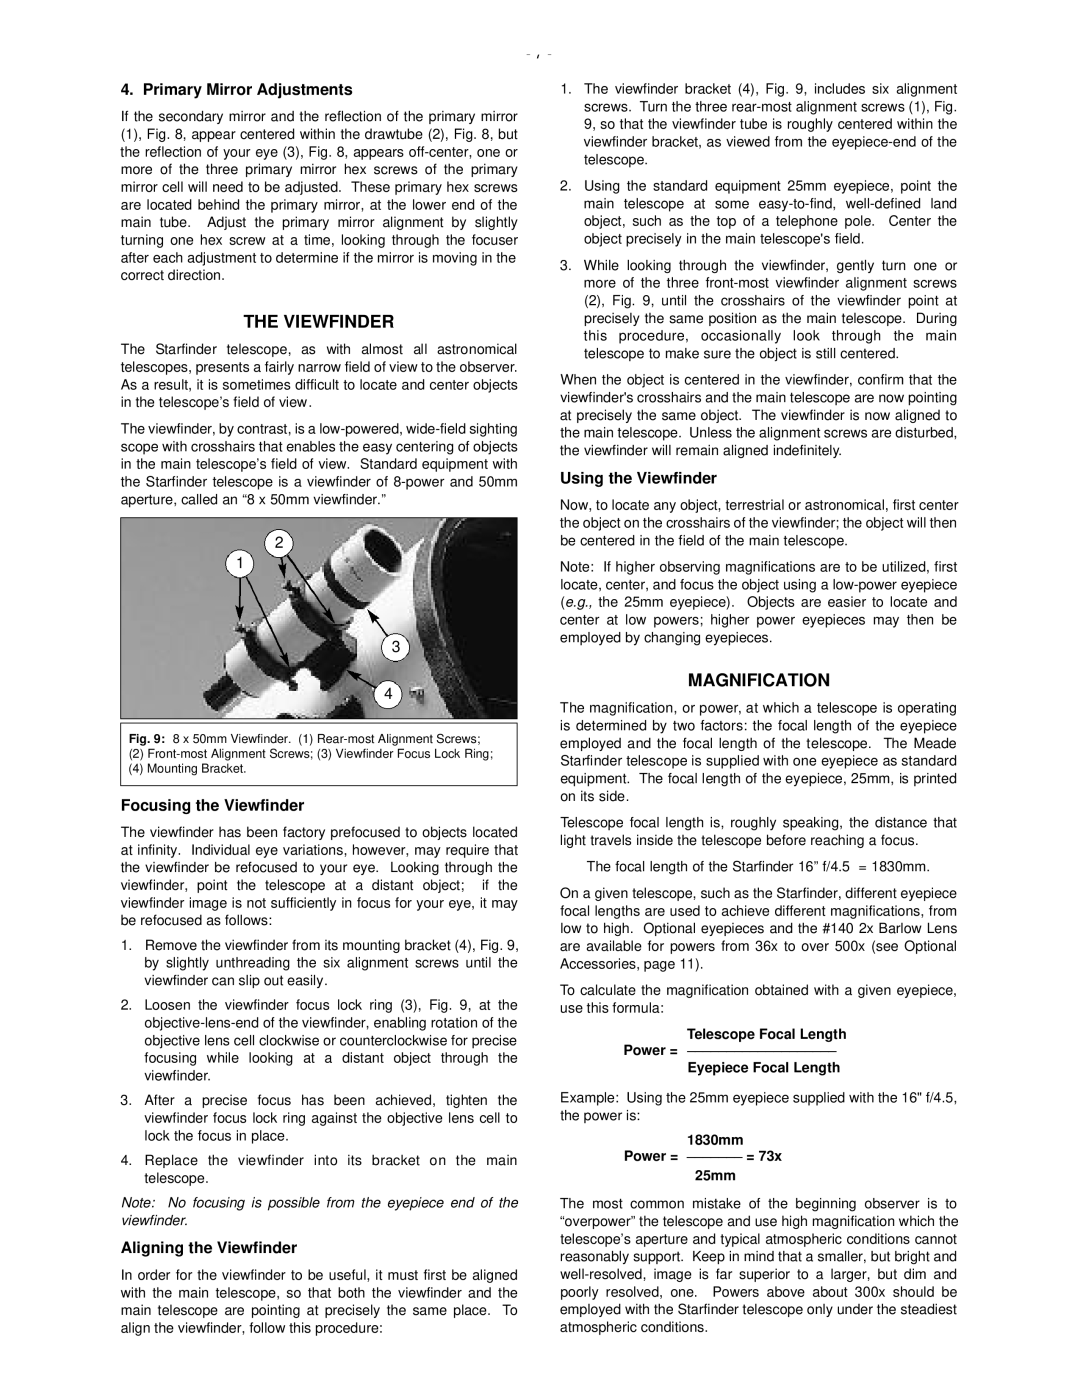
Fig. 9: 8 x 50mm Viewfinder. (1) Rear-most Alignment Screws;
(2)Front-most Alignment Screws; (3) Viewfinder Focus Lock Ring;
(4)Mounting Bracket.
Focusing the Viewfinder
The viewfinder has been factory prefocused to objects located at infinity. Individual eye variations, however, may require that the viewfinder be refocused to your eye. Looking through the viewfinder, point the telescope at a distant object; if the viewfinder image is not sufficiently in focus for your eye, it may be refocused as follows:
1.Remove the viewfinder from its mounting bracket (4), Fig. 9, by slightly unthreading the six alignment screws until the viewfinder can slip out easily.
2.Loosen the viewfinder focus lock ring (3), Fig. 9, at the
3.After a precise focus has been achieved, tighten the viewfinder focus lock ring against the objective lens cell to lock the focus in place.
4.Replace the viewfinder into its bracket on the main telescope.
Note: No focusing is possible from the eyepiece end of the viewfinder.
Aligning the Viewfinder
In order for the viewfinder to be useful, it must first be aligned with the main telescope, so that both the viewfinder and the main telescope are pointing at precisely the same place. To align the viewfinder, follow this procedure:
1.The viewfinder bracket (4), Fig. 9, includes six alignment screws. Turn the three
2.Using the standard equipment 25mm eyepiece, point the main telescope at some
3.While looking through the viewfinder, gently turn one or more of the three
When the object is centered in the viewfinder, confirm that the viewfinder's crosshairs and the main telescope are now pointing at precisely the same object. The viewfinder is now aligned to the main telescope. Unless the alignment screws are disturbed, the viewfinder will remain aligned indefinitely.
Using the Viewfinder
Now, to locate any object, terrestrial or astronomical, first center the object on the crosshairs of the viewfinder; the object will then be centered in the field of the main telescope.
Note: If higher observing magnifications are to be utilized, first locate, center, and focus the object using a
MAGNIFICATION
The magnification, or power, at which a telescope is operating is determined by two factors: the focal length of the eyepiece employed and the focal length of the telescope. The Meade Starfinder telescope is supplied with one eyepiece as standard equipment. The focal length of the eyepiece, 25mm, is printed on its side.
Telescope focal length is, roughly speaking, the distance that light travels inside the telescope before reaching a focus.
The focal length of the Starfinder 16” f/4.5 = 1830mm.
On a given telescope, such as the Starfinder, different eyepiece focal lengths are used to achieve different magnifications, from low to high. Optional eyepieces and the #140 2x Barlow Lens are available for powers from 36x to over 500x (see Optional Accessories, page 11).
To calculate the magnification obtained with a given eyepiece, use this formula:
Telescope Focal Length
Power = ___________________
Eyepiece Focal Length
Example: Using the 25mm eyepiece supplied with the 16" f/4.5, the power is:
1830mm
Power = _______ = 73x
025mm
The most common mistake of the beginning observer is to “overpower” the telescope and use high magnification which the telescope’s aperture and typical atmospheric conditions cannot reasonably support. Keep in mind that a smaller, but bright and