- 9 -
circles with the Celestial Pole at the center. By lining up the telescope's polar axis with the North Celestial Pole (or South Celestial Pole if observing from the Earth's Southern Hemisphere), celestial objects may be followed (tracked) by moving the telescope about one axis, the polar axis.
Polar alignment consists of the following two operations:
1.Aligning the telescope with the celestial pole:
a.Identify the tripod leg designated as the "North Leg" (3), Fig. 11, (the leg that is parallel to the Polar Housing (2), Fig. 11, when viewed from above).
b.Set the mount on level ground with this "North Leg" pointing North.
2.Tilt the telescope tube towards Polaris, so that the polar axis (1), Fig. 11, in now roughly aligned with the North Celestial Pole.
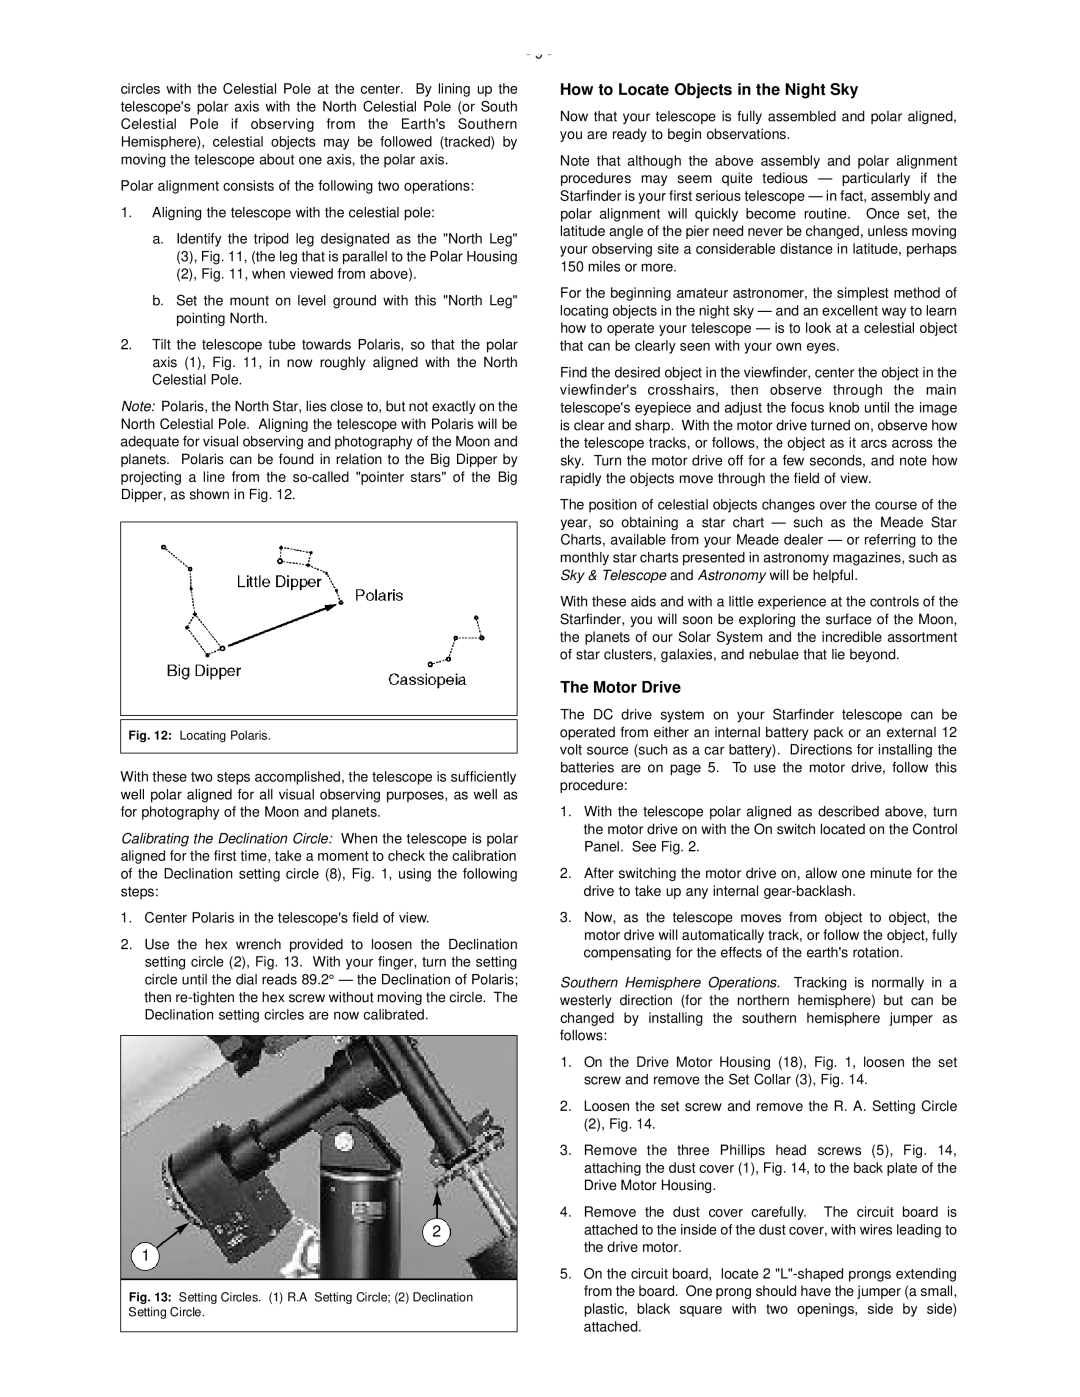
Note: Polaris, the North Star, lies close to, but not exactly on the North Celestial Pole. Aligning the telescope with Polaris will be adequate for visual observing and photography of the Moon and planets. Polaris can be found in relation to the Big Dipper by projecting a line from the
Fig. 12: Locating Polaris.
With these two steps accomplished, the telescope is sufficiently well polar aligned for all visual observing purposes, as well as for photography of the Moon and planets.
Calibrating the Declination Circle: When the telescope is polar aligned for the first time, take a moment to check the calibration of the Declination setting circle (8), Fig. 1, using the following steps:
1.Center Polaris in the telescope's field of view.
2.Use the hex wrench provided to loosen the Declination setting circle (2), Fig. 13. With your finger, turn the setting circle until the dial reads 89.2° — the Declination of Polaris; then
2
1
Fig. 13: Setting Circles. (1) R.A Setting Circle; (2) Declination Setting Circle.
How to Locate Objects in the Night Sky
Now that your telescope is fully assembled and polar aligned, you are ready to begin observations.
Note that although the above assembly and polar alignment procedures may seem quite tedious — particularly if the Starfinder is your first serious telescope — in fact, assembly and polar alignment will quickly become routine. Once set, the latitude angle of the pier need never be changed, unless moving your observing site a considerable distance in latitude, perhaps 150 miles or more.
For the beginning amateur astronomer, the simplest method of locating objects in the night sky — and an excellent way to learn how to operate your telescope — is to look at a celestial object that can be clearly seen with your own eyes.
Find the desired object in the viewfinder, center the object in the viewfinder's crosshairs, then observe through the main telescope's eyepiece and adjust the focus knob until the image is clear and sharp. With the motor drive turned on, observe how the telescope tracks, or follows, the object as it arcs across the sky. Turn the motor drive off for a few seconds, and note how rapidly the objects move through the field of view.
The position of celestial objects changes over the course of the year, so obtaining a star chart — such as the Meade Star Charts, available from your Meade dealer — or referring to the monthly star charts presented in astronomy magazines, such as Sky & Telescope and Astronomy will be helpful.
With these aids and with a little experience at the controls of the Starfinder, you will soon be exploring the surface of the Moon, the planets of our Solar System and the incredible assortment of star clusters, galaxies, and nebulae that lie beyond.
The Motor Drive
The DC drive system on your Starfinder telescope can be operated from either an internal battery pack or an external 12 volt source (such as a car battery). Directions for installing the batteries are on page 5. To use the motor drive, follow this procedure:
1.With the telescope polar aligned as described above, turn the motor drive on with the On switch located on the Control Panel. See Fig. 2.
2.After switching the motor drive on, allow one minute for the drive to take up any internal
3.Now, as the telescope moves from object to object, the motor drive will automatically track, or follow the object, fully compensating for the effects of the earth's rotation.
Southern Hemisphere Operations. Tracking is normally in a westerly direction (for the northern hemisphere) but can be changed by installing the southern hemisphere jumper as follows:
1.On the Drive Motor Housing (18), Fig. 1, loosen the set screw and remove the Set Collar (3), Fig. 14.
2.Loosen the set screw and remove the R. A. Setting Circle (2), Fig. 14.
3.Remove the three Phillips head screws (5), Fig. 14, attaching the dust cover (1), Fig. 14, to the back plate of the Drive Motor Housing.
4.Remove the dust cover carefully. The circuit board is attached to the inside of the dust cover, with wires leading to the drive motor.
5.On the circuit board, locate 2