INSTRUCTIONS
mySKY™ is an
Quick Start
Follow the Quick Start Guide on the back cover to insert the batteries, plug in the earbuds and turn on mySKY. When mySKY starts up, a screen displays which offers the choice: “Instructions” or “SkyMap.”
Introduction & Quick Instruction Video
If you are using mySKY for the first time, press the up arrow to select “Instructions”— you will see a brief introductory video that explains how to get started using mySKY.
The instruction video will teach you how to use the keys, what the trigger is for, how to use the identify function and how to take a guided tour.
During the video, the three keys just below the screen have the following functions: The Left Key is BACK. When pressed, it will take you back to the beginning of the video or to the previous video. The Center Key is PAUSE/PLAY. When pressed, it will pause the video. When pressed again, the video will resume. The Right Key is NEXT. It will advance the video to the next segment.
Important Note About Your mySKY
Your mySKY uses very sensitive magnetic sensors to determine where you are pointing it in the sky. The magnetic lines of force that are detected by these sensors are bent and distorted by any magnetic materials or large metal objects such as cars, metal fences or steel reinforced buildings. In order for your mySKY to work accurately,
you must be about 10 yards or meters from the average car. The larger the metal object, the farther you should be from it to get the best performance from your mySKY.
mySKY Keys
The TRIGGER The TRIGGER is located on the hand grip. When the TRIGGER is pushed, you tell mySKY that you are pointing at an object in the sky that you wish to identify and learn about.
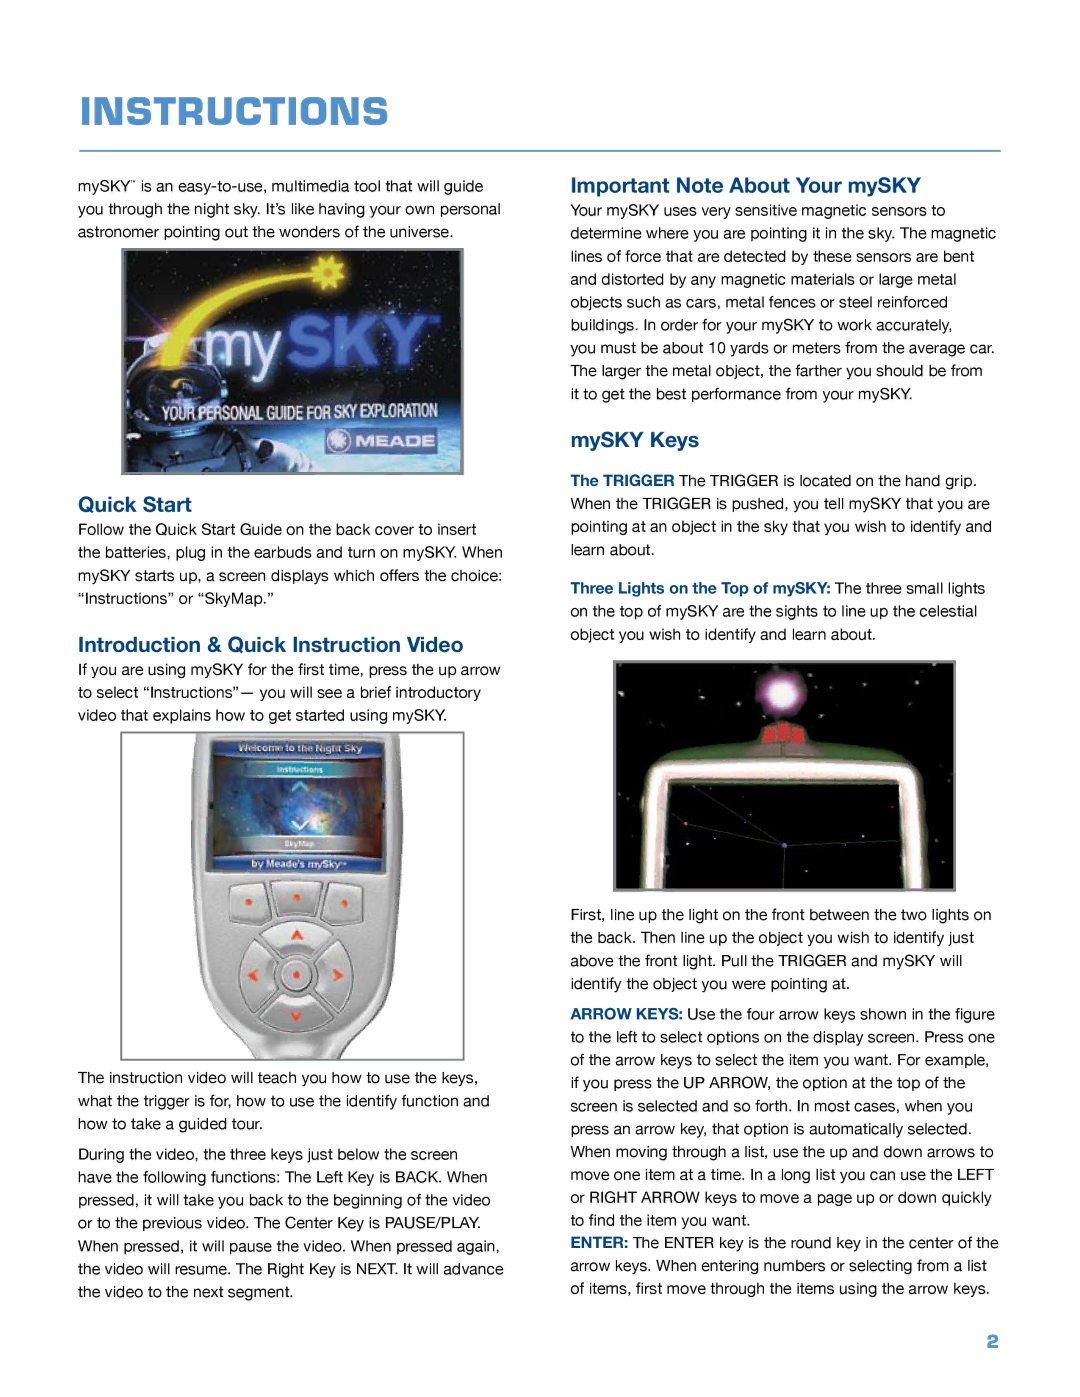
Three Lights on the Top of mySKY: The three small lights on the top of mySKY are the sights to line up the celestial object you wish to identify and learn about.
First, line up the light on the front between the two lights on the back. Then line up the object you wish to identify just above the front light. Pull the TRIGGER and mySKY will identify the object you were pointing at.
ARROW KEYS: Use the four arrow keys shown in the figure to the left to select options on the display screen. Press one of the arrow keys to select the item you want. For example, if you press the UP ARROW, the option at the top of the screen is selected and so forth. In most cases, when you press an arrow key, that option is automatically selected. When moving through a list, use the up and down arrows to move one item at a time. In a long list you can use the LEFT or RIGHT ARROW keys to move a page up or down quickly to find the item you want.
ENTER: The ENTER key is the round key in the center of the arrow keys. When entering numbers or selecting from a list of items, first move through the items using the arrow keys.
2