CARE AND MAINTENANCE
(Continued)
Burner Maintenance
Most residue on the Cooking Grids can be cleaned with a baking soda and water solution. For stubborn stains, use a nonabrasive scouring powder. Do not use steel wool or other like cleaning products on the porcelain coated sur- faces. This will scratch the porcelain coating causing foods to stick.
To reduce the risk of a fire beneath the grill:
·Inspect and clean burner/venturi tubes for insects and insect nests.
·Be sure burners are
·Inspect burners periodically, if large cracks or holes are found, replace the Burner.
SPIDER ALERT!
Should you notice that you burner(s) are getting hard to light or the flame is not as hot as it once was, Refer to the “How to Clean your Burners” Section to remove any possible obstructions.
Control Panel
Burner
Venturi Tube
Spider Webs or Nest |
| Valve |
Inside Venturi Tube |
|
|
| ||
|
|
|
Spiders or small insects can build nests, webs and lay eggs in the grills venturi tubes obstructing the flow of gas to the burner. The
In order to prevent flashbacks, the burner(s) should be removed from the grill and cleaned periodically, especially if the grill has been stored for an extended period of time.
·Check the LP gas grill for gas leaks and Burner obstructions before each use.
·Always turn off the LP gas cylinder at the
LP cylinder valve when not in use. Allow grill to cool before handling parts or cleaning.
Provided that the Burner is operating correctly, in normal usage, burning off the residue after cooking will keep the burner clean. The Burner should be removed and cleaned annually, or whenever heavy
How to clean the Burner
1)Make sure the LP cylinder and grill control knobs are turned off, and the grill has completely cooled.
2)Carefully remove Grease Cup, Cooking Grid, and Flavor Activator™.
3)Remove the Burner, by first removing the Heat Shield from the bottom of grill Bowl. Remove the two screws securing the burner (also located underneath the grill bowl.)
4)Remove Burner from the grill.
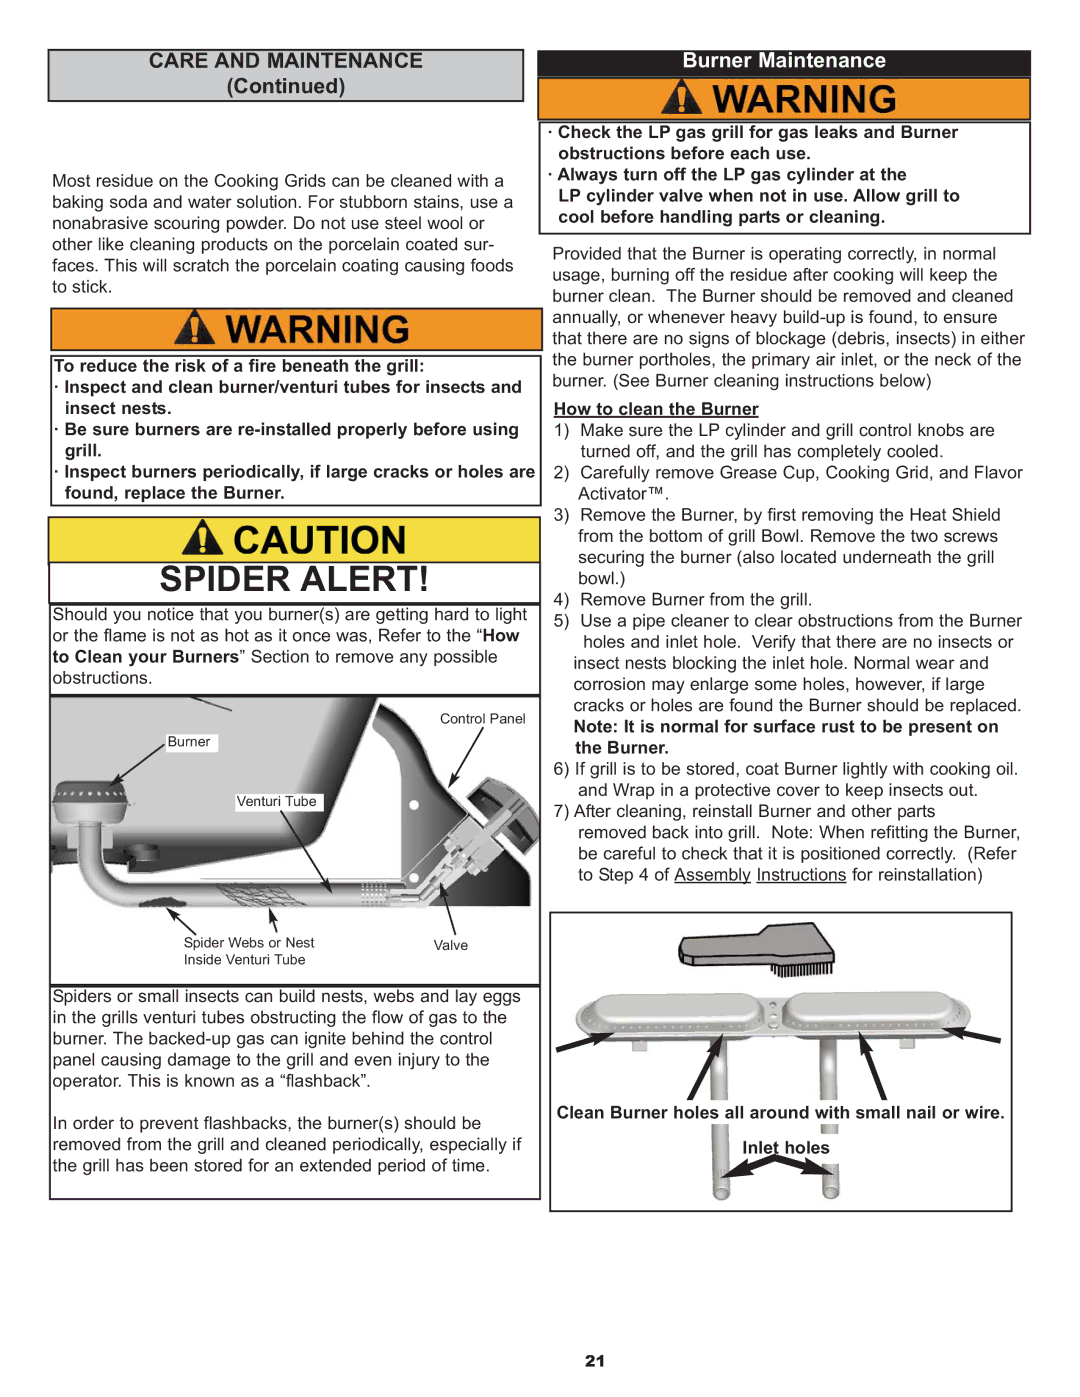
5)Use a pipe cleaner to clear obstructions from the Burner holes and inlet hole. Verify that there are no insects or
insect nests blocking the inlet hole. Normal wear and corrosion may enlarge some holes, however, if large cracks or holes are found the Burner should be replaced.
Note: It is normal for surface rust to be present on the Burner.
6)If grill is to be stored, coat Burner lightly with cooking oil. and Wrap in a protective cover to keep insects out.
7)After cleaning, reinstall Burner and other parts
removed back into grill. Note: When refitting the Burner, be careful to check that it is positioned correctly. (Refer to Step 4 of Assembly Instructions for reinstallation)
Clean Burner holes all around with small nail or wire.
Inlet holes
21
