MAINTENANCE
WARNING: When servicing, use only identical Craftsman replacement parts. Use of any other part may create a hazard or cause product damage.
WARNING: Do not at any time let brake fluids, gasoline,
Do not abuse power tools. Abusive practices can damage tool as well as workpiece.
WARNING: Do not attempt to modify this worklight or create accessories not recommended for use with this worklight. Any such alteration or modification is misuse and could result in a hazardous condition leading to possible serious personal injury.
FLUORESCENT TUBE REPLACEMENT
See Figure 4.
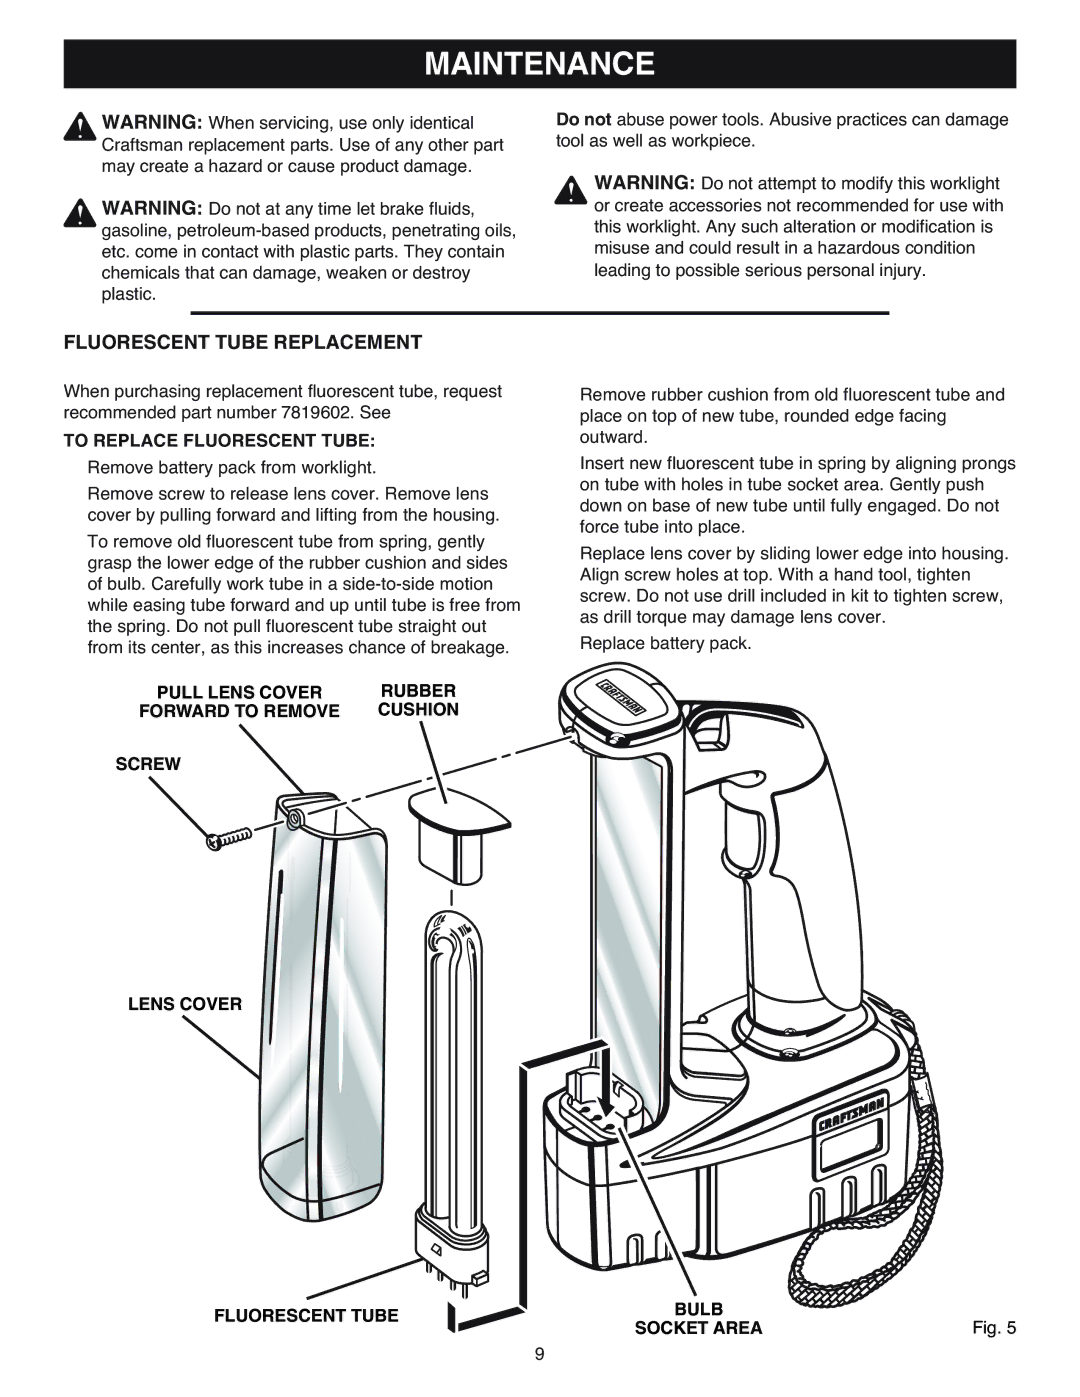
When purchasing replacement fluorescent tube, request recommended part number 7819602. See Figure 5.
TO REPLACE FLUORESCENT TUBE:
■Remove battery pack from worklight. See Page 8.
■Remove screw to release lens cover. Remove lens cover by pulling forward and lifting from the housing.
■To remove old fluorescent tube from spring, gently grasp the lower edge of the rubber cushion and sides of bulb. Carefully work tube in a
PULL LENS COVER | RUBBER |
FORWARD TO REMOVE | CUSHION |
Remove rubber cushion from old fluorescent tube and place on top of new tube, rounded edge facing outward.
■Insert new fluorescent tube in spring by aligning prongs on tube with holes in tube socket area. Gently push down on base of new tube until fully engaged. Do not force tube into place.
■Replace lens cover by sliding lower edge into housing. Align screw holes at top. With a hand tool, tighten screw. Do not use drill included in kit to tighten screw, as drill torque may damage lens cover.
■Replace battery pack.
SCREW
LENS COVER
FLUORESCENT TUBE
BULB |
|
SOCKET AREA | Fig. 5 |
9