OPERATION
BEVEL CUTTING
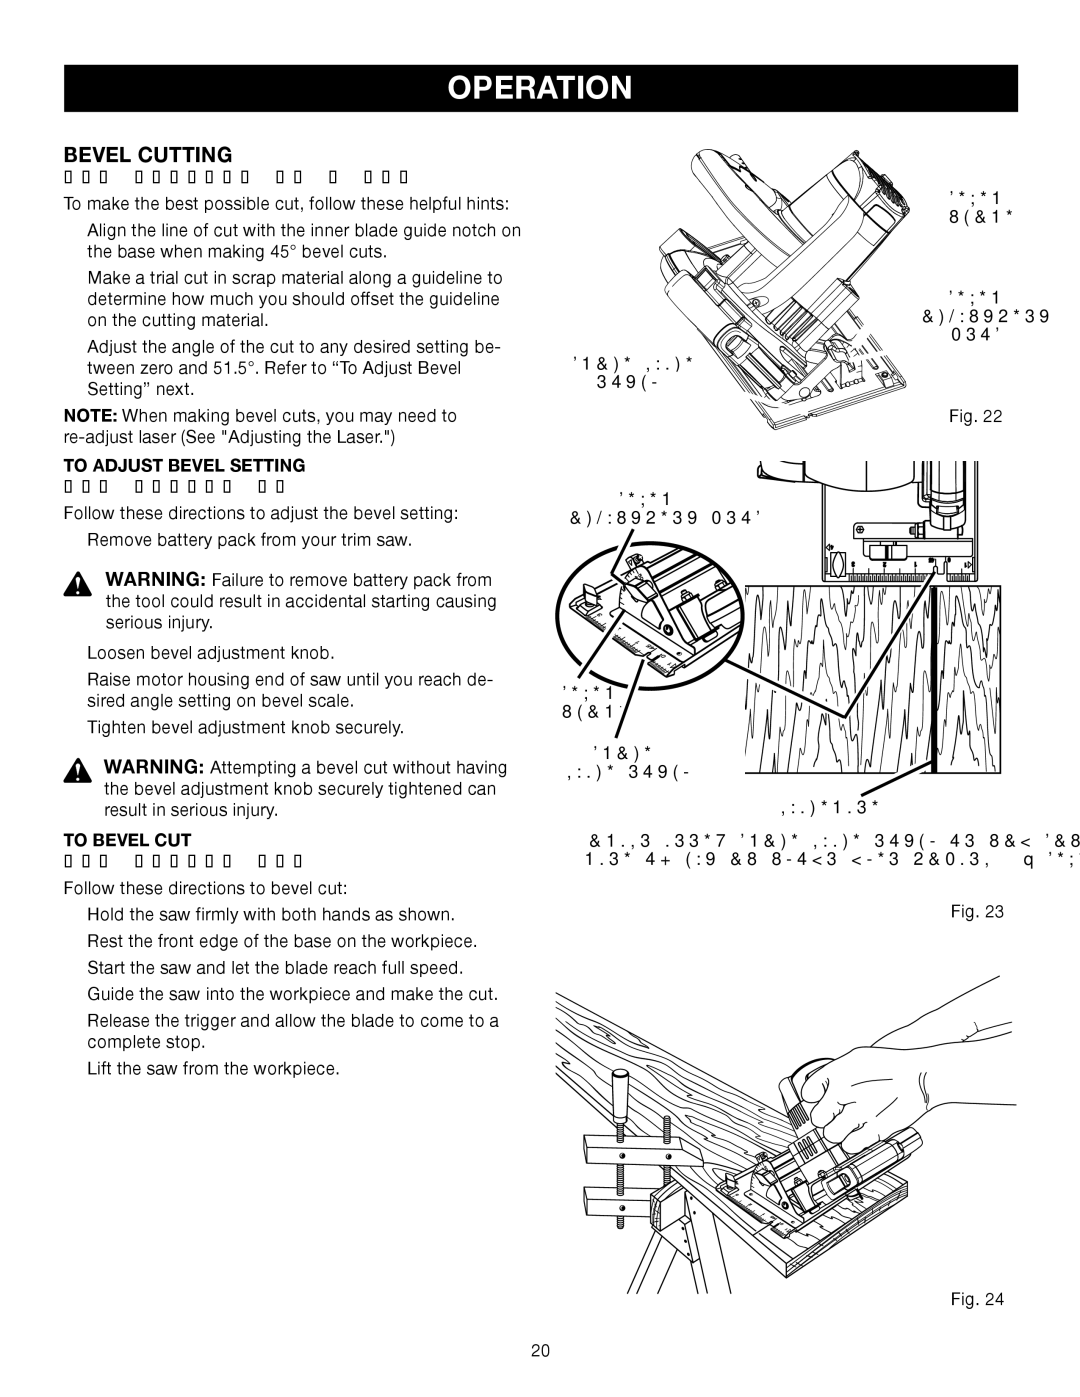
See Figures 22 - 24.
To make the best possible cut, follow these helpful hints:
nAlign the line of cut with the inner blade guide notch on the base when making 45° bevel cuts.
nMake a trial cut in scrap material along a guideline to determine how much you should offset the guideline on the cutting material.
nAdjust the angle of the cut to any desired setting be- tween zero and 51.5°. Refer to “To Adjust Bevel Setting” next.
NOTE: When making bevel cuts, you may need to
BEVEL
SCALE
![]()
![]()
![]()
![]()
![]()
![]()
![]()
![]()
![]()
![]()
![]()
![]()
![]()
![]()
![]()
![]()
![]()
![]()
![]()
![]() BEVEL
BEVEL ![]()
![]()
![]()
![]()
![]()
![]()
![]()
![]()
![]()
![]()
![]()
![]()
![]()
![]()
![]()
![]()
![]()
![]() ADJUSTMENT
ADJUSTMENT ![]()
![]()
![]()
![]()
![]()
![]()
![]()
![]()
![]()
![]()
![]()
![]()
![]()
![]()
![]()
![]()
![]()
![]()
![]()
![]()
![]()
![]()
![]()
![]() KNOB BLADE GUIDE
KNOB BLADE GUIDE ![]()
![]()
![]()
![]()
![]()
![]()
![]()
![]()
![]()
![]()
![]()
![]()
![]()
![]() NOTCH
NOTCH![]()
![]()
![]()
![]()
![]()
![]()
![]()
![]()
![]()
![]()
![]()
![]()
![]()
![]()
![]()
![]()
![]()
![]()
![]()
![]()
![]()
![]()
![]()
![]()
![]()
![]()
![]()
![]()
![]()
![]()
Fig. 22
TO ADJUST BEVEL SETTING
See Figure 23
Follow these directions to adjust the bevel setting:
nRemove battery pack from your trim saw.
WARNING: Failure to remove battery pack from the tool could result in accidental starting causing serious injury.
nLoosen bevel adjustment knob.
nRaise motor housing end of saw until you reach de- sired angle setting on bevel scale.
nTighten bevel adjustment knob securely.
WARNING: Attempting a bevel cut without having the bevel adjustment knob securely tightened can result in serious injury.
BEVEL
ADJUSTMENT KNOB
50 |
45 |
15
4 ![]()
![]() 0
0
3 ![]() 2
2
1 | 5 |
| |
| 4 |
![]() 0
0
1
BEVEL
SCALE
BLADE
GUIDE NOTCH
4 |
|
|
|
|
|
3 | 2 | 1 | 45 | 0 | 1 |
|
| ||||
GUIDELINE |
|
|
|
|
|
TO BEVEL CUT
See Figure 24.
Follow these directions to bevel cut:
nHold the saw firmly with both hands as shown.
nRest the front edge of the base on the workpiece.
nStart the saw and let the blade reach full speed.
nGuide the saw into the workpiece and make the cut.
nRelease the trigger and allow the blade to come to a complete stop.
nLift the saw from the workpiece.
ALIGN INNER BLADE GUIDE NOTCH ON SAW BASE WITH LINE OF CUT AS SHOWN WHEN MAKING 45° BEVEL CUTS
Fig. 23
5
40 |
5 |
1![]() 5
5
4 ![]()
![]() 0
0
3 ![]() 2
2
1 54![]()
![]() 0
0
1
Fig. 24
20
