UK
INTRODUCTION
To get the best out of your new appliance, please read this user guide carefully before using it for the first time. Take particular note of the safety precautions. We also recommend that you keep the instructions for future reference, so that you can remind yourself of the functions of your appliance.
IMPORTANT SAFETY PRECAUTIONS
•Incorrect use of this appliance may cause personal injury and damage.
•Use for its intended purpose only. The manufacturer is not responsible for any injury or damage resulting from incorrect use or handling (see also Guarantee Terms).
•For connection to mains electricity only in accordance with the instructions in this user guide. Appliance must be permanently installed by an authorised electrician.
•For domestic use only. Not for outdoor or commercial use.
•Do not place anything on the appliance other than the pan that is to be used.
•Use kitchen implements approved for this type of appliance only.
•Never use kitchen implements with uneven or damaged bottoms to avoid scratching and damaging the ceramic hob.
•Do not switch the appliance on unless there is a pan on it.
•Use only pans with diameters that fit that of the hot plate. Always place the pan in the middle of the hot plate.
•Never heat up an empty pan on the appliance.
•Keep an eye on any children in the vicinity of the appliance when it is in use.
•Always switch appliance off when not in use or before cleaning.
•The appliance, cord or plug must not be submerged in water or allowed to get wet.
•Do not use if the cord or plug are damaged, if the ceramic hob is broken, if the appliance is not working correctly or if it is damaged due to heavy impact etc, to avoid risk of electric shock and serious injury.
•If the appliance, cable or plug needs to be repaired, it should be taken to an authorised service centre. Never try to repair the appliance yourself. Any unauthorised tampering with the appliance will void the guarantee and can cause serious injury. Please contact the store where you bought the appliance for repairs under guarantee.
KEY TO MAIN COMPONENTS OF THE APPLIANCE
1.Small hotplate (1,200 W)
2.Large hotplate (1,800 W)
3.Ceramic plate
4.Power cord with plug
5.Control panel
6.Small hotplate (1,200 W)
7.
8.
a.On/Off buttons
b.Heat level, down
c.Heat level, up
d.Heat indicator (shows warning of residual heat)
e.Heat indicator (shows heat level 6)
f.On/Off indicators
g.Child lock
h.Hotplate selector
i.Front left hotplate
j.Front right hotplate
k.Back right hotplate
l.Back left hotplate
INSTALLATION
IMPORTANT! This appliance may ONLY be installed by an authorised electrician. It is essential that installation complies with applicable rules and standards, and that suitable
materials are used in a fully professional and proper manner. Failure to comply can result in serious injury.
Installation
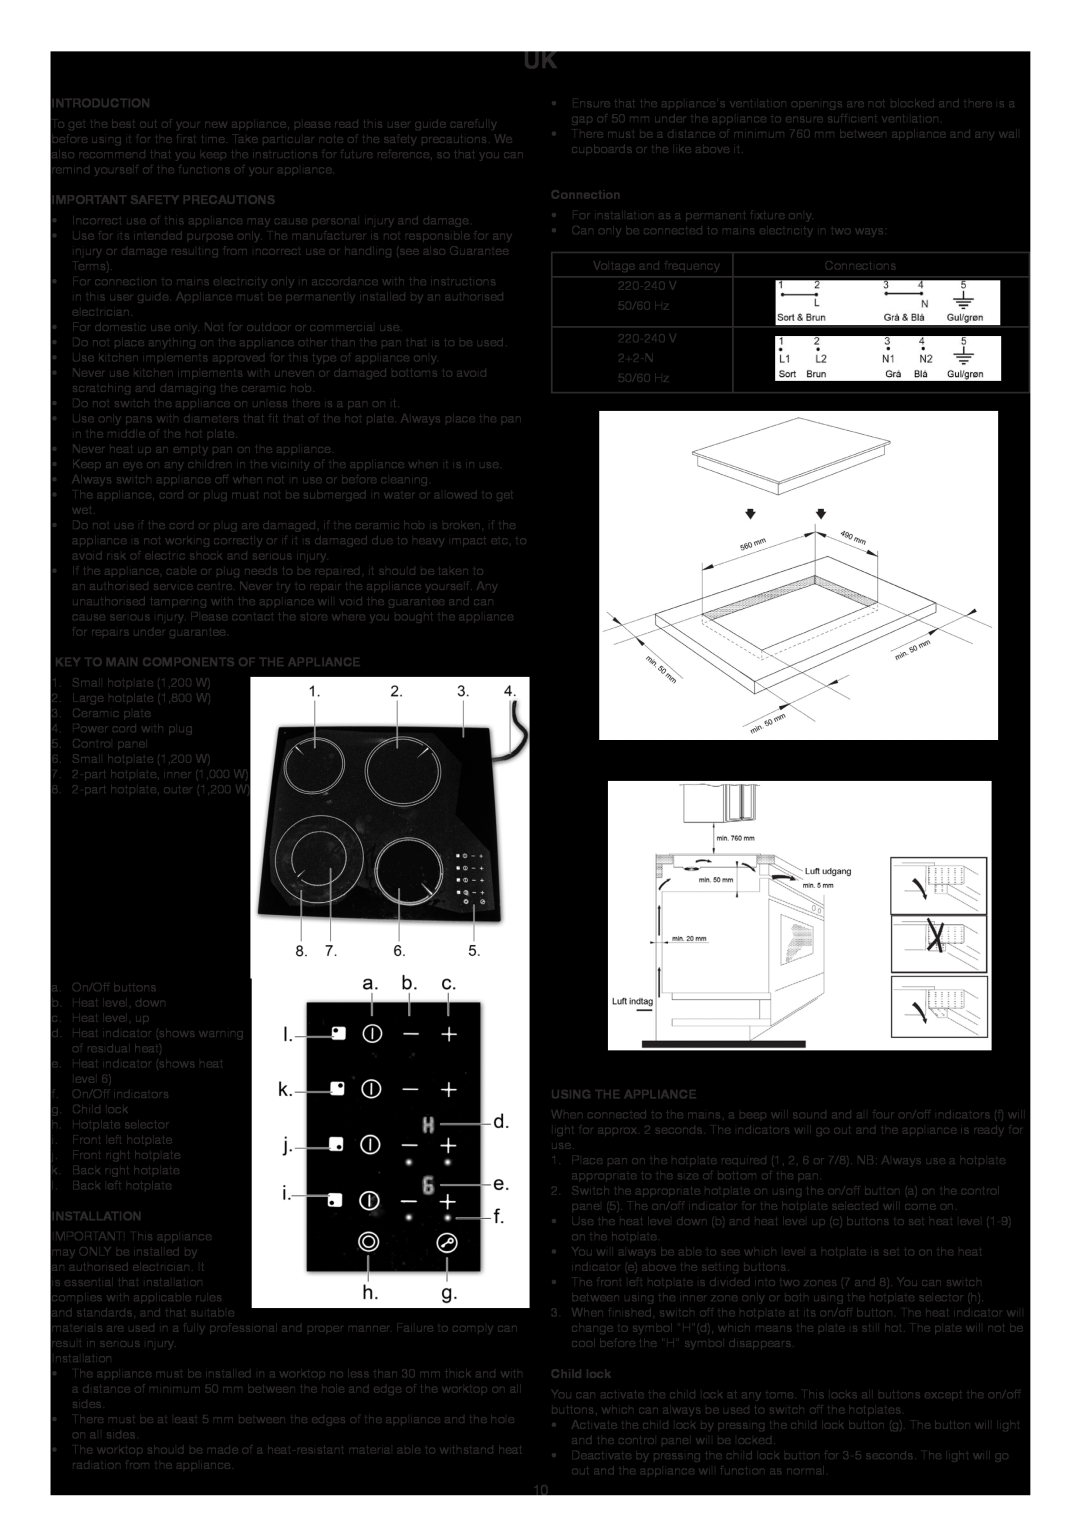
•The appliance must be installed in a worktop no less than 30 mm thick and with a distance of minimum 50 mm between the hole and edge of the worktop on all sides.
•There must be at least 5 mm between the edges of the appliance and the hole on all sides.
•The worktop should be made of a
•Ensure that the appliance's ventilation openings are not blocked and there is a gap of 50 mm under the appliance to ensure sufficient ventilation.
•There must be a distance of minimum 760 mm between appliance and any wall cupboards or the like above it.
Connection
•For installation as a permanent fixture only.
•Can only be connected to mains electricity in two ways:
Voltage and frequency | Connections |
|
|
| |
50/60 Hz |
|
|
|
| |
| |
50/60 Hz |
|
|
|
USING THE APPLIANCE
When connected to the mains, a beep will sound and all four on/off indicators (f) will light for approx. 2 seconds. The indicators will go out and the appliance is ready for use.
1.Place pan on the hotplate required (1, 2, 6 or 7/8). NB: Always use a hotplate appropriate to the size of bottom of the pan.
2.Switch the appropriate hotplate on using the on/off button (a) on the control
panel (5). The on/off indicator for the hotplate selected will come on.
•Use the heat level down (b) and heat level up (c) buttons to set heat level
•You will always be able to see which level a hotplate is set to on the heat indicator (e) above the setting buttons.
•The front left hotplate is divided into two zones (7 and 8). You can switch
between using the inner zone only or both using the hotplate selector (h).
3.When finished, switch off the hotplate at its on/off button. The heat indicator will change to symbol "H"(d), which means the plate is still hot. The plate will not be cool before the "H" symbol disappears.
Child lock
You can activate the child lock at any tome. This locks all buttons except the on/off buttons, which can always be used to switch off the hotplates.
•Activate the child lock by pressing the child lock button (g). The button will light and the control panel will be locked.
•Deactivate by pressing the child lock button for
10