ONE-TOUCH TIMER

RECORDING (OTR)

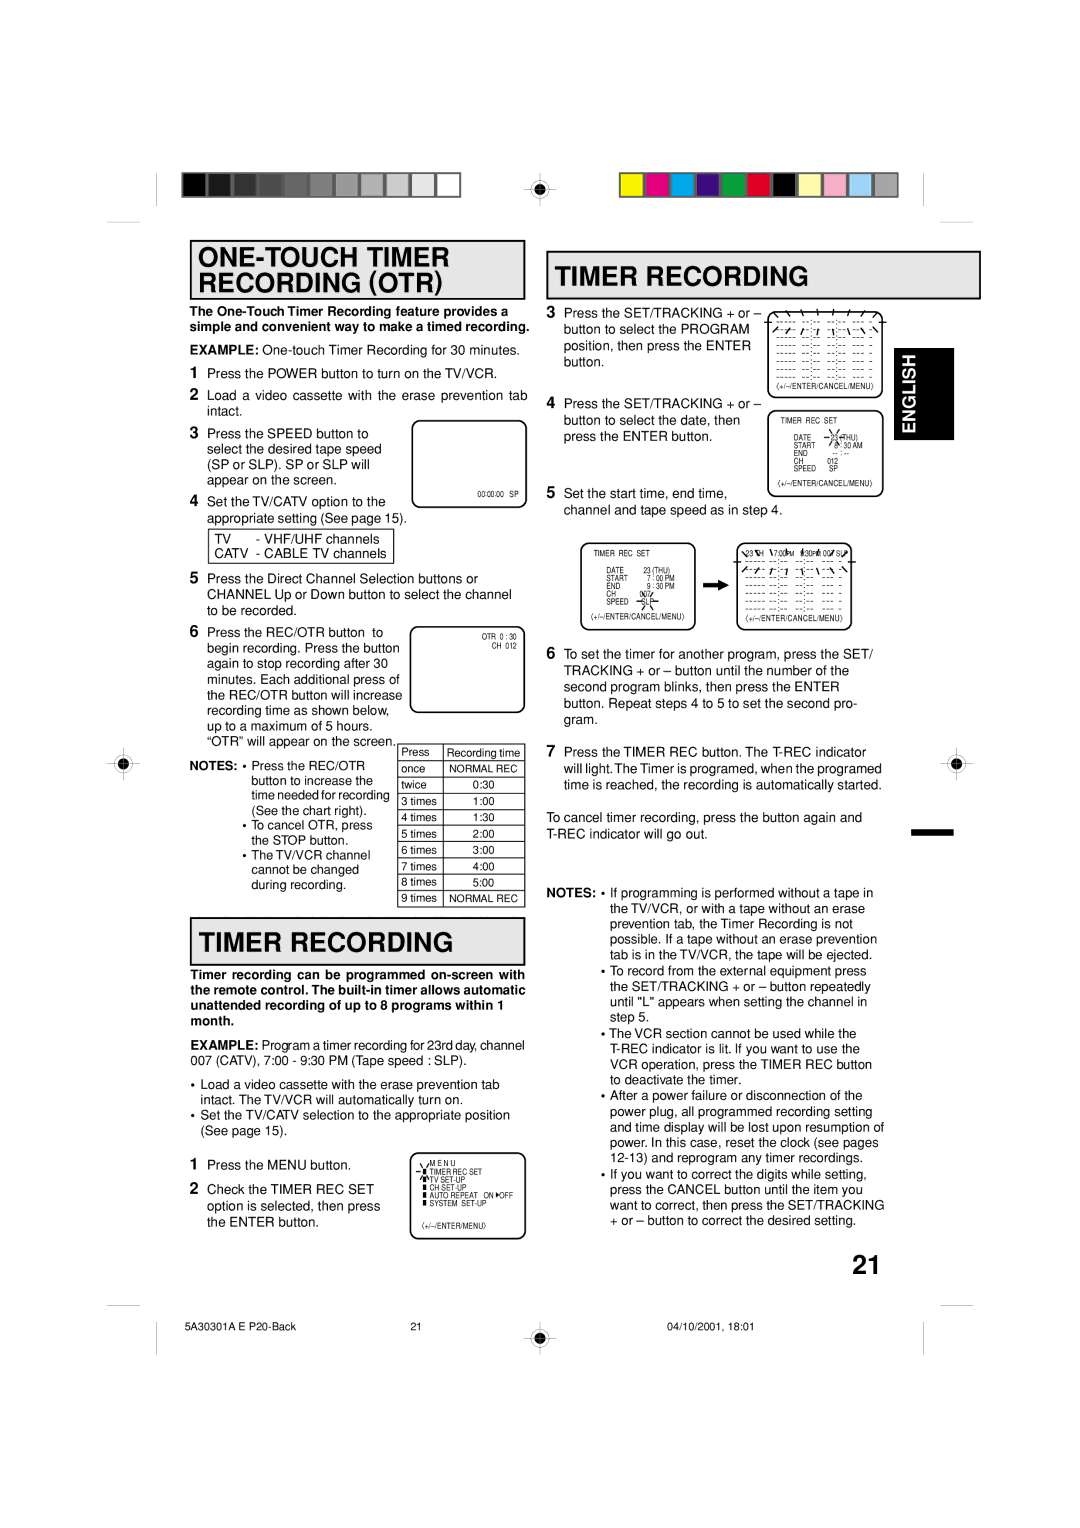
The One-Touch Timer Recording feature provides a simple and convenient way to make a timed recording.

EXAMPLE: One-touch Timer Recording for 30 minutes.

1

Press the POWER button to turn on the TV/VCR.

2

Load a video cassette with the erase prevention tab

TIMER RECORDING

3Press the SET/TRACKING + or –

button to select the PROGRAM -------

:-- --

:-- --- -

:-- --

:-- --- -

position, then press the ENTER -------

:-- --

:-- --- -

:-- --

:-- --- -

button.-------

:-- --

:-- --- -

:-- --

:-- --- -

----- --

:-- --

:-- --- -

----- --

:-- --

:-- --- -

+/–/ENTER/CANCEL/MENU

ENGLISH

intact.

3 Press the SPEED button to

select the desired tape speed

(SP or SLP). SP or SLP will

appear on the screen.

4


00:00:00 SP

Set the TV/CATV option to the


appropriate setting (See page 15).


TV - VHF/UHF channels

4Press the SET/TRACKING + or – button to select the date, then press the ENTER button.

5Set the start time, end time, channel and tape speed as in step

TIMER REC SET

DATE

23

(THU)

START

8

: 30 AM

END

-- : --

CH

012


SPEED

SP


+/–/ENTER/CANCEL/MENU

4.

CATV - CABLE TV channels

5Press the Direct Channel Selection buttons or CHANNEL Up or Down button to select the channel to be recorded.

6 Press the REC/OTR button to


OTR 0 : 30

begin recording. Press the button


CH 012


again to stop recording after 30


minutes. Each additional press of


the REC/OTR button will increase


recording time as shown below,


up to a maximum of 5 hours.


“OTR” will appear on the screen.


NOTES: • Press the REC/OTR


Press

Recording time


once

NORMAL REC

button to increase the


twice

0:30

time needed for recording


3 times

1:00

(See the chart right).


4 times

1:30

To cancel OTR, press


5 times

2:00

the STOP button.


6 times

3:00

The TV/VCR channel


7 times

4:00

cannot be changed


during recording.


8 times

5:00


9 times

NORMAL REC

TIMER RECORDING

Timer recording can be programmed on-screen with the remote control. The built-in timer allows automatic unattended recording of up to 8 programs within 1 month.

EXAMPLE: Program a timer recording for 23rd day, channel

007 (CATV), 7:00 - 9:30 PM (Tape speed : SLP).

Load a video cassette with the erase prevention tab intact. The TV/VCR will automatically turn on.

Set the TV/CATV selection to the appropriate position (See page 15).

1

Press the MENU button.


M E N U


TIMER REC SET

2

Check the TIMER REC SET


TV SET-UP


CH SET-UP


AUTO REPEAT ON OFF


option is selected, then press


SYSTEM SET-UP


the ENTER button.

+/–/ENTER/MENU

TIMER REC SET


23 TH 7:00PM

9:30PM 007 SLP


----- --:--

--:-- --- -

DATE

23

(THU)

----- --:--

--:-- --- -

START

7

: 00 PM

----- --:--

--:-- --- -

END

9

: 30 PM

----- --:--

--:-- --- -

CH

007


----- --:--

--:-- --- -

SPEED

SLP

----- --:--

--:-- --- -

+/–/ENTER/CANCEL/MENU

----- --:--

--:-- --- -

+/–/ENTER/CANCEL/MENU

6To set the timer for another program, press the SET/ TRACKING + or – button until the number of the second program blinks, then press the ENTER button. Repeat steps 4 to 5 to set the second pro- gram.

7Press the TIMER REC button. The T-REC indicator will light.The Timer is programed, when the programed time is reached, the recording is automatically started.

To cancel timer recording, press the button again and T-REC indicator will go out.

NOTES: • If programming is performed without a tape in the TV/VCR, or with a tape without an erase prevention tab, the Timer Recording is not possible. If a tape without an erase prevention tab is in the TV/VCR, the tape will be ejected.

To record from the external equipment press the SET/TRACKING + or – button repeatedly until "L" appears when setting the channel in step 5.

The VCR section cannot be used while the T-REC indicator is lit. If you want to use the VCR operation, press the TIMER REC button to deactivate the timer.

After a power failure or disconnection of the power plug, all programmed recording setting and time display will be lost upon resumption of power. In this case, reset the clock (see pages 12-13) and reprogram any timer recordings.

If you want to correct the digits while setting, press the CANCEL button until the item you want to correct, then press the SET/TRACKING + or – button to correct the desired setting.

21

5A30301A E P20-Back

21

04/10/2001, 18:01

Page 21
Image 21
Memorex DBVT1341 owner manual ONE-TOUCH Timer Recording OTR, Press the Power button to turn on the TV/VCR

DBVT1341 specifications

The Memorex DBVT1341 is a versatile and feature-rich digital television receiver designed to enhance your TV viewing experience. Known for its user-friendly interface and advanced technology, this device bridges the gap between traditional analog broadcasts and modern digital signals, ensuring high-quality picture and sound for home entertainment.

One of the standout features of the Memorex DBVT1341 is its capability to receive both over-the-air digital broadcasts and standard analog signals. This dual reception makes it perfect for users who are transitioning from analog to digital television. The device supports various digital broadcast standards, including ATSC, ensuring compatibility with a wide range of signals available across different regions.

The DBVT1341 boasts a sleek and compact design, making it an excellent addition to any home entertainment system without taking up too much space. Its straightforward setup process allows users to quickly connect it to their television using HDMI or composite outputs, delivering high-definition video quality. The device is also equipped with a built-in digital tuner, which eliminates the need for external tuners or receivers.

Another significant characteristic of the Memorex DBVT1341 is its electronic program guide (EPG), which provides viewers with an easy-to-navigate interface for accessing current and upcoming programming. This feature allows users to search for their favorite shows, set reminders, and record programming for later viewing.

Additionally, the DBVT1341 supports various audio formats, ensuring compatibility with modern sound systems. Its audio output options provide flexibility, allowing users to connect the receiver to their home theater systems for an immersive viewing experience. The device also includes a USB port, giving users the option to play media files directly from USB drives, enhancing its utility beyond regular TV viewing.

In summary, the Memorex DBVT1341 is designed with the viewer's needs in mind. Its combination of dual reception capabilities, user-friendly interface, program guide, and modern connectivity options make it a valuable tool for anyone looking to enjoy high-quality television reception. Whether used in a basic setup or as part of a more elaborate home theater system, the DBVT1341 stands out as a reliable choice for enhancing digital TV experiences.