
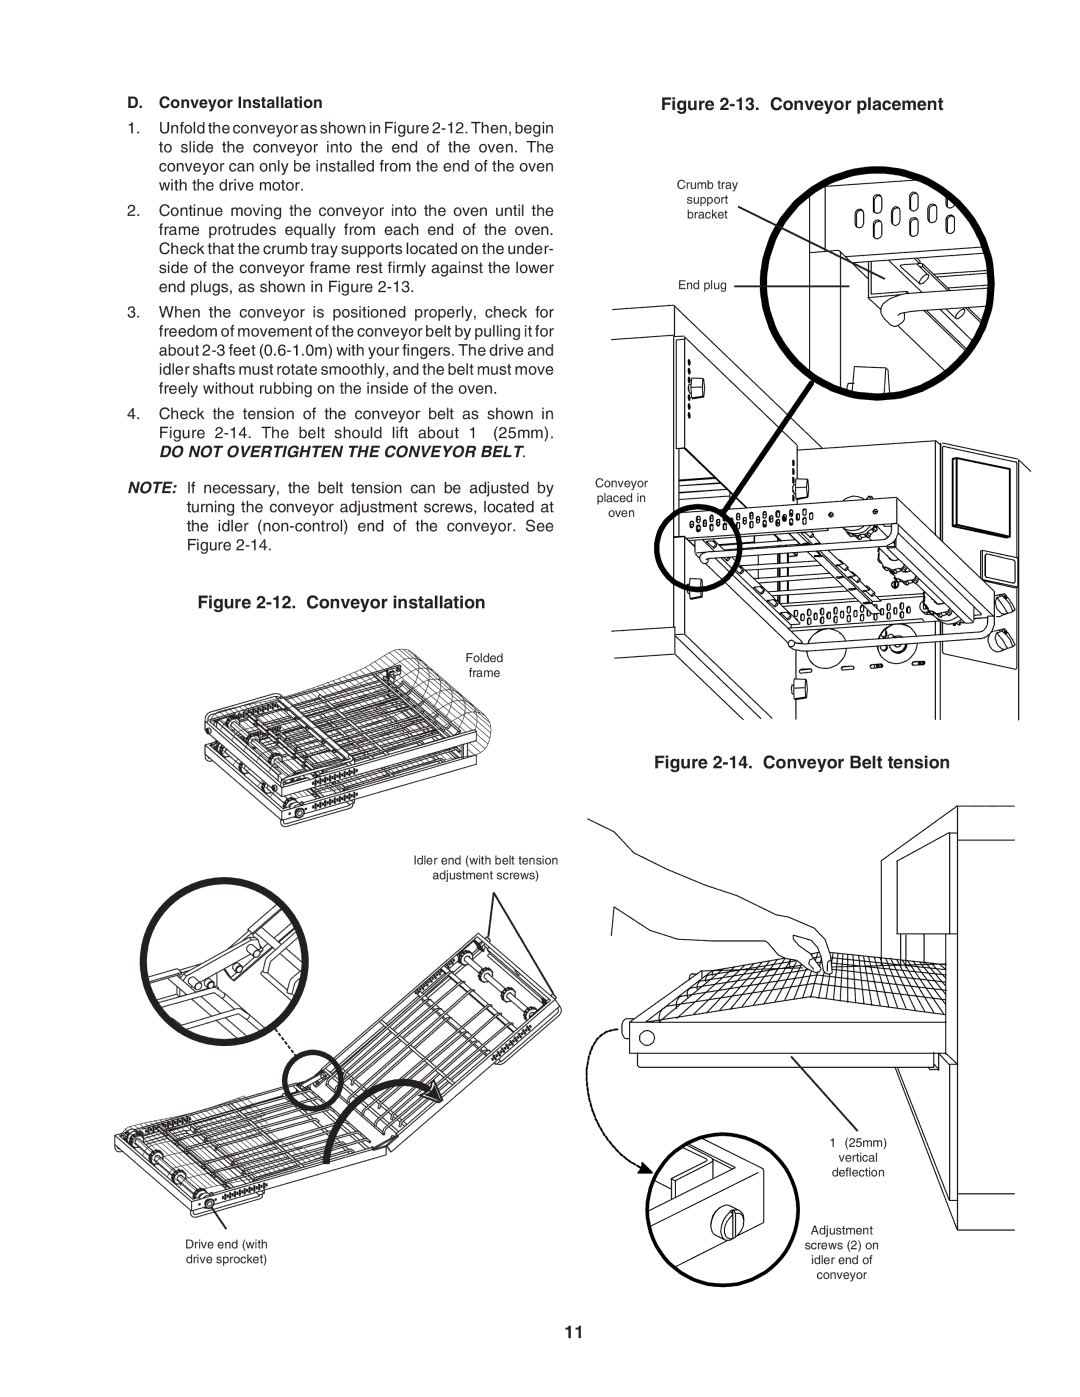
PS640E specifications
The Middleby Marshall PS640E is a state-of-the-art conveyor oven designed to meet the demands of high-volume food production with efficiency and precision. This innovative oven is widely used in pizzerias, restaurants, and various commercial kitchens, renowned for its ability to deliver consistent and high-quality food results.One of the main features of the PS640E is its energy-efficient design. Utilizing advanced energy management technology, this oven minimizes energy consumption while maximizing cooking performance. The oven is equipped with a high-performance jet plate system that provides even heat distribution, ensuring that every dish is cooked uniformly. This technology substantially reduces cooking times, allowing operators to serve meals faster without compromising quality.
The PS640E also incorporates advanced temperature controls and an intuitive digital interface, which enable precise temperature adjustments throughout the cooking process. This feature is crucial for achieving optimal results, especially when working with a variety of food items that may require different cooking conditions. The digital controls allow for easy programmability, enabling chefs to create custom cooking profiles tailored to their specific menu items.
Another standout characteristic of the PS640E is its dual belt system. This innovative feature maximizes throughput by allowing different cooking temperatures on each belt, facilitating the preparation of diverse menu items simultaneously. This is especially beneficial in busy kitchen environments where efficiency and speed are crucial.
The oven's robust construction ensures durability and reliability under heavy use, making it a trusted choice for commercial operators. Its stainless-steel exterior not only enhances its aesthetic appeal but also makes it easy to clean and maintain. Furthermore, the PS640E has been designed with ergonomics in mind, promoting ease of use for kitchen staff.
In addition to its core functionalities, the Middleby Marshall PS640E supports a variety of cooking applications, making it a versatile addition to any kitchen. From pizzas and baked goods to roasted meats and vegetables, this oven excels in a wide array of culinary tasks, helping operators diversify their menu offerings.
In conclusion, the Middleby Marshall PS640E stands out in the crowded marketplace of commercial ovens due to its combination of energy efficiency, advanced cooking technologies, and versatile applications. Its robust design, precise controls, and user-friendly interface make it an indispensable tool for chefs and kitchen operators striving for excellence in food preparation.