Installation instructions
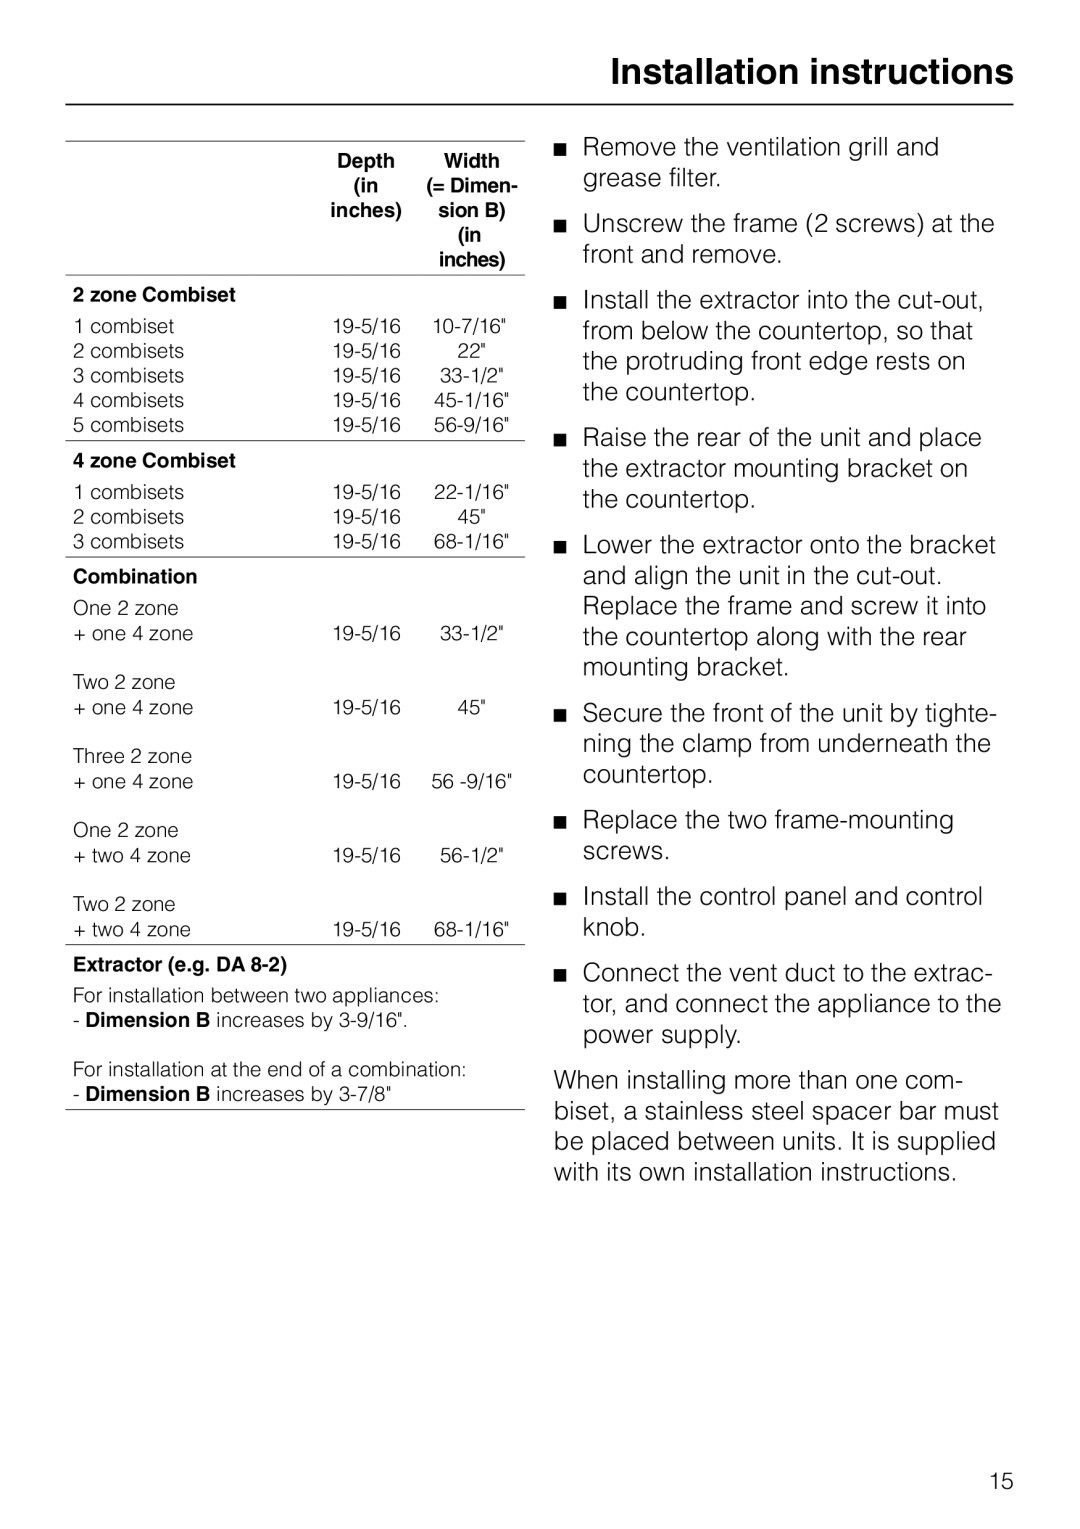
| Depth | Width |
| (in | (= Dimen- |
| inches) | sion B) |
|
| (in |
|
| inches) |
|
|
|
2 zone Combiset |
|
|
1 combiset | ||
2 combisets | 22" | |
3 combisets | ||
4 combisets | ||
5 combisets | ||
|
|
|
4 zone Combiset |
|
|
1 combisets | ||
2 combisets | 45" | |
3 combisets | ||
|
|
|
Combination |
|
|
One 2 zone |
|
|
+ one 4 zone | ||
Two 2 zone |
|
|
+ one 4 zone | 45" | |
Three 2 zone |
|
|
+ one 4 zone | 56 | |
One 2 zone |
|
|
+ two 4 zone | ||
Two 2 zone |
|
|
+ two 4 zone | ||
|
|
|
Extractor (e.g. DA 8-2)
For installation between two appliances: - Dimension B increases by
For installation at the end of a combination: - Dimension B increases by
Remove the ventilation grill and grease filter.
Unscrew the frame (2 screws) at the front and remove.
Install the extractor into the
Raise the rear of the unit and place the extractor mounting bracket on the countertop.
Lower the extractor onto the bracket and align the unit in the
Secure the front of the unit by tighte- ning the clamp from underneath the countertop.
Replace the two
Install the control panel and control knob.
Connect the vent duct to the extrac- tor, and connect the appliance to the power supply.
When installing more than one com- biset, a stainless steel spacer bar must be placed between units. It is supplied with its own installation instructions.
15
