CCSCF30xx-10x
| Part Number |
|
|
| Port One - Copper |
| Port Two - Single Fiber Optic |
| |
|
|
|
|
|
|
| SC, 1550 nm (TX)/1310 nm (RX) |
| |
|
|
|
| 75 ohm coax (BNC) |
|
| |||
|
|
|
|
|
|
| single mode, 20 km (12.4 miles)* |
| |
|
|
|
|
|
|
|
|
| |
|
|
| 75 ohm coax (BNC) |
| SC, 1310 nm (TX)/1550 nm (RX) |
| |||
|
|
|
|
|
|
| single mode, 40 km (24.8 miles)* |
| |
|
|
|
|
|
|
|
|
| |
|
| 75 ohm coax (BNC) |
| SC, 1550 nm (TX)/1310 nm (RX) |
| ||||
|
|
|
|
|
|
| single mode, 40 km (24.8 miles)* |
| |
|
|
|
| 75 ohm coax (BNC) |
| LC, 1300 nm multimode, 2 km |
|
| |
|
|
|
|
|
| ||||
|
|
|
|
| |||||
|
|
|
|
|
| (1.2 miles)* |
|
| |
|
|
|
|
|
|
|
|
|
|
* Typical maximum cable distance. Actual distance is dependent upon the |
physical characteristics of the network. (TX) = transmit (RX) = receive |
Installation -- Continued
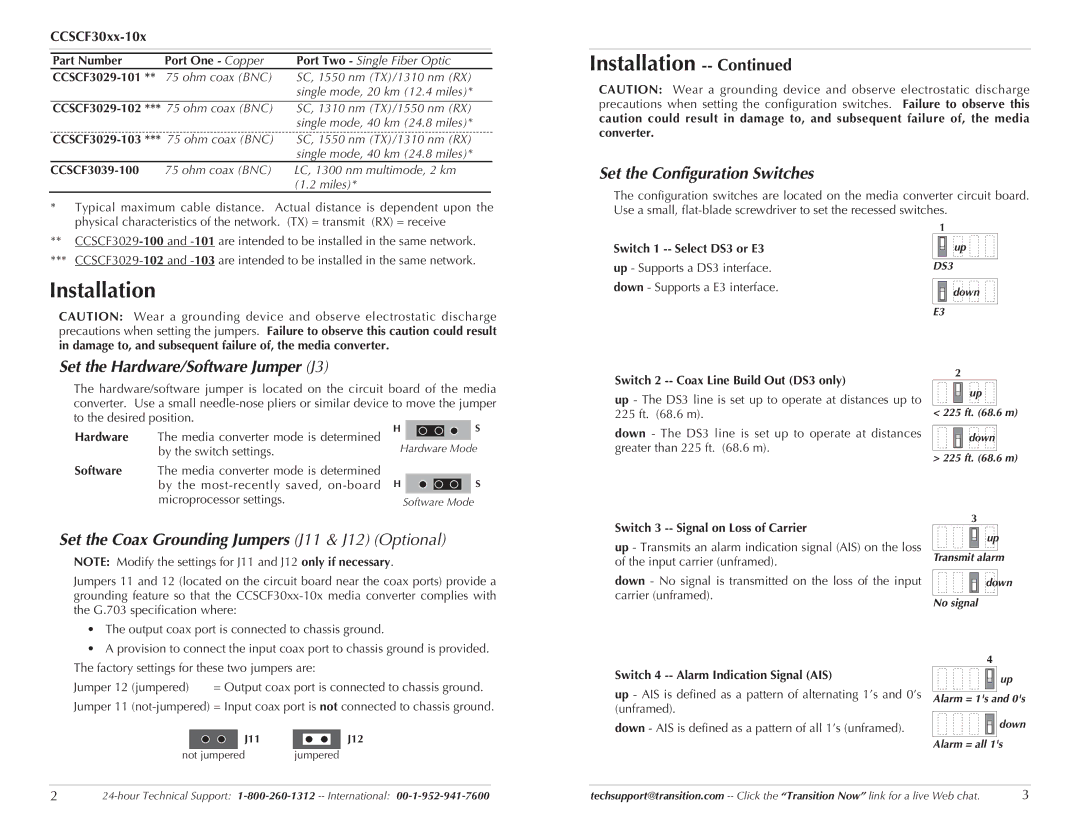
CAUTION: Wear a grounding device and observe electrostatic discharge precautions when setting the configuration switches. Failure to observe this caution could result in damage to, and subsequent failure of, the media converter.
Set the Configuration Switches
The configuration switches are located on the media converter circuit board. Use a small,
** | |
*** | |
Installation
CAUTION: Wear a grounding device and observe electrostatic discharge precautions when setting the jumpers. Failure to observe this caution could result in damage to, and subsequent failure of, the media converter.
Set the Hardware/Software Jumper (J3)
The hardware/software jumper is located on the circuit board of the media converter. Use a small
Switch 1
Switch 2 -- Coax Line Build Out (DS3 only)
up - The DS3 line is set up to operate at distances up to 225 ft. (68.6 m).
1
up ![]()
DS3
down ![]()
![]()
E3
2
up ![]()
![]()
< 225 ft. (68.6 m) |
Hardware The media converter mode is determined by the switch settings.
Software The media converter mode is determined by the
H ![]() S
S
Hardware Mode
H ![]() S
S
Software Mode
down - The DS3 line is set up to operate at distances greater than 225 ft. (68.6 m).
down |
> 225 ft. (68.6 m) |
Switch 3
3
Set the Coax Grounding Jumpers (J11 & J12) (Optional)
NOTE: Modify the settings for J11 and J12 only if necessary.
Jumpers 11 and 12 (located on the circuit board near the coax ports) provide a grounding feature so that the
•The output coax port is connected to chassis ground.
•A provision to connect the input coax port to chassis ground is provided. The factory settings for these two jumpers are:
Jumper 12 (jumpered) | = Output coax port is connected to chassis ground. |
Jumper 11
J11 | J12 |
not jumpered | jumpered |
up - Transmits an alarm indication signal (AIS) on the loss of the input carrier (unframed).
down - No signal is transmitted on the loss of the input carrier (unframed).
Switch 4 -- Alarm Indication Signal (AIS)
up - AIS is defined as a pattern of alternating 1’s and 0’s (unframed).
down - AIS is defined as a pattern of all 1’s (unframed).
up
Transmit alarm
down
No signal
4
![]()
![]()
![]()
![]()
![]()
![]()
![]()
![]() up Alarm = 1's and 0's
up Alarm = 1's and 0's
![]()
![]()
![]()
![]()
![]()
![]()
![]()
![]() down Alarm = all 1's
down Alarm = all 1's
2 | techsupport@transition.com | 3 |
