TOOL ASSEMBLY
![]() WARNING!
WARNING!
To reduce the risk of injury, always unplug tool before attaching or removing accessories or making adjustments. Use only specifically recommended accessories. Others may be hazardous.
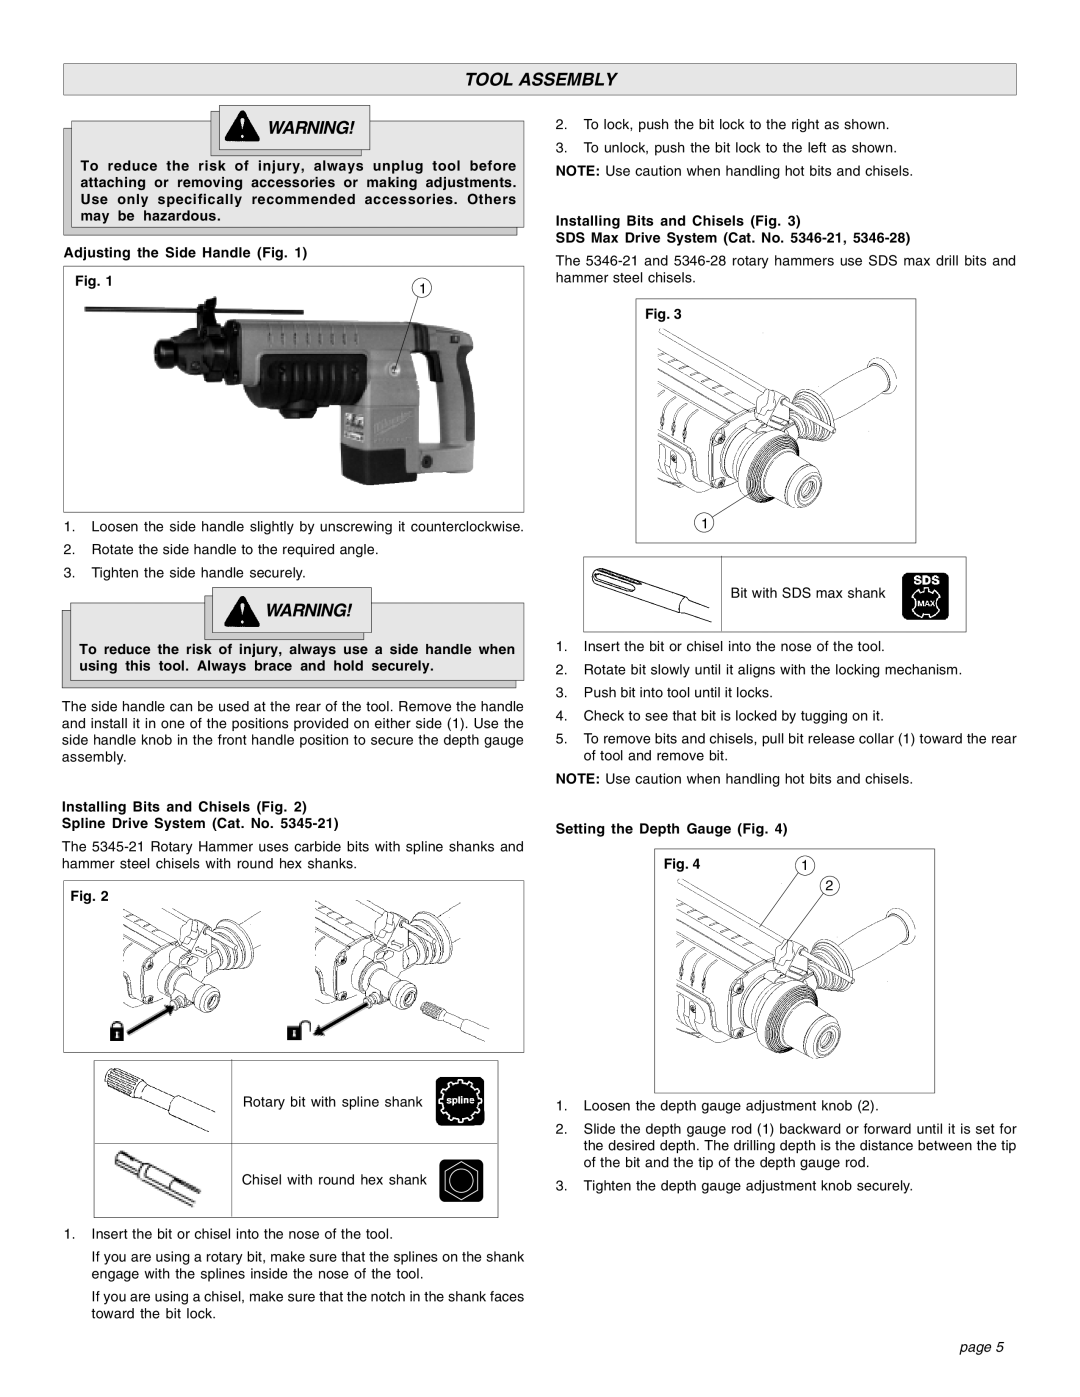
Adjusting the Side Handle (Fig. 1)
Fig. 1
1
1.Loosen the side handle slightly by unscrewing it counterclockwise.
2.Rotate the side handle to the required angle.
3.Tighten the side handle securely.
![]() WARNING!
WARNING!
To reduce the risk of injury, always use a side handle when using this tool. Always brace and hold securely.
The side handle can be used at the rear of the tool. Remove the handle and install it in one of the positions provided on either side (1). Use the side handle knob in the front handle position to secure the depth gauge assembly.
2.To lock, push the bit lock to the right as shown.
3.To unlock, push the bit lock to the left as shown.
NOTE: Use caution when handling hot bits and chisels.
Installing Bits and Chisels (Fig. 3)
SDS Max Drive System (Cat. No.
The
Fig. 3
1
Bit with SDS max shank
1.Insert the bit or chisel into the nose of the tool.
2.Rotate bit slowly until it aligns with the locking mechanism.
3.Push bit into tool until it locks.
4.Check to see that bit is locked by tugging on it.
5.To remove bits and chisels, pull bit release collar (1) toward the rear of tool and remove bit.
NOTE: Use caution when handling hot bits and chisels.
Installing Bits and Chisels (Fig. 2)
Spline Drive System (Cat. No. 5345-21)
The
Fig. 2
Setting the Depth Gauge (Fig. 4)
Fig. 4 | 1 |
2
Rotary bit with spline shank
Chisel with round hex shank
1.Insert the bit or chisel into the nose of the tool.
If you are using a rotary bit, make sure that the splines on the shank engage with the splines inside the nose of the tool.
If you are using a chisel, make sure that the notch in the shank faces toward the bit lock.
1.Loosen the depth gauge adjustment knob (2).
2.Slide the depth gauge rod (1) backward or forward until it is set for the desired depth. The drilling depth is the distance between the tip of the bit and the tip of the depth gauge rod.
3.Tighten the depth gauge adjustment knob securely.
page 5