INSTALLATION
SWIVEL BASE
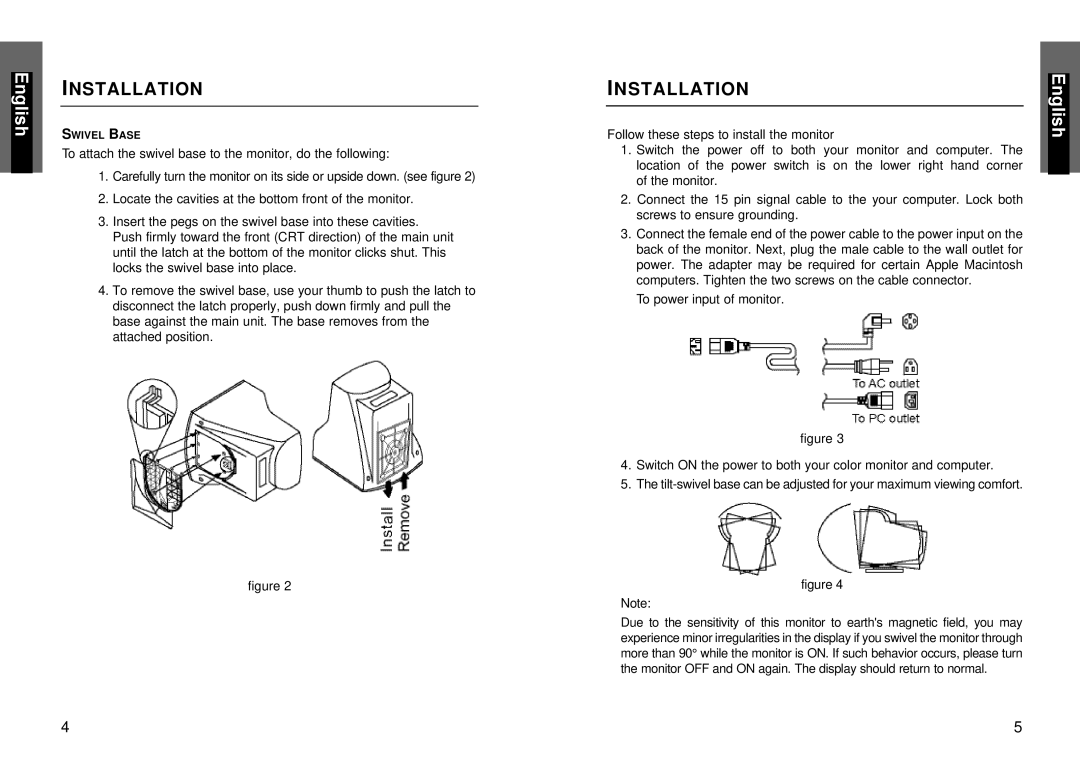
To attach the swivel base to the monitor, do the following:
1.Carefully turn the monitor on its side or upside down. (see figure 2)
2.Locate the cavities at the bottom front of the monitor.
3.Insert the pegs on the swivel base into these cavities. Push firmly toward the front (CRT direction) of the main unit until the latch at the bottom of the monitor clicks shut. This locks the swivel base into place.
4.To remove the swivel base, use your thumb to push the latch to disconnect the latch properly, push down firmly and pull the base against the main unit. The base removes from the attached position.
figure 2
INSTALLATION
Follow these steps to install the monitor
1.Switch the power off to both your monitor and computer. The location of the power switch is on the lower right hand corner of the monitor.
2.Connect the 15 pin signal cable to the your computer. Lock both screws to ensure grounding.
3.Connect the female end of the power cable to the power input on the back of the monitor. Next, plug the male cable to the wall outlet for power. The adapter may be required for certain Apple Macintosh computers. Tighten the two screws on the cable connector.
To power input of monitor.
figure 3
4.Switch ON the power to both your color monitor and computer.
5.The
figure 4
Note:
Due to the sensitivity of this monitor to earth's magnetic field, you may experience minor irregularities in the display if you swivel the monitor through more than 90° while the monitor is ON. If such behavior occurs, please turn the monitor OFF and ON again. The display should return to normal.
4 | 5 |