BEFORE OPERATION
Before printing,
1Install the print paper to this unit. (See below.)
2Install the ink ribbon to this unit. (page
INSTALLATION OF PRINT PAPER
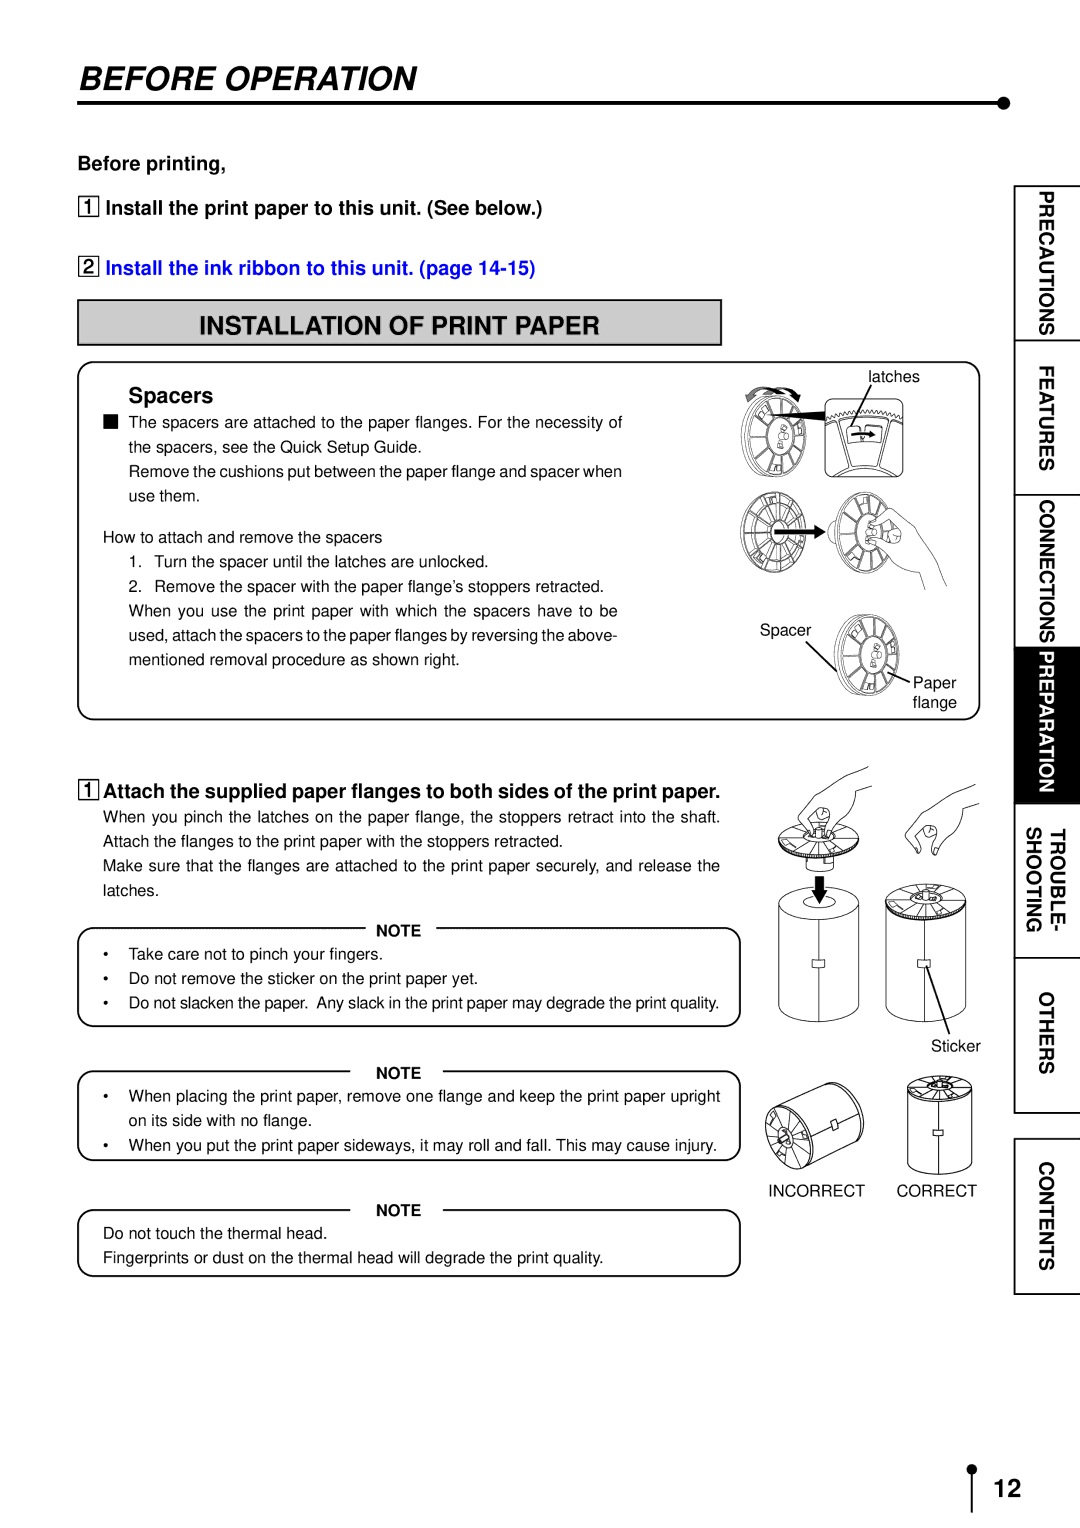
latches
PRECAUTIONS |
Spacers
2The spacers are attached to the paper flanges. For the necessity of the spacers, see the Quick Setup Guide.
Remove the cushions put between the paper flange and spacer when use them.
How to attach and remove the spacers
1.Turn the spacer until the latches are unlocked.
2.Remove the spacer with the paper flange’s stoppers retracted. When you use the print paper with which the spacers have to be used, attach the spacers to the paper flanges by reversing the above- mentioned removal procedure as shown right.
Spacer
![]() Paper flange
Paper flange
FEATURES |
|
PREPARATIONCONNECTIONS |
1Attach the supplied paper flanges to both sides of the print paper.
When you pinch the latches on the paper flange, the stoppers retract into the shaft.
Attach the flanges to the print paper with the stoppers retracted.
Make sure that the flanges are attached to the print paper securely, and release the latches.
NOTE
•Take care not to pinch your fingers.
•Do not remove the sticker on the print paper yet.
•Do not slacken the paper. Any slack in the print paper may degrade the print quality.
Sticker
NOTE
•When placing the print paper, remove one flange and keep the print paper upright
on its side with no flange.
• When you put the print paper sideways, it may roll and fall. This may cause injury.
INCORRECT CORRECT
NOTE
Do not touch the thermal head.
Fingerprints or dust on the thermal head will degrade the print quality.
SHOOTING | TROUBLE- |
| |
OTHERS | |
|
|
CONTENTS
12