BEFORE OPERATION
INSTALLATION OF INK RIBBON
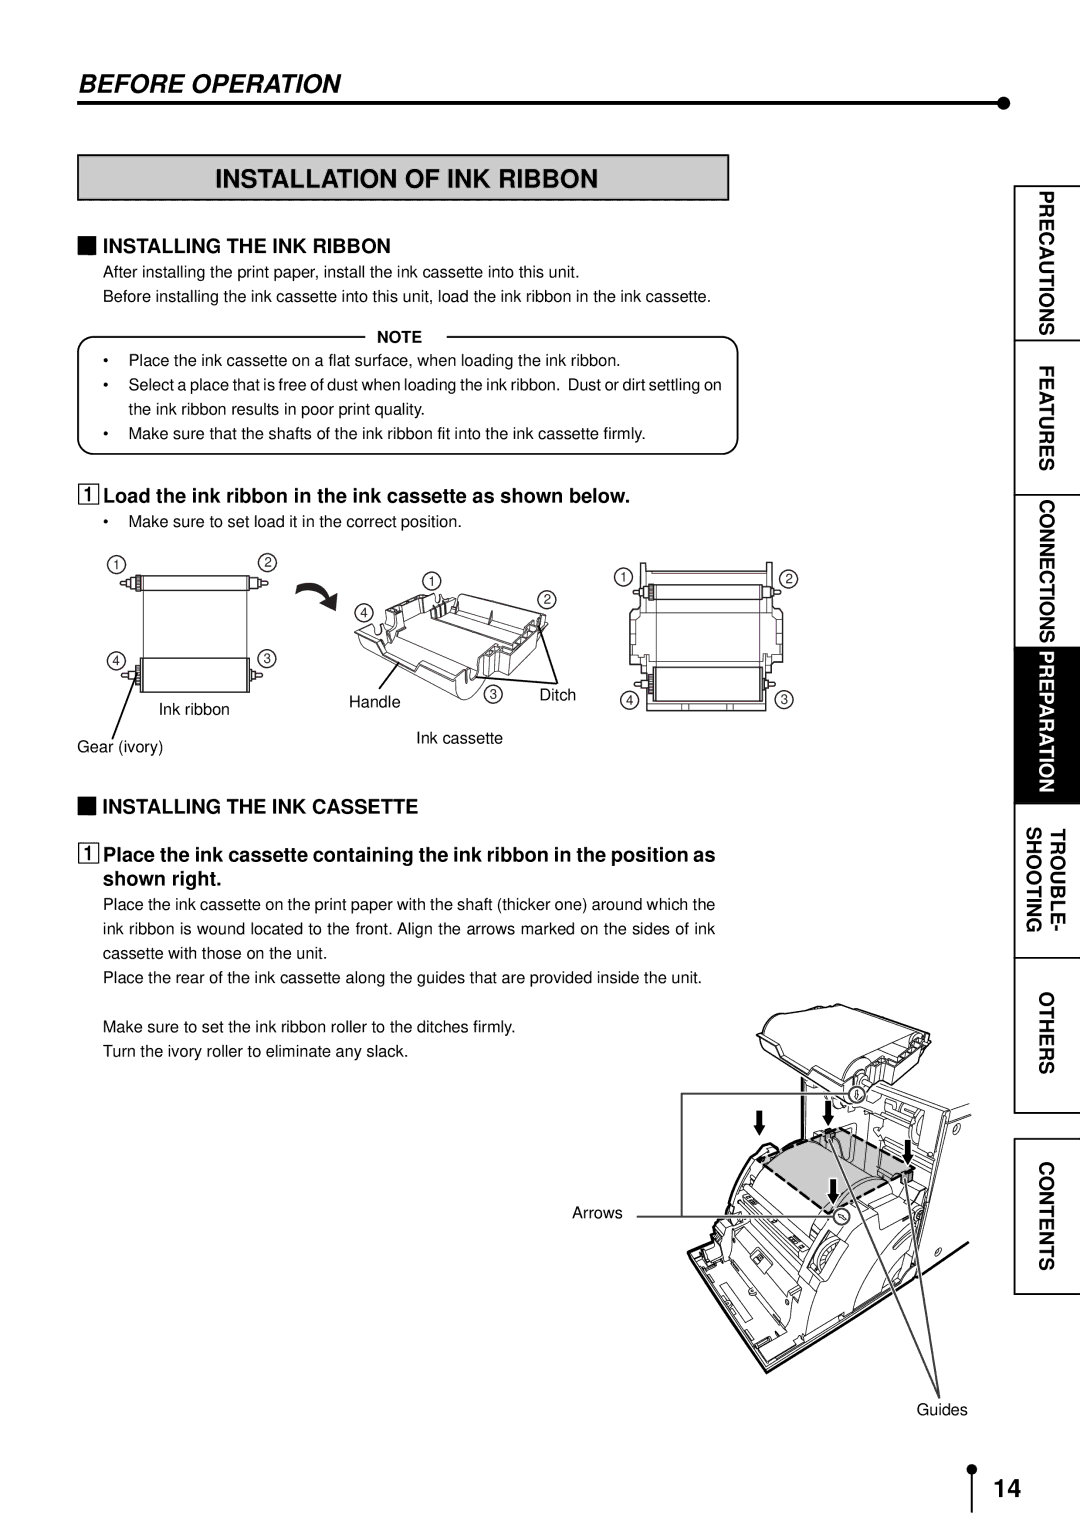
2INSTALLING THE INK RIBBON
After installing the print paper, install the ink cassette into this unit.
Before installing the ink cassette into this unit, load the ink ribbon in the ink cassette.
NOTE
•Place the ink cassette on a flat surface, when loading the ink ribbon.
•Select a place that is free of dust when loading the ink ribbon. Dust or dirt settling on the ink ribbon results in poor print quality.
•Make sure that the shafts of the ink ribbon fit into the ink cassette firmly.
1Load the ink ribbon in the ink cassette as shown below.
•Make sure to set load it in the correct position.
PRECAUTIONS |
FEATURES |
2INSTALLING THE INK CASSETTE
1Place the ink cassette containing the ink ribbon in the position as shown right.
Place the ink cassette on the print paper with the shaft (thicker one) around which the ink ribbon is wound located to the front. Align the arrows marked on the sides of ink cassette with those on the unit.
Place the rear of the ink cassette along the guides that are provided inside the unit.
Make sure to set the ink ribbon roller to the ditches firmly.
Turn the ivory roller to eliminate any slack.
Arrows |
14