U s i n g t h e u n i t

( c o n t i n u e d )

9 Adjust the picture elements (see page 22), then select the picture type according to the video content (see page 26).

10 Start using the unit.

The following functions are available while using the unit:

Adjusting the volume of the unit's speaker (see pages 18 and 28),

Turning off the image and muting the sound temporarily (see page 18),

Freezing a moving picture (see page 18),

Enlarging the picture (see page 19)

Note

When there is no signal input for a period of 5 min. or more, the power is automatically turned off and standby status is activated. (see page 29)

After using the unit

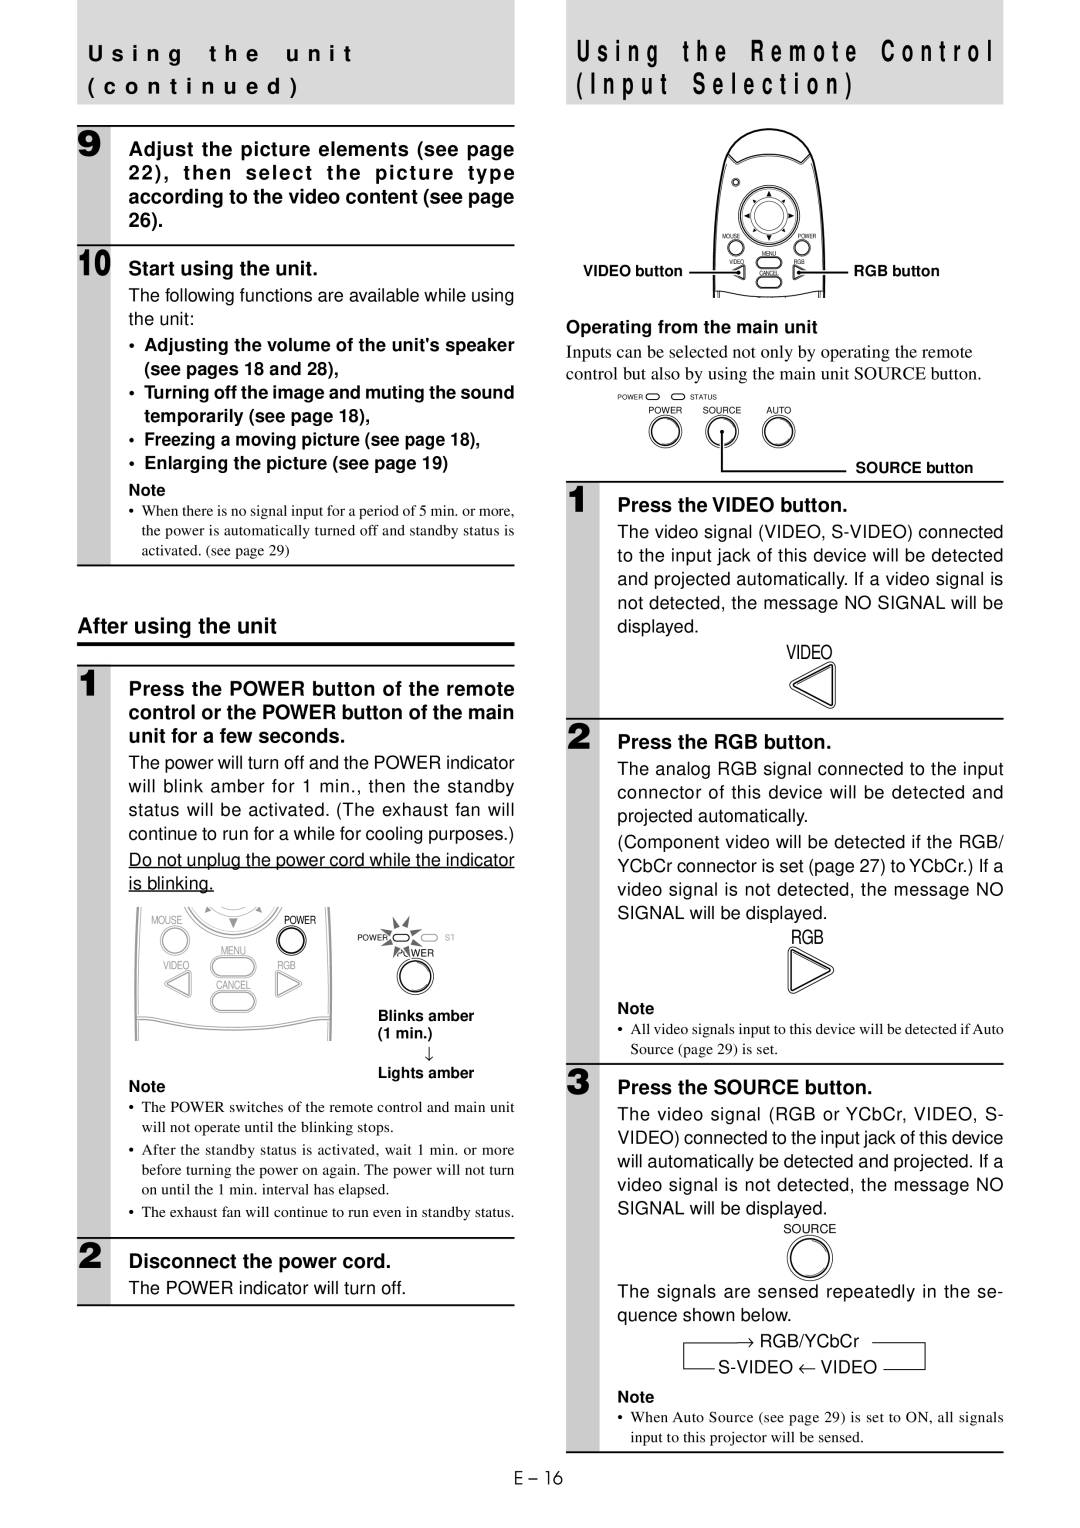
1 Press the POWER button of the remote control or the POWER button of the main unit for a few seconds.

The power will turn off and the POWER indicator will blink amber for 1 min., then the standby status will be activated. (The exhaust fan will continue to run for a while for cooling purposes.) Do not unplug the power cord while the indicator is blinking.

MOUSE

POWER


POWER

ST

MENU


POWER

VIDEO

RGB


CANCEL


Blinks amber (1 min.)

Lights amber

Note

The POWER switches of the remote control and main unit will not operate until the blinking stops.

After the standby status is activated, wait 1 min. or more before turning the power on again. The power will not turn on until the 1 min. interval has elapsed.

The exhaust fan will continue to run even in standby status.

2 Disconnect the power cord.

The POWER indicator will turn off.

U s i n g t h e R e m o t e C o n t r o l ( I n p u t S e l e c t i o n )

MOUSEPOWER

MENU

VIDEORGB

VIDEO button CANCEL RGB button

Operating from the main unit

Inputs can be selected not only by operating the remote control but also by using the main unit SOURCE button.

POWER STATUS

POWER SOURCE AUTO

SOURCE button

1 Press the VIDEO button.

The video signal (VIDEO, S-VIDEO) connected to the input jack of this device will be detected and projected automatically. If a video signal is not detected, the message NO SIGNAL will be displayed.

VIDEO

2 Press the RGB button.

The analog RGB signal connected to the input connector of this device will be detected and projected automatically.

(Component video will be detected if the RGB/ YCbCr connector is set (page 27) to YCbCr.) If a video signal is not detected, the message NO SIGNAL will be displayed.

RGB

Note

All video signals input to this device will be detected if Auto Source (page 29) is set.

3 Press the SOURCE button.

The video signal (RGB or YCbCr, VIDEO, S- VIDEO) connected to the input jack of this device will automatically be detected and projected. If a video signal is not detected, the message NO SIGNAL will be displayed.

SOURCE

The signals are sensed repeatedly in the se- quence shown below.

RGB/YCbCr

S-VIDEO VIDEO

Note

When Auto Source (see page 29) is set to ON, all signals input to this projector will be sensed.

E – 16

Page 18
Image 18
Mitsubishi Electronics LVP-X30U user manual I n g t h e u n i t N t i n u e d, After using the unit

LVP-X30U specifications

The Mitsubishi Electronics LVP-X30U is a versatile and powerful projector that caters well to the needs of both business professionals and educational institutions. This model showcases a blend of advanced technology and user-friendly features, making it a popular choice for various presentation environments.

One of the standout characteristics of the LVP-X30U is its impressive brightness level. With a luminosity of 3,000 ANSI lumens, this projector ensures vivid and clear images, even in well-lit rooms. The high brightness capability makes it particularly suitable for large venues or classrooms where ambient light can be challenging.

The projector features a native XGA resolution of 1024 x 768 pixels, which delivers sharp and detailed visuals. This resolution is ideal for displaying text-rich presentations, intricate graphics, and video content. Additionally, the LVP-X30U supports an array of resolutions, allowing users to project from various input devices without losing image quality.

Another significant technological advantage of the LVP-X30U is its advanced color reproduction capabilities. Utilizing Mitsubishi's proprietary color wheel technology, this projector provides a wide color gamut, ensuring that images appear vibrant and true to life. The projector's brightness and color accuracy combine to create engaging presentations that captivate audiences.

Furthermore, the LVP-X30U incorporates robust connectivity options, including HDMI, VGA, and composite video inputs. This versatility allows users to connect multiple devices such as laptops, DVD players, and other multimedia sources without hassle. The inclusion of a built-in 10-watt speaker also enhances the audio experience, ensuring that sound accompanies visuals effectively.

The projector's design emphasizes portability and ease of use. Weighing around 6.5 pounds, it is lightweight enough for mobile presentations. Moreover, the intuitive user interface simplifies operation, allowing presenters to focus on their content rather than grappling with technical difficulties.

In terms of durability, the LVP-X30U boasts a long lamp life of approximately 4000 hours in standard mode and even longer in eco mode. This longevity reduces the frequency of replacements, resulting in lower overall maintenance costs.

Overall, the Mitsubishi Electronics LVP-X30U is a reliable and feature-rich projector that meets the demands of various users. Its combination of brightness, resolution, connectivity options, and ease of use makes it an excellent choice for those looking to enhance their presentation capabilities, whether in the boardroom or the classroom.