Menu operation (continued)

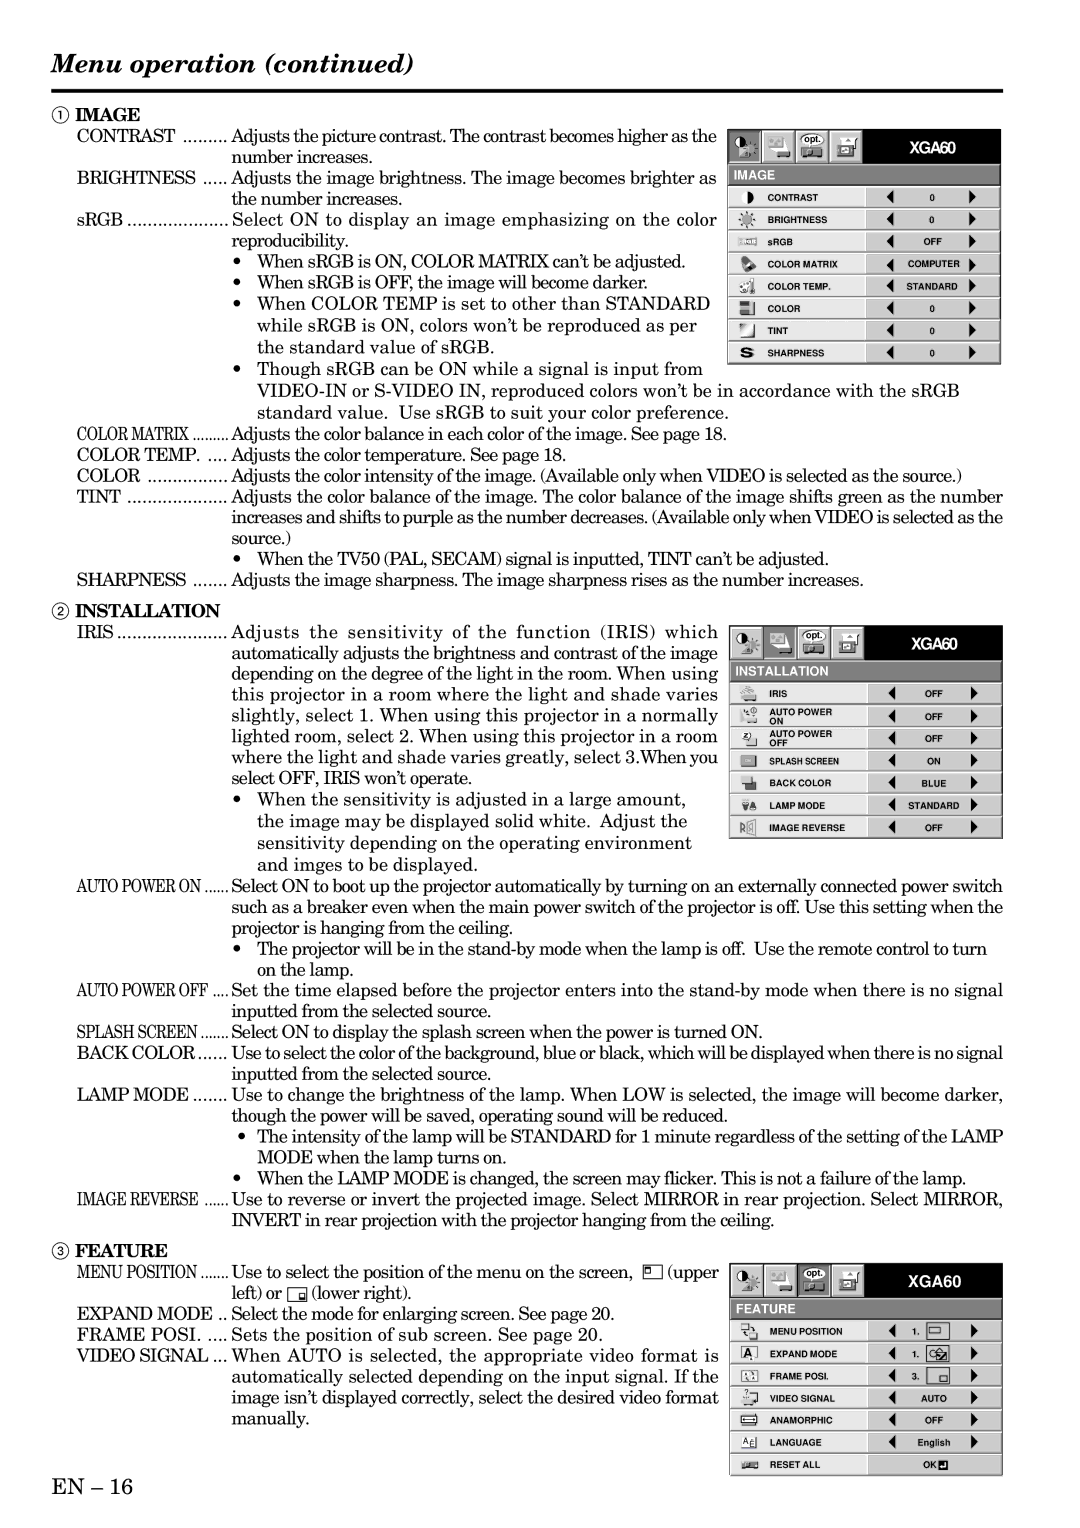
1IMAGE

CONTRAST ......... Adjusts the picture contrast. The contrast becomes higher as the


opt.


XGA60


number increases.


BRIGHTNESS ..... Adjusts the image brightness. The image becomes brighter as

IMAGE


the number increases.


CONTRAST

0


sRGB .................... Select ON to display an image emphasizing on the color


BRIGHTNESS

0


reproducibility.


sRGB

OFF


• When sRGB is ON, COLOR MATRIX can’t be adjusted.


COLOR MATRIX

COMPUTER


• When sRGB is OFF, the image will become darker.


COLOR TEMP.

STANDARD


• When COLOR TEMP is set to other than STANDARD


COLOR

0


while sRGB is ON, colors won’t be reproduced as per


TINT

0


the standard value of sRGB.


SHARPNESS

0


Though sRGB can be ON while a signal is input from

VIDEO-IN or S-VIDEO IN, reproduced colors won’t be in accordance with the sRGB


standard value. Use sRGB to suit your color preference.

COLOR MATRIX

Adjusts the color balance in each color of the image. See page 18.

COLOR TEMP

Adjusts the color temperature. See page 18.

COLOR

Adjusts the color intensity of the image. (Available only when VIDEO is selected as the source.)

TINT

Adjusts the color balance of the image. The color balance of the image shifts green as the number


increases and shifts to purple as the number decreases. (Available only when VIDEO is selected as the


source.)

When the TV50 (PAL, SECAM) signal is inputted, TINT can’t be adjusted. SHARPNESS ....... Adjusts the image sharpness. The image sharpness rises as the number increases.

2INSTALLATION

IRIS ...................... Adjusts the sensitivity of the function (IRIS) which


opt.


XGA60

automatically adjusts the brightness and contrast of the image


depending on the degree of the light in the room. When using

INSTALLATION


this projector in a room where the light and shade varies


IRIS

OFF

slightly, select 1. When using this projector in a normally


AUTO POWER

OFF


ON

lighted room, select 2. When using this projector in a room


AUTO POWER

OFF


OFF

where the light and shade varies greatly, select 3.When you


SPLASH SCREEN

ON


ON

select OFF, IRIS won’t operate.


BACK COLOR

BLUE


• When the sensitivity is adjusted in a large amount,


LAMP MODE

STANDARD

the image may be displayed solid white. Adjust the


IMAGE REVERSE

OFF

sensitivity depending on the operating environment


and imges to be displayed.

AUTO POWER ON ...... Select ON to boot up the projector automatically by turning on an externally connected power switch

such as a breaker even when the main power switch of the projector is off. Use this setting when the projector is hanging from the ceiling.


• The projector will be in the stand-by mode when the lamp is off. Use the remote control to turn


on the lamp.

AUTO POWER OFF ....

Set the time elapsed before the projector enters into the stand-by mode when there is no signal


inputted from the selected source.

SPLASH SCREEN

Select ON to display the splash screen when the power is turned ON.

BACK COLOR

Use to select the color of the background, blue or black, which will be displayed when there is no signal


inputted from the selected source.

LAMP MODE

Use to change the brightness of the lamp. When LOW is selected, the image will become darker,


though the power will be saved, operating sound will be reduced.

The intensity of the lamp will be STANDARD for 1 minute regardless of the setting of the LAMP MODE when the lamp turns on.

When the LAMP MODE is changed, the screen may flicker. This is not a failure of the lamp. IMAGE REVERSE ...... Use to reverse or invert the projected image. Select MIRROR in rear projection. Select MIRROR,

INVERT in rear projection with the projector hanging from the ceiling.

3FEATURE

MENU POSITION ....... Use to select the position of the menu on the screen, (upper

left) or (lower right).

EXPAND MODE .. Select the mode for enlarging screen. See page 20. FRAME POSI. .... Sets the position of sub screen. See page 20.

VIDEO SIGNAL ... When AUTO is selected, the appropriate video format is automatically selected depending on the input signal. If the image isn’t displayed correctly, select the desired video format manually.

opt.

FEATURE

MENU POSITION

AEXPAND MODE

A


A

FRAME POSI.

A

?

VIDEO SIGNAL


ANAMORPHIC

AË LANGUAGE

RESET ALL

XGA60

1.

1.

3.

AUTO

OFF

English

OK

EN – 16

Page 16
Image 16
Mitsubishi Electronics X500U user manual Image, Installation, Feature

X500U specifications

The Mitsubishi Electronics X500U is a cutting-edge projector designed to cater to a wide range of professional and educational environments. This compact device is renowned for its impressive image quality, advanced technologies, and versatile features that make it an ideal choice for presentations, lectures, and multimedia experiences.

One of the main features of the X500U is its high brightness capacity, capable of delivering up to 5000 lumens. This ensures that images remain vibrant and clear even in well-lit rooms, making it well-suited for various settings. The projector utilizes a full HD resolution of 1920 x 1080, providing crystal-clear images with stunning detail. This resolution is particularly beneficial for displaying intricate graphs, charts, and videos, providing a rich viewing experience for any audience.

The X500U incorporates advanced DLP (Digital Light Processing) technology, which enhances color accuracy and contrast. With a high dynamic contrast ratio, the projector produces deep blacks and bright whites, ensuring that every detail is captured, even in the darkest scenes. This technology minimizes the potential for color degradation over time, ensuring that the projector maintains its performance over extended usage.

Another significant feature is the X500U's connectivity options. It includes multiple HDMI ports, USB slots, and VGA inputs, allowing seamless integration with a variety of devices such as laptops, Blu-ray players, and mobile devices. This versatility ensures that users can easily switch between different input sources without hassle.

The projector also boasts a range of user-friendly features, such as a quick-start option, which allows users to begin presenting almost immediately. Furthermore, with its built-in speaker system, the X500U provides adequate audio output for smaller rooms, eliminating the need for external speakers in certain situations.

In terms of portability, the X500U is designed to be lightweight and compact. This means it can be easily transported between locations, making it an excellent choice for traveling professionals and educators.

Lastly, the X500U is equipped with an eco-friendly mode that extends lamp life significantly, often reaching up to 15,000 hours. This feature not only reduces maintenance costs but also minimizes environmental impact, aligning with modern sustainability goals.

In conclusion, the Mitsubishi Electronics X500U is a versatile and robust projector, packed with features that enhance the viewing experience while providing convenience and efficiency for users across various applications.