Preparing your projector

Checking accessories

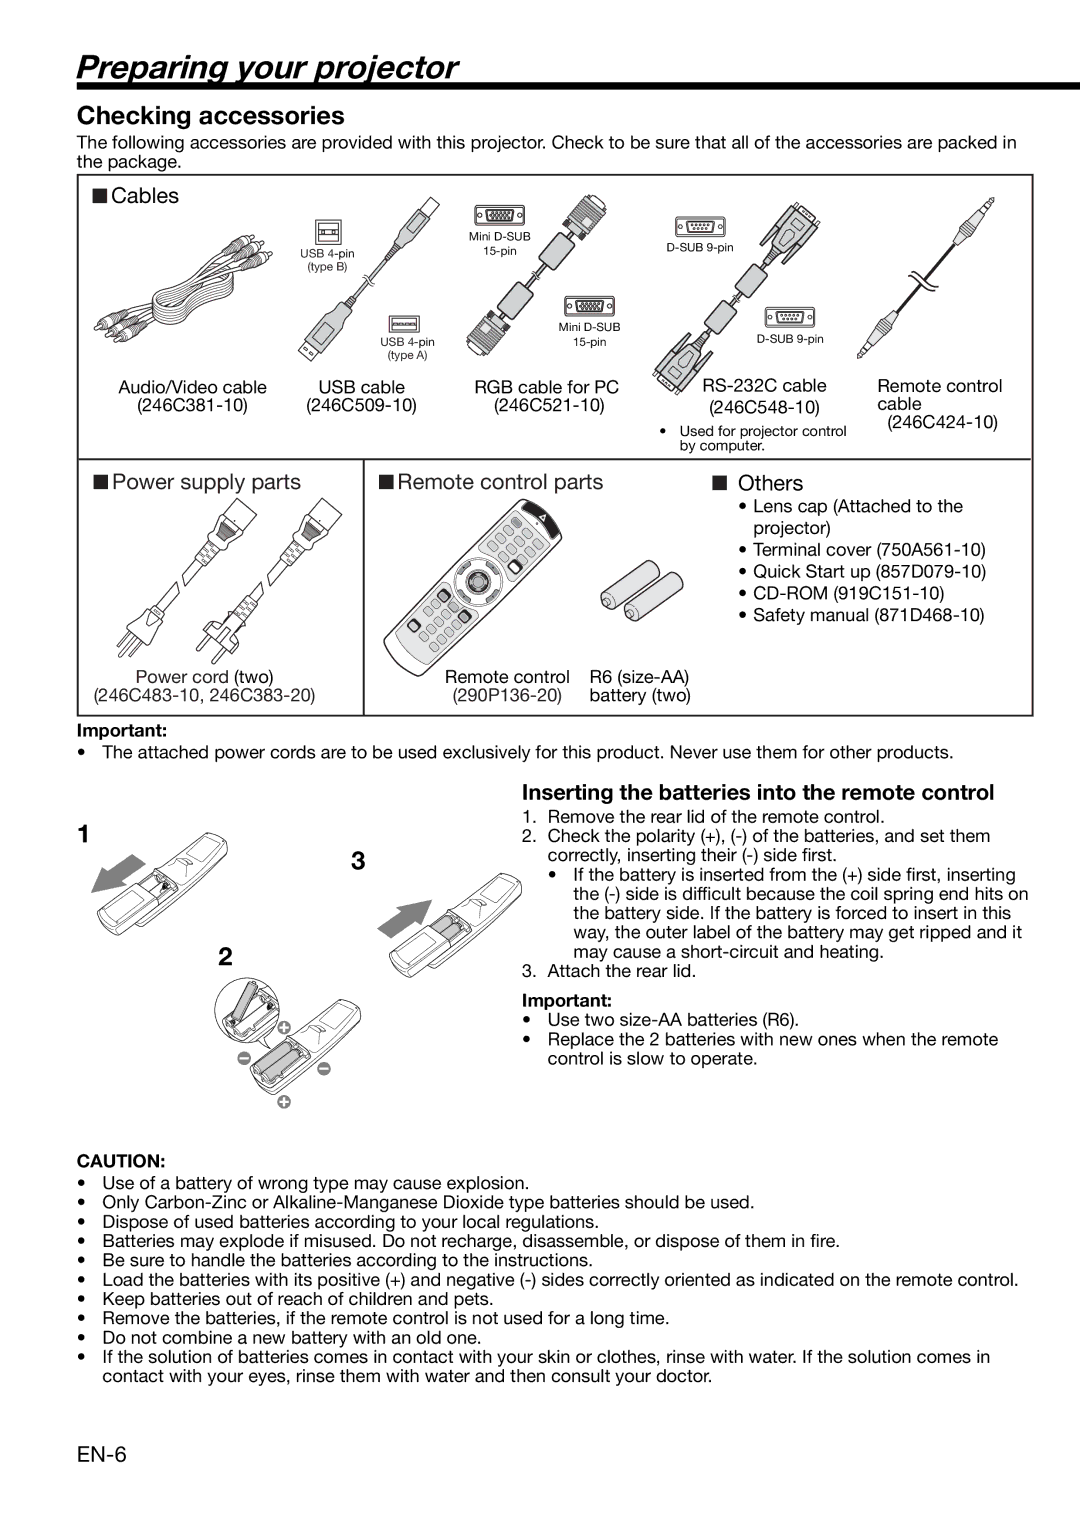
The following accessories are provided with this projector. Check to be sure that all of the accessories are packed in the package.

Cables


Mini D-SUB


USB 4-pin

15-pin


(type B)


Mini D-SUB


USB 4-pin

15-pin


(type A)


Audio/Video cable

USB cable

RGB cable for PC

(246C381-10)

(246C509-10)

(246C521-10)

D-SUB 9-pin

D-SUB 9-pin

RS-232C cable (246C548-10)

Used for projector control by computer.

Remote control cable

(246C424-10)

Power supply parts

Power cord (two)

(246C483-10, 246C383-20)

Remote control parts

Remote control

R6 (size-AA)

(290P136-20)

battery (two)

Others

Lens cap (Attached to the projector)

Terminal cover (750A561-10)

Quick Start up (857D079-10)

CD-ROM (919C151-10)

Safety manual (871D468-10)

Important:

• The attached power cords are to be used exclusively for this product. Never use them for other products.

Inserting the batteries into the remote control

1

1.

Remove the rear lid of the remote control.

2.

Check the polarity (+), (-) of the batteries, and set them


3

correctly, inserting their (-) side first.


• If the battery is inserted from the (+) side first, inserting


the (-) side is difficult because the coil spring end hits on


the battery side. If the battery is forced to insert in this


way, the outer label of the battery may get ripped and it


2

may cause a short-circuit and heating.


3.

Attach the rear lid.

Important:

Use two size-AA batteries (R6).

Replace the 2 batteries with new ones when the remote

control is slow to operate.

CAUTION:

Use of a battery of wrong type may cause explosion.

Only Carbon-Zinc or Alkaline-Manganese Dioxide type batteries should be used.

Dispose of used batteries according to your local regulations.

Batteries may explode if misused. Do not recharge, disassemble, or dispose of them in fire.

Be sure to handle the batteries according to the instructions.

Load the batteries with its positive (+) and negative (-) sides correctly oriented as indicated on the remote control.

Keep batteries out of reach of children and pets.

Remove the batteries, if the remote control is not used for a long time.

Do not combine a new battery with an old one.

If the solution of batteries comes in contact with your skin or clothes, rinse with water. If the solution comes in contact with your eyes, rinse them with water and then consult your doctor.

EN-6

Page 6
Image 6
Mitsubishi Electronics XD2000U user manual Preparing your projector, Checking accessories

XD2000U specifications

The Mitsubishi Electronics XD2000U is a high-performance, versatile projector designed to meet the demands of both professional and educational environments. With its compact design and advanced features, the XD2000U is suitable for various applications including conferences, classrooms, and training sessions.

One of the standout features of the XD2000U is its brightness, delivering an impressive 2000 ANSI lumens. This ensures clear and vibrant images even in well-lit environments, making it ideal for presentations where ambient light cannot be controlled. The projector also boasts a high contrast ratio of 2000:1, providing deep blacks and bright whites that enhance image clarity and detail.

The XD2000U utilizes DLP (Digital Light Processing) technology, which contributes to its reliable performance and image quality. DLP technology is known for its sharpness, consistent color reproduction, and reduced maintenance needs compared to traditional LCD projectors. This makes the XD2000U a great choice for users who prioritize longevity and minimal upkeep.

In terms of resolution, the XD2000U supports a native XGA resolution of 1024x768 pixels, making it suitable for detailed graphics and text presentation. Additionally, the projector can accommodate various input formats, including VGA, HDMI, and component video, ensuring compatibility with a range of devices such as laptops, DVDs, and gaming consoles.

The user-friendly features of the XD2000U enhance its adaptability in various settings. The integrated speaker eliminates the need for additional audio equipment, enabling seamless presentations. Its compact size and lightweight design make it easy to transport, making it a favored option among mobile professionals and educators.

Mitsubishi has equipped the XD2000U with extensive connectivity options, including RS-232 for control systems and USB for easy file access. These features streamline the setup process, allowing users to focus on delivering impactful presentations without technical distractions.

Moreover, the XD2000U incorporates energy-saving technologies, such as an eco mode that extends lamp life significantly while reducing power consumption. This not only lowers operational costs but also minimizes environmental impact.

Overall, the Mitsubishi Electronics XD2000U exemplifies a well-rounded projector that combines brightness, clarity, and connectivity in a portable package. Whether for professional or educational purposes, it promises to deliver high-quality performance and reliability for a variety of presentation needs.