Menu operation (continued)

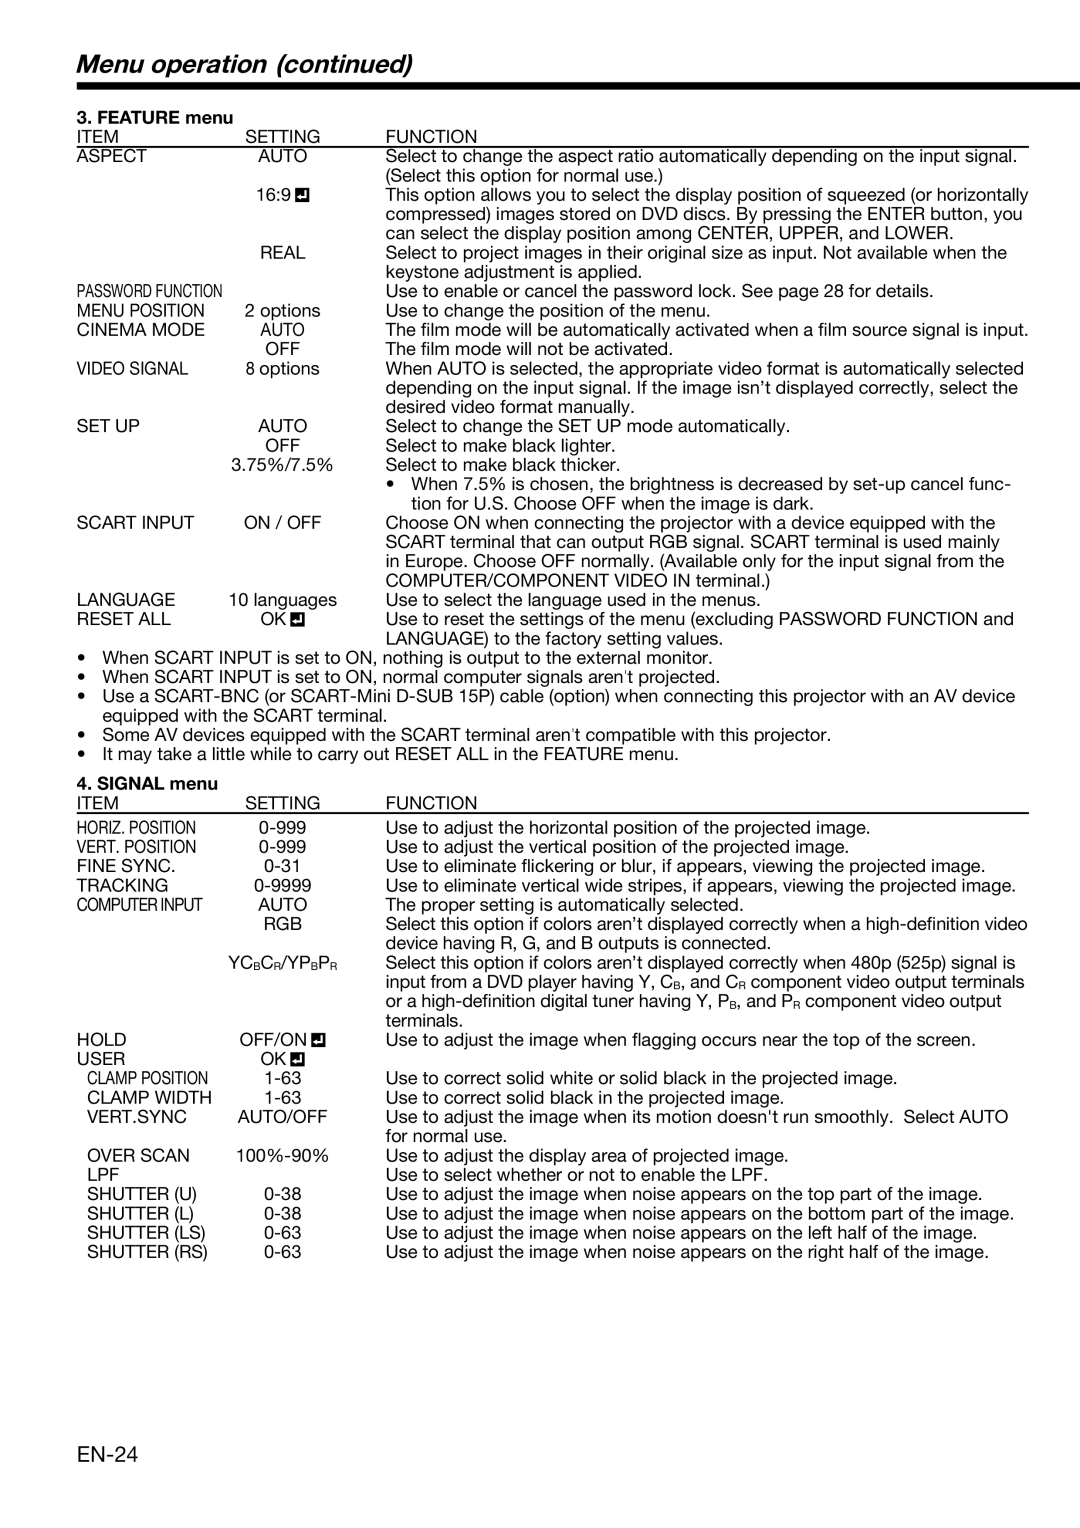
3. FEATURE menu


ITEM

SETTING

FUNCTION

ASPECT

AUTO

Select to change the aspect ratio automatically depending on the input signal.


16:9


(Select this option for normal use.)


This option allows you to select the display position of squeezed (or horizontally


compressed) images stored on DVD discs. By pressing the ENTER button, you


can select the display position among CENTER, UPPER, and LOWER.


REAL

Select to project images in their original size as input. Not available when the


keystone adjustment is applied.

PASSWORD FUNCTION


Use to enable or cancel the password lock. See page 28 for details.

MENU POSITION

2 options

Use to change the position of the menu.

CINEMA MODE

AUTO

The film mode will be automatically activated when a film source signal is input.


OFF

The film mode will not be activated.

VIDEO SIGNAL

8 options

When AUTO is selected, the appropriate video format is automatically selected


depending on the input signal. If the image isn’t displayed correctly, select the


desired video format manually.

SET UP

AUTO

Select to change the SET UP mode automatically.


OFF

Select to make black lighter.


3.75%/7.5%

Select to make black thicker.


• When 7.5% is chosen, the brightness is decreased by set-up cancel func-


tion for U.S. Choose OFF when the image is dark.

SCART INPUT

ON / OFF

Choose ON when connecting the projector with a device equipped with the


SCART terminal that can output RGB signal. SCART terminal is used mainly


in Europe. Choose OFF normally. (Available only for the input signal from the


COMPUTER/COMPONENT VIDEO IN terminal.)

LANGUAGE

10 languages

Use to select the language used in the menus.

RESET ALL

OK


Use to reset the settings of the menu (excluding PASSWORD FUNCTION and


LANGUAGE) to the factory setting values.

When SCART INPUT is set to ON, nothing is output to the external monitor.

When SCART INPUT is set to ON, normal computer signals aren't projected.

Use a SCART-BNC (or SCART-Mini D-SUB 15P) cable (option) when connecting this projector with an AV device equipped with the SCART terminal.

Some AV devices equipped with the SCART terminal aren't compatible with this projector.

It may take a little while to carry out RESET ALL in the FEATURE menu.

4. SIGNAL menu


ITEM

SETTING

FUNCTION

HORIZ. POSITION

0-999


Use to adjust the horizontal position of the projected image.

VERT. POSITION

0-999


Use to adjust the vertical position of the projected image.

FINE SYNC.

0-31


Use to eliminate flickering or blur, if appears, viewing the projected image.

TRACKING

0-9999


Use to eliminate vertical wide stripes, if appears, viewing the projected image.

COMPUTER INPUT

AUTO

The proper setting is automatically selected.


RGB

Select this option if colors aren’t displayed correctly when a high-definition video


device having R, G, and B outputs is connected.


YCBCR/YPBPR

Select this option if colors aren’t displayed correctly when 480p (525p) signal is


input from a DVD player having Y, CB, and CR component video output terminals


or a high-definition digital tuner having Y, PB, and PR component video output


terminals.

HOLD

OFF/ON


Use to adjust the image when flagging occurs near the top of the screen.


USER

OK


CLAMP POSITION

1-63


Use to correct solid white or solid black in the projected image.

CLAMP WIDTH

1-63


Use to correct solid black in the projected image.

VERT.SYNC

AUTO/OFF

Use to adjust the image when its motion doesn't run smoothly. Select AUTO


for normal use.

OVER SCAN

100%-90%

Use to adjust the display area of projected image.

LPF


Use to select whether or not to enable the LPF.

SHUTTER (U)

0-38


Use to adjust the image when noise appears on the top part of the image.

SHUTTER (L)

0-38


Use to adjust the image when noise appears on the bottom part of the image.

SHUTTER (LS)

0-63


Use to adjust the image when noise appears on the left half of the image.

SHUTTER (RS)

0-63


Use to adjust the image when noise appears on the right half of the image.

EN-24

Page 24
Image 24
Mitsubishi Electronics XD2000U user manual Menu operation, Feature menu, Signal menu

XD2000U specifications

The Mitsubishi Electronics XD2000U is a high-performance, versatile projector designed to meet the demands of both professional and educational environments. With its compact design and advanced features, the XD2000U is suitable for various applications including conferences, classrooms, and training sessions.

One of the standout features of the XD2000U is its brightness, delivering an impressive 2000 ANSI lumens. This ensures clear and vibrant images even in well-lit environments, making it ideal for presentations where ambient light cannot be controlled. The projector also boasts a high contrast ratio of 2000:1, providing deep blacks and bright whites that enhance image clarity and detail.

The XD2000U utilizes DLP (Digital Light Processing) technology, which contributes to its reliable performance and image quality. DLP technology is known for its sharpness, consistent color reproduction, and reduced maintenance needs compared to traditional LCD projectors. This makes the XD2000U a great choice for users who prioritize longevity and minimal upkeep.

In terms of resolution, the XD2000U supports a native XGA resolution of 1024x768 pixels, making it suitable for detailed graphics and text presentation. Additionally, the projector can accommodate various input formats, including VGA, HDMI, and component video, ensuring compatibility with a range of devices such as laptops, DVDs, and gaming consoles.

The user-friendly features of the XD2000U enhance its adaptability in various settings. The integrated speaker eliminates the need for additional audio equipment, enabling seamless presentations. Its compact size and lightweight design make it easy to transport, making it a favored option among mobile professionals and educators.

Mitsubishi has equipped the XD2000U with extensive connectivity options, including RS-232 for control systems and USB for easy file access. These features streamline the setup process, allowing users to focus on delivering impactful presentations without technical distractions.

Moreover, the XD2000U incorporates energy-saving technologies, such as an eco mode that extends lamp life significantly while reducing power consumption. This not only lowers operational costs but also minimizes environmental impact.

Overall, the Mitsubishi Electronics XD2000U exemplifies a well-rounded projector that combines brightness, clarity, and connectivity in a portable package. Whether for professional or educational purposes, it promises to deliver high-quality performance and reliability for a variety of presentation needs.