Network settings (continued)
Setting or Clearing DHCP
1.Display the IP CONFIG menu.
2.Press the S or T button to select DHCP.
DHCP | ON |
|
|
3.Press the ENTER button.
•Confirmation dialog appears.
4.Press the W or X button to select ON ![]() or OFF
or OFF ![]() .
.
5.Select the item to set, and press the ENTER button.
•To cancel the setting, press the MENU button.
•It may take some time to reflect the settings.
•When setting DHCP to ON, IP ADDRESS, SUBNET MASK, and DEFAULT GATEWAY cannot be set. If you set those set- tings, set DHCP to OFF and perform the IP settings as the following procedures.
IP Address Settings
1.Display the IP CONFIG menu.
2.Press the S or T button to select IP ADDRESS.
IP ADDRESS | SET |
3.Press the W or X button to select SET ![]() .
.
4.Press the ENTER button.
• IP ADDRESS screen appears.
5.Press the direction buttons to move the key cursor, select the numbers to enter, and press the ENTER button.
•Set the numeric value within the range from 0 to 255. How- ever, set the numeric value for the final octet within the range from 1 to 254.
← key: Shifting the position of enter cursor to the left.
→ key: Shifting the position of enter cursor to the right. DEL key:Deleting the character in the position of enter cur-
sor for each character.
6.When selecting OK, the setting is completed as the IP ADDRESS stored. However, when selecting CANCEL, the set- ting is completed without storing.
•The display returns the IP CONFIG menu after selecting OK or CANCEL.
•If the entered content is not correct, IP ADDRESS screen appears again after an error dialog is displayed.
•It may take some time to reflect the settings.
Subnet Mask Settings
1.Display the IP CONFIG menu.
2.Press the S or T button to select SUBNET MASK.
SUBNET MASK | SET |
3.Press the W or X button to select SET ![]() .
.
4.Press the ENTER button.
• SUBNET MASK screen appears.
5.Enter the Subnet Mask.
• Refer to IP Address Settings for the detail of entering.
6.When selecting OK, the setting is completed as the Subnet Mask stored. However, when selecting CANCEL, the setting is completed without storing.
•The display returns the IP CONFIG menu after selecting OK or CANCEL.
•If the entered content is not correct, SUBNET MASK screen appears again after an error dialog is displayed.
•It may take some time to reflect the settings.
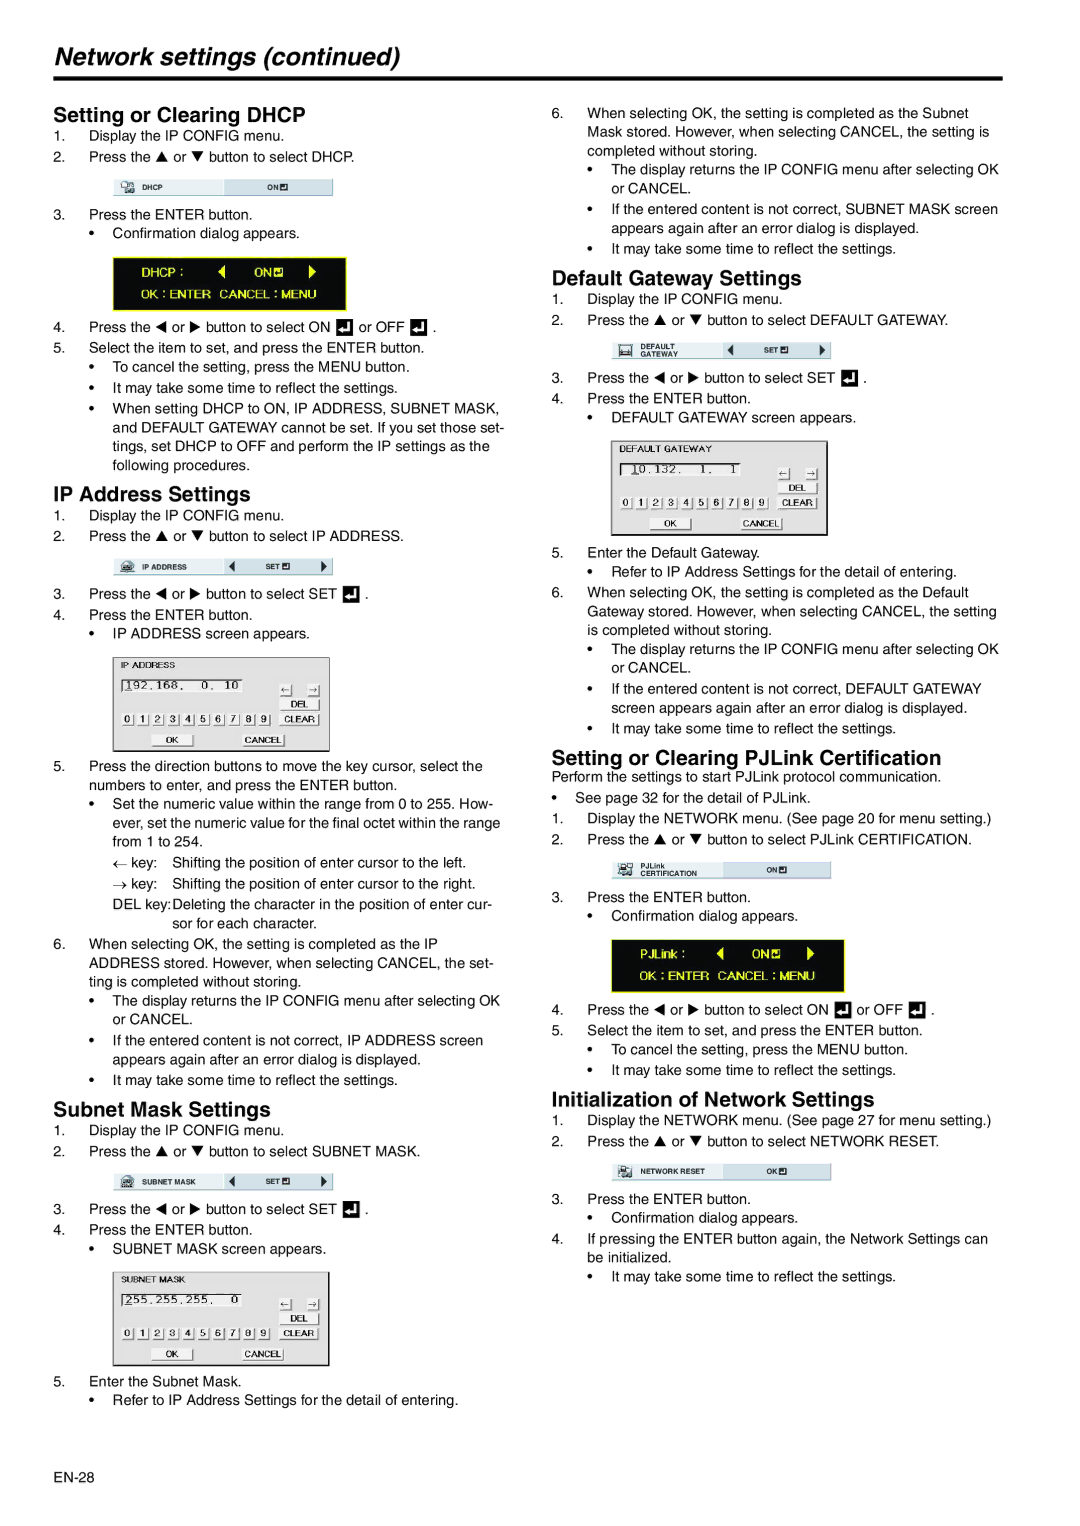
Default Gateway Settings
1.Display the IP CONFIG menu.
2.Press the S or T button to select DEFAULT GATEWAY.
DEFAULT | SET | |
GATEWAY | ||
|
3.Press the W or X button to select SET ![]() .
.
4.Press the ENTER button.
• DEFAULT GATEWAY screen appears.
5.Enter the Default Gateway.
•Refer to IP Address Settings for the detail of entering.
6.When selecting OK, the setting is completed as the Default Gateway stored. However, when selecting CANCEL, the setting is completed without storing.
•The display returns the IP CONFIG menu after selecting OK or CANCEL.
•If the entered content is not correct, DEFAULT GATEWAY screen appears again after an error dialog is displayed.
•It may take some time to reflect the settings.
Setting or Clearing PJLink Certification
Perform the settings to start PJLink protocol communication.
•See page 32 for the detail of PJLink.
1.Display the NETWORK menu. (See page 20 for menu setting.)
2.Press the S or T button to select PJLink CERTIFICATION.
PJLinkON
CERTIFICATION
3.Press the ENTER button.
•Confirmation dialog appears.
4.Press the W or X button to select ON ![]() or OFF
or OFF ![]() .
.
5.Select the item to set, and press the ENTER button.
•To cancel the setting, press the MENU button.
•It may take some time to reflect the settings.
Initialization of Network Settings
1.Display the NETWORK menu. (See page 27 for menu setting.)
2.Press the S or T button to select NETWORK RESET.
NETWORK RESET | OK |
3.Press the ENTER button.
•Confirmation dialog appears.
4.If pressing the ENTER button again, the Network Settings can be initialized.
•It may take some time to reflect the settings.