Adjusting projected images (continued)

To adjust the tone of white (COLOR TEMP.):

You can select a preset color temperature (white tone) using the menu. (See page 22 for menu setting.)

1.Display the IMAGE menu.

2.Select COLOR TEMP. by pressing the ￿ or ￿ button.

3.Select your desired color temperature by pressing the ￿ or ￿ button.

To cancel the menu:

4. Press the MENU button.

To adjust the tone of white (To customize the color temperature):

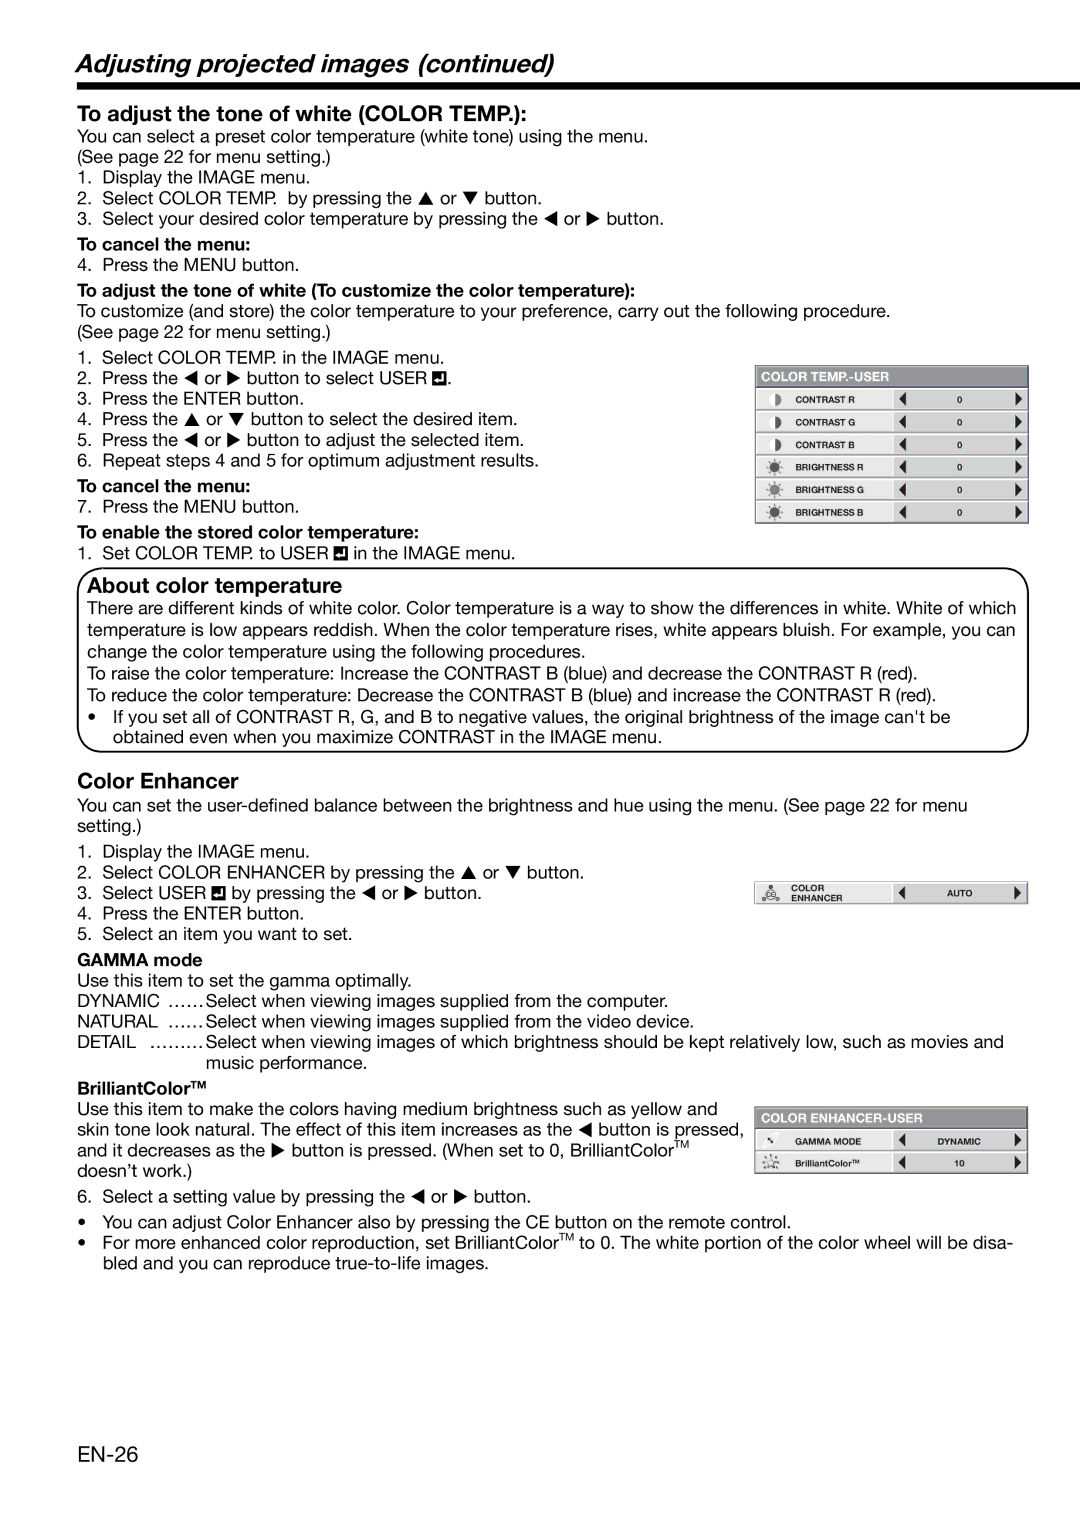
To customize (and store) the color temperature to your preference, carry out the following procedure. (See page 22 for menu setting.)

1.Select COLOR TEMP. in the IMAGE menu.

2.Press the ￿ or ￿ button to select USER .

3.Press the ENTER button.

4.Press the ￿ or ￿ button to select the desired item.

5.Press the ￿ or ￿ button to adjust the selected item.

6.Repeat steps 4 and 5 for optimum adjustment results.

To cancel the menu:

7. Press the MENU button.

To enable the stored color temperature:

1. Set COLOR TEMP. to USER in the IMAGE menu.

COLOR TEMP.-USER

CONTRAST R

0


CONTRAST G

0


CONTRAST B

0


BRIGHTNESS R

0


BRIGHTNESS G

0


BRIGHTNESS B

0


About color temperature

There are different kinds of white color. Color temperature is a way to show the differences in white. White of which temperature is low appears reddish. When the color temperature rises, white appears bluish. For example, you can change the color temperature using the following procedures.

To raise the color temperature: Increase the CONTRAST B (blue) and decrease the CONTRAST R (red).

To reduce the color temperature: Decrease the CONTRAST B (blue) and increase the CONTRAST R (red).

If you set all of CONTRAST R, G, and B to negative values, the original brightness of the image can't be obtained even when you maximize CONTRAST in the IMAGE menu.

Color Enhancer

You can set the user-defined balance between the brightness and hue using the menu. (See page 22 for menu setting.)

1.Display the IMAGE menu.

2.Select COLOR ENHANCER by pressing the ￿ or ￿ button.

3. Select USER by pressing the ￿ or ￿ button.

COLOR

AUTO

ENHANCER

4.Press the ENTER button.

5.Select an item you want to set.

GAMMA mode

Use this item to set the gamma optimally.

DYNAMIC ……Select when viewing images supplied from the computer.

NATURAL ……Select when viewing images supplied from the video device.

DETAIL ………Select when viewing images of which brightness should be kept relatively low, such as movies and

music performance.

BrilliantColorTM


Use this item to make the colors having medium brightness such as yellow and


COLOR ENHANCER-USER


skin tone look natural. The effect of this item increases as the ￿ button is pressed,


GAMMA MODE


DYNAMIC

and it decreases as the ￿ button is pressed. (When set to 0, BrilliantColorTM


BrilliantColorTM


10

doesn’t work.)


6. Select a setting value by pressing the ￿ or ￿ button.

You can adjust Color Enhancer also by pressing the CE button on the remote control.

For more enhanced color reproduction, set BrilliantColorTM to 0. The white portion of the color wheel will be disa- bled and you can reproduce true-to-life images.

EN-26

Page 26
Image 26
Mitsubishi Electronics XD490U Adjusting projected images, To adjust the tone of white Color Temp, About color temperature

XD490U specifications

The Mitsubishi Electronics XD490U is a projector designed to cater to the needs of both professional and educational environments. Its versatility and advanced features make it a popular choice for those looking to deliver impactful presentations and engaging lectures. This model stands out for its blend of performance, convenience, and image quality.

One of the main features of the XD490U is its high brightness, delivering up to 5000 ANSI lumens. This allows for clear and vivid images in well-lit environments, making it suitable for various settings, from classrooms to conference rooms. Coupled with a high contrast ratio, the projector ensures that colors are vibrant and details are sharp, enhancing the overall viewing experience.

The XD490U uses DLP technology, which is well-known for its reliability and excellent color reproduction. DLP projectors like the XD490U are less prone to color decay over time compared to other technologies, ensuring consistent performance throughout its lifespan. The projector supports a native resolution of XGA (1024 x 768), making it ideal for displaying presentations, videos, and images without losing detail.

To enhance usability, the Mitsubishi XD490U features a range of connectivity options. It includes multiple inputs such as HDMI, VGA, and composite video, making it compatible with a variety of devices from laptops to DVD players. This adaptability is essential for environments where multiple devices may be used for presentations.

The XD490U is also equipped with a built-in 10-watt speaker, which provides adequate sound for smaller rooms without the need for additional audio equipment. For larger settings, the projector can easily be connected to external sound systems.

Moreover, the XD490U is designed with user convenience in mind. Its lightweight and portable design make it easy to transport and set up in different locations. The projector also features a quick start-up time, allowing users to begin presentations without lengthy delays.

In terms of energy efficiency, the XD490U incorporates eco-conscious technologies that help reduce power consumption during operation and standby modes. This feature not only minimizes the environmental impact but also contributes to lower operating costs.

Overall, the Mitsubishi Electronics XD490U is a robust projector that combines impressive image quality, versatile connectivity, and user-friendly features, making it an excellent option for anyone seeking a reliable projection solution for various professional and educational applications.