8.0 BATTERY AND POWER SUPPLY SPECIFICS
8.1 Displaying Battery Charge Percentage
To view the current battery charge percentage, press the DISPLAY button to cycle the display between FPM, FPS, PHASE, TIME, and the battery charge percentage. The battery charge percentage will display the current battery charge level from 0 to 100% for about 2 seconds and then automatically return to FPM. PHASE and TIME are skipped when not in an External Delay mode.
When the strobe is not flashing, the battery charge percentage represents the percentage of usable charge left in the batteries. When the strobe is flashing, the percentage value will be lower. The percentage value will generally decrease with increasing flash rates giving the user an indication of how much quicker the batteries will be discharged at the current flash rate.
8.2 Low Battery Indication
When the batteries are low, the display blinks “LO BAT” every half second. The strobe may still be used for a short time. When the battery charge is further depleted, the strobe will stop flashing, display “LO BAT” and then completely shut off. When “LOW BAT” is displayed, the unit needs to be recharged (section 8.3 Charging the Batteries) or powered by the power supply/charger (section 8.4 External Power Supply/Charger).
8.3 Charging the Batteries
The unit may be recharged at any time. You do not need to wait until the low battery condition is indicated.
CAUTION: Use of power supplies or rechargers other than the one supplied
To charge the battery with the standard recharger
1.Release the trigger so the strobe is off.
2.Plug the recharger cable into the recharger socket (located below the display panel behind the handle).
3.Plug the recharger into an AC mains wall outlet.
The recharger will fast charge the batteries for up to 5 hours (typically 3½ - 4 hours). Once the fast charge is completed, the recharger will trickle charge the batteries (as indicated by all the chevrons on the display coming on).
To charge the battery with the external power supply/charger
1.Release the trigger so the strobe is off.
2.Plug the power supply/charger cable into the recharger socket (located below the display panel behind the handle).
3.Plug the power supply/charger into an AC mains wall outlet.
4.Move the switch on the power supply/charger to “CHARGE”. Charging takes approximately 16 hours.
WARNING: The unit may be left on to charge overnight, but the unit should not be left on charge indefinitely (more than 36 hours) as this will damage the lead acid batteries.
8.4 External Power Supply/Charger
The external power supply/charger
10
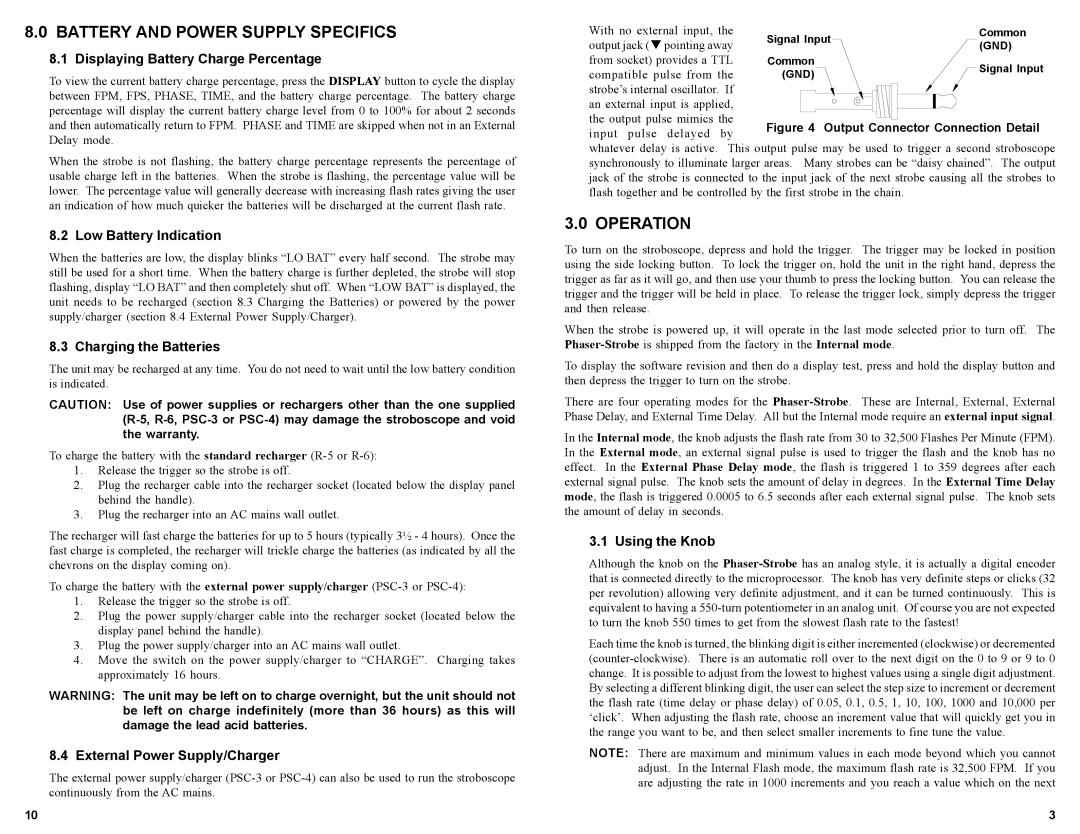
With no external input, the
output jack (!pointing away from socket) provides a TTL
compatible pulse from the strobe’s internal oscillator. If
an external input is applied, the output pulse mimics the
input pulse delayed by
whatever delay is active. This output pulse may be used to trigger a second stroboscope synchronously to illuminate larger areas. Many strobes can be “daisy chained”. The output jack of the strobe is connected to the input jack of the next strobe causing all the strobes to flash together and be controlled by the first strobe in the chain.
3.0 OPERATION
To turn on the stroboscope, depress and hold the trigger. The trigger may be locked in position using the side locking button. To lock the trigger on, hold the unit in the right hand, depress the trigger as far as it will go, and then use your thumb to press the locking button. You can release the trigger and the trigger will be held in place. To release the trigger lock, simply depress the trigger and then release.
When the strobe is powered up, it will operate in the last mode selected prior to turn off. The
To display the software revision and then do a display test, press and hold the display button and then depress the trigger to turn on the strobe.
There are four operating modes for the
In the Internal mode, the knob adjusts the flash rate from 30 to 32,500 Flashes Per Minute (FPM). In the External mode, an external signal pulse is used to trigger the flash and the knob has no effect. In the External Phase Delay mode, the flash is triggered 1 to 359 degrees after each external signal pulse. The knob sets the amount of delay in degrees. In the External Time Delay mode, the flash is triggered 0.0005 to 6.5 seconds after each external signal pulse. The knob sets the amount of delay in seconds.
3.1 Using the Knob
Although the knob on the
Each time the knob is turned, the blinking digit is either incremented (clockwise) or decremented
NOTE: There are maximum and minimum values in each mode beyond which you cannot adjust. In the Internal Flash mode, the maximum flash rate is 32,500 FPM. If you are adjusting the rate in 1000 increments and you reach a value which on the next
3