
Compact Food Processor specifications
Morphy Richards, a renowned name in kitchen appliances, has developed the Compact Food Processor, a versatile and efficient tool designed to simplify food preparation. This appliance is particularly suited for those who seek convenience without compromising on quality or performance.One of the standout features of the Morphy Richards Compact Food Processor is its powerful motor. With a robust wattage that enables it to handle a variety of tasks, this processor can blend, chop, slice, and even knead dough, making it an all-in-one solution for preparing your favorite meals. The high-performance motor is paired with stainless steel blades, ensuring sharpness and durability, allowing for precise cutting and blending every time.
The design of the Compact Food Processor is both stylish and functional. Its compact size makes it an ideal addition to any kitchen, especially where counter space may be limited. The sleek exterior not only looks good but is also easy to clean, with parts that can be detached and washed in the dishwasher.
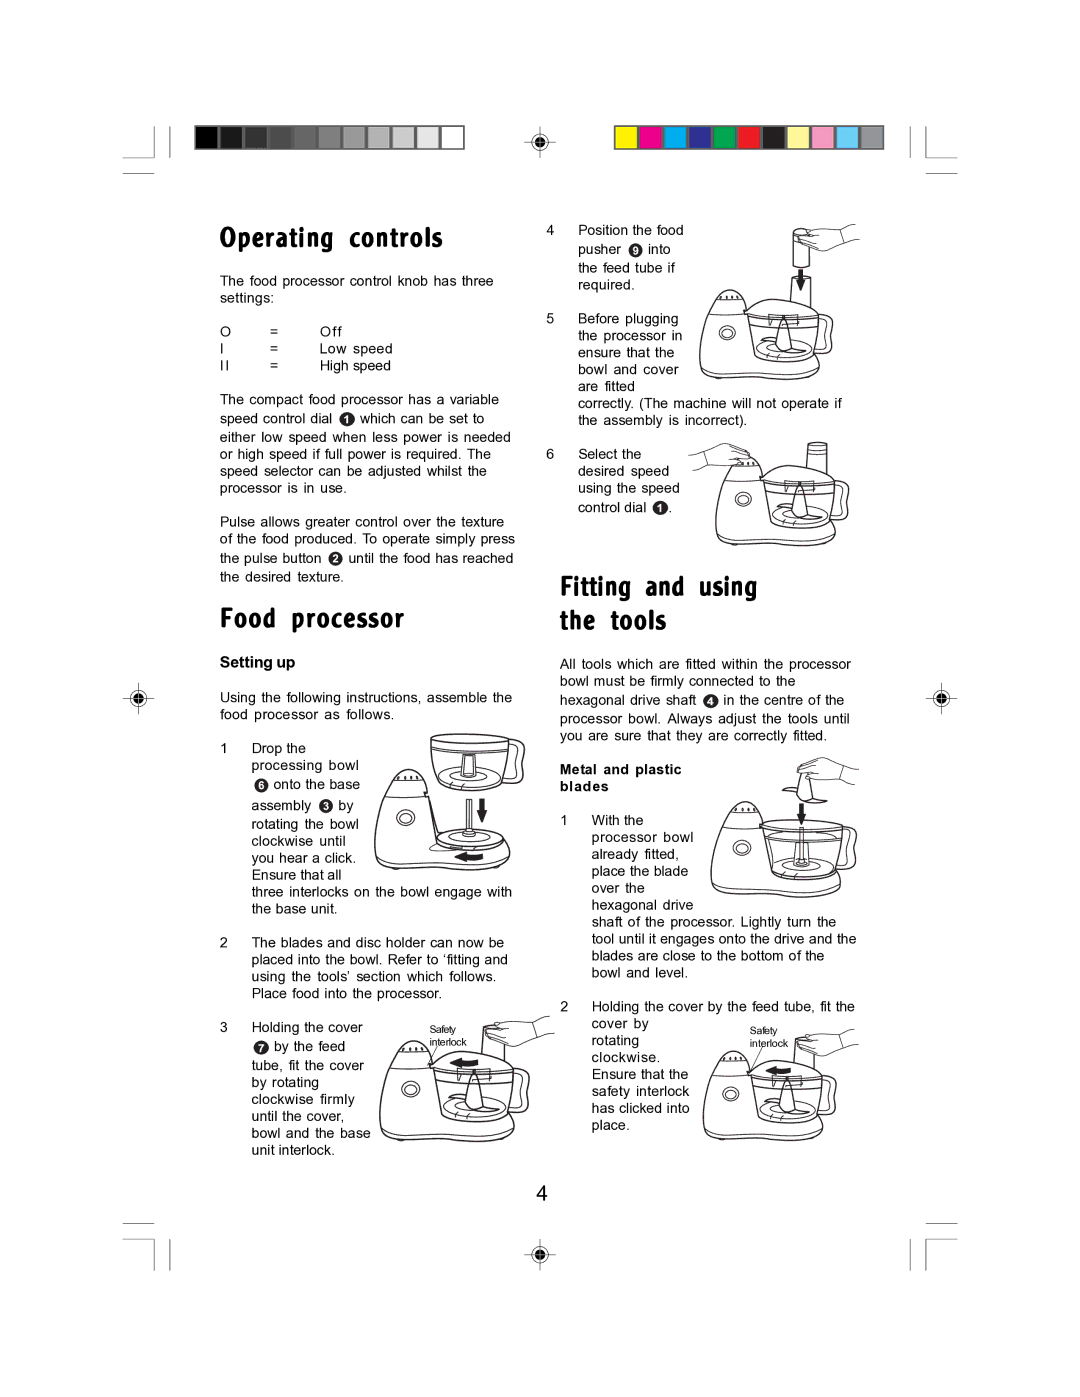
In terms of technology, this food processor comes equipped with multiple speed settings. Users have the flexibility to choose the right speed for various ingredients, ensuring optimal results for whatever they’re preparing. Additionally, the pulse function allows for greater control over food texture, making it perfect for tasks that require a bit more finesse, such as chopping herbs or making salsas.
Safety is another priority for Morphy Richards. The Compact Food Processor includes features like a safety lock mechanism that ensures the processor cannot operate unless all parts are securely in place. This thoughtful design minimizes the risk of accidents, making it a reliable choice for families.
The versatility of the Compact Food Processor extends to its various attachments. From grating discs to dough blades, users can easily switch between functionalities, allowing them to customize food preparation techniques to suit their culinary needs.
Overall, the Morphy Richards Compact Food Processor is a remarkable kitchen appliance that combines performance, design, and safety. Its powerful motor, multiple speed settings, safety features, and versatile attachments make it an essential tool for anyone looking to streamline their cooking process. Whether you're a seasoned chef or a home cook, this food processor can help elevate your culinary skills and enhance your kitchen experience.