2 |
| Connecting Up |
|
|
| Home theater audio connections | Important |
|
| This player outputs | • Before making or changing any rear panel |
|
| in digital form. Check the manual for your | connections, make sure that all components are |
|
| amplifier/receiver to see what equipment it | switched off and unplugged from the wall outlet. |
|
| is compatible with (especially which digital | • While a connected component is turned on, |
|
| formats such as Dolby Digital, DTS, etc. It | do not unplug the power cord of this DVD |
|
| can decode). | player from the wall outlet. The speaker may be |
|
| damaged. | |
|
|
| |
|
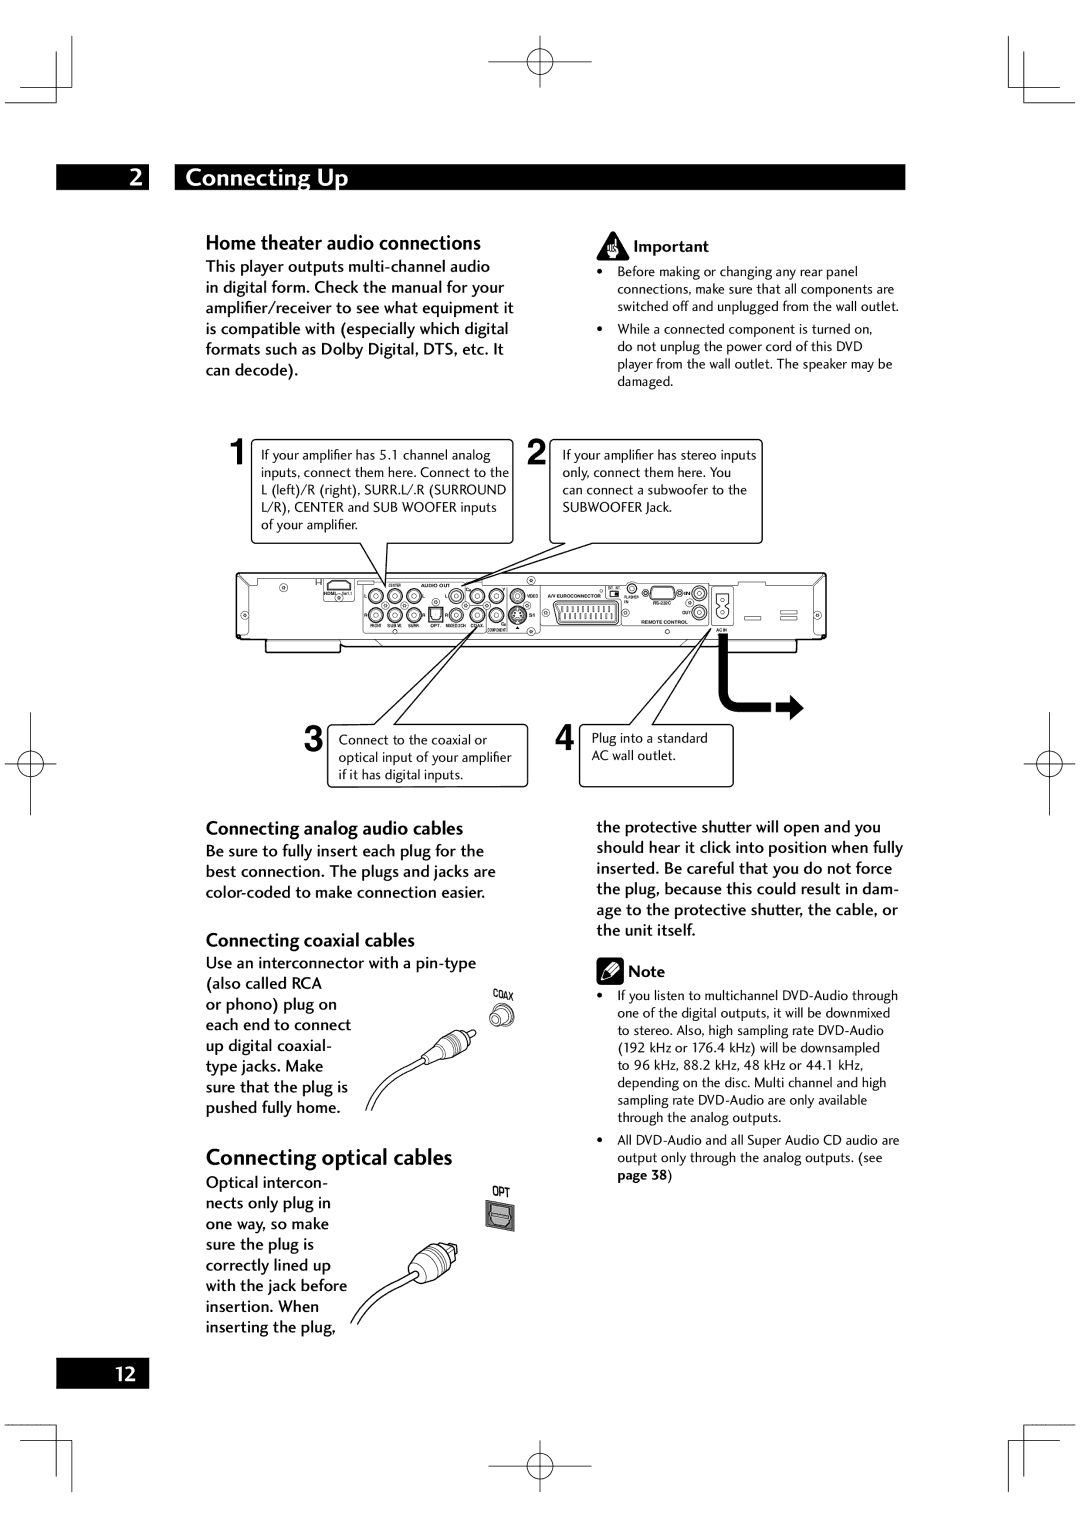
| 1 If your amplifier has 5.1 channel analog | 2 If your amplifier has stereo inputs |
|
| inputs, connect them here. Connect to the | only, connect them here. You |
|
| L (left)/R (right), SURR.L/.R (SURROUND | can connect a subwoofer to the |
|
| L/R), CENTER and SUB WOOFER inputs | SUBWOOFER Jack. |
|
| of your amplifier. |
|
HDMI Ver1.1
CENTER | AUDIO OUT | Y | |
|
| CR | |
L | L | L |
|
R |
|
| R | R |
|
|
FRONT | SUB W. | SURR. | OPT. | MIXED 2CH | COAX. | CB |
|
|
|
|
|
| COMPONENT |
| EXT. INT. |
|
VIDEO A/V EUROCONNECTOR | FLASHER | IN |
| ||
| IN | |
S1 |
| OUT |
|
| |
|
| REMOTE CONTROL |
AC IN
3 Connect to the coaxial or optical input of your amplifier if it has digital inputs.
Connecting analog audio cables
Be sure to fully insert each plug for the best connection. The plugs and jacks are
Connecting coaxial cables |
| |
Use an interconnector with a |
| |
(also called RCA | COAX | |
or phono) plug on | ||
| ||
each end to connect |
| |
up digital coaxial- |
| |
type jacks. Make |
| |
sure that the plug is |
| |
pushed fully home. |
|
Connecting optical cables
Optical intercon- | OPT | |
nects only plug in | ||
| ||
one way, so make |
| |
sure the plug is |
| |
correctly lined up |
| |
with the jack before |
| |
insertion. When |
| |
inserting the plug, |
|
4 | Plug into a standard |
| AC wall outlet. |
the protective shutter will open and you should hear it click into position when fully inserted. Be careful that you do not force the plug, because this could result in dam- age to the protective shutter, the cable, or the unit itself.
![]() Note
Note
•If you listen to multichannel
•All
12