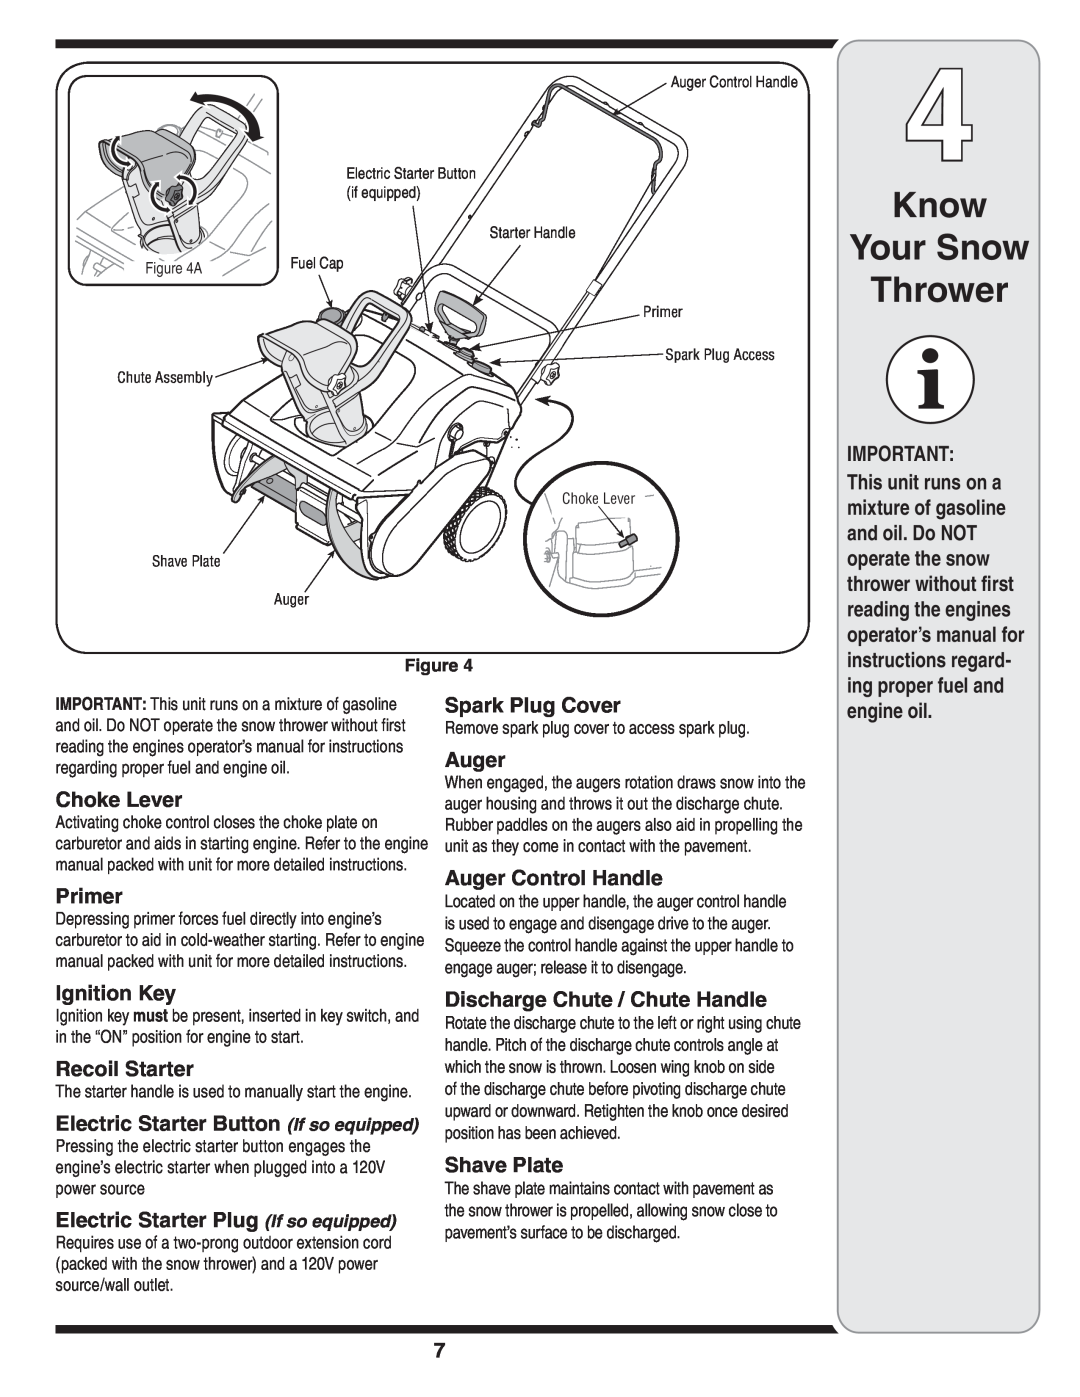
Auger Control Handle
Electric Starter Button (if equipped)
Starter Handle
Figure 4A | Fuel Cap |
|
Primer
![]() Spark Plug Access
Spark Plug Access
Chute Assembly
Choke Lever
Shave Plate
Auger
Figure 4
4
Know
Your Snow
Thrower
IMPORTANT:
This unit runs on a mixture of gasoline and oil. Do NOT operate the snow thrower without first reading the engines operator’s manual for instructions regard- ing proper fuel and
IMPORTANT: This unit runs on a mixture of gasoline and oil. Do NOT operate the snow thrower without first reading the engines operator’s manual for instructions regarding proper fuel and engine oil.
Choke Lever
Activating choke control closes the choke plate on carburetor and aids in starting engine. Refer to the engine manual packed with unit for more detailed instructions.
Primer
Depressing primer forces fuel directly into engine’s carburetor to aid in
Spark Plug Cover
Remove spark plug cover to access spark plug.
Auger
When engaged, the augers rotation draws snow into the auger housing and throws it out the discharge chute. Rubber paddles on the augers also aid in propelling the unit as they come in contact with the pavement.
Auger Control Handle
Located on the upper handle, the auger control handle is used to engage and disengage drive to the auger. Squeeze the control handle against the upper handle to engage auger; release it to disengage.
engine oil.
Ignition Key
Ignition key must be present, inserted in key switch, and in the “ON” position for engine to start.
Recoil Starter
The starter handle is used to manually start the engine.
Electric Starter Button (If so equipped) Pressing the electric starter button engages the engine’s electric starter when plugged into a 120V power source
Electric Starter Plug (If so equipped) Requires use of a
Discharge Chute / Chute Handle
Rotate the discharge chute to the left or right using chute handle. Pitch of the discharge chute controls angle at which the snow is thrown. Loosen wing knob on side
of the discharge chute before pivoting discharge chute upward or downward. Retighten the knob once desired position has been achieved.
Shave Plate
The shave plate maintains contact with pavement as the snow thrower is propelled, allowing snow close to pavement’s surface to be discharged.
7