passes across its width. The addition of decayed organic matter will substantially increase the fertility of your garden. For proper decaying action, fertilizer should be applied and worked in with the mulch materials. Breaking up leaves and straw and mixing it with several inches of soil causes the soil to hold moisture longer and allows proper aeration of the plant root system. This also retards the growth of weeds.
Figure 14
SECTION 5: MAKING ADJUSTMENTS
WARNING: Disconnect the spark plug wire and ground it against the engine before performing any adjustments.
Engine Adjustment
Refer to the separate engine manual for engine adjustment instructions.
Wheel Adjustments
To adjust the wheel yoke and wheel position, refer to the Operating Section.
Clutch Control Adjustments
To adjust the clutch controls, refer to the Final Adjustment section of assembly instructions.
Depth Stake Adjustment
To adjust the depth stake, refer to the Operating Section.
Tine Width Adjustment
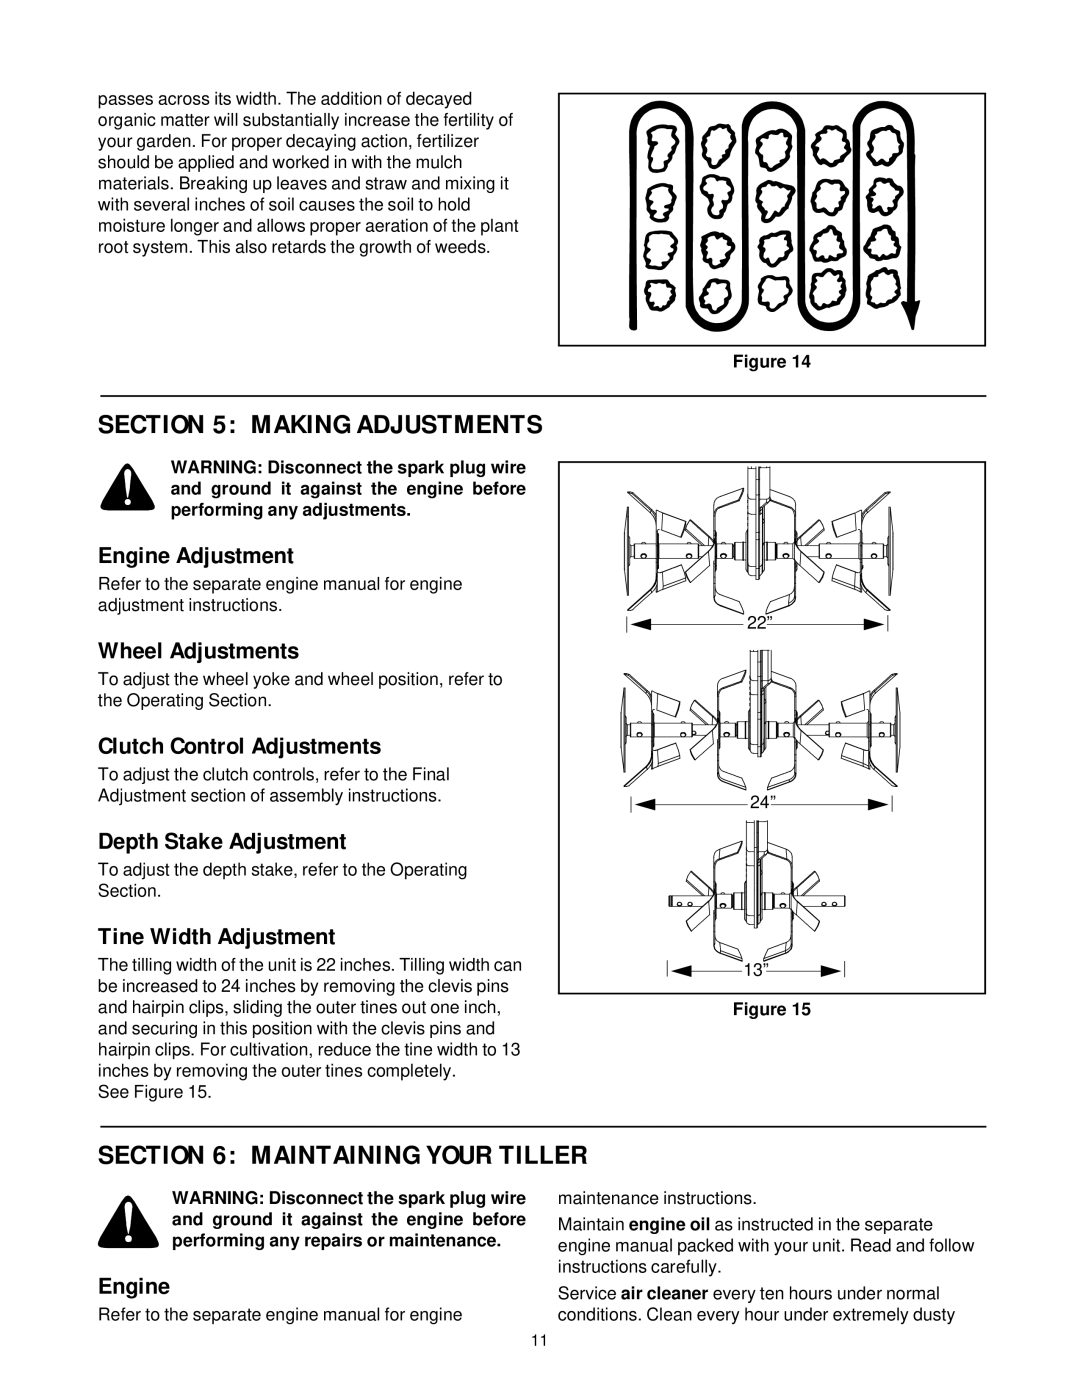
The tilling width of the unit is 22 inches. Tilling width can be increased to 24 inches by removing the clevis pins and hairpin clips, sliding the outer tines out one inch, and securing in this position with the clevis pins and hairpin clips. For cultivation, reduce the tine width to 13 inches by removing the outer tines completely.
See Figure 15.
22” |
24” |
13” |
Figure 15
SECTION 6: MAINTAINING YOUR TILLER
WARNING: Disconnect the spark plug wire and ground it against the engine before performing any repairs or maintenance.
Engine
Refer to the separate engine manual for engine
maintenance instructions.
Maintain engine oil as instructed in the separate engine manual packed with your unit. Read and follow instructions carefully.
Service air cleaner every ten hours under normal conditions. Clean every hour under extremely dusty
11
