MTX WARRANTY INFORMATION
All MTX
Proof of purchase is required when requesting service, so please retain your sales receipt and take a moment to register your product on line at www.mtx.com.
INSTALLATION PREPARATION-NEW CONSTRUCTION
When installing the H615W into a newly built wall, please follow these instructions carefully.
1) Determine placement
Determine the location in the wall the speakers will be placed, using the recommendations in the "Loudspeaker Placement" section.
2) Mount a Rough-In Kit
For best results, mount a RIK6W
3) The location is ready for dry wall
The RIK6W bracket provides a stable opening around which the drywall installer can cut out an opening, providing a perfect location for the installation of the H615W.
INSTALLATION
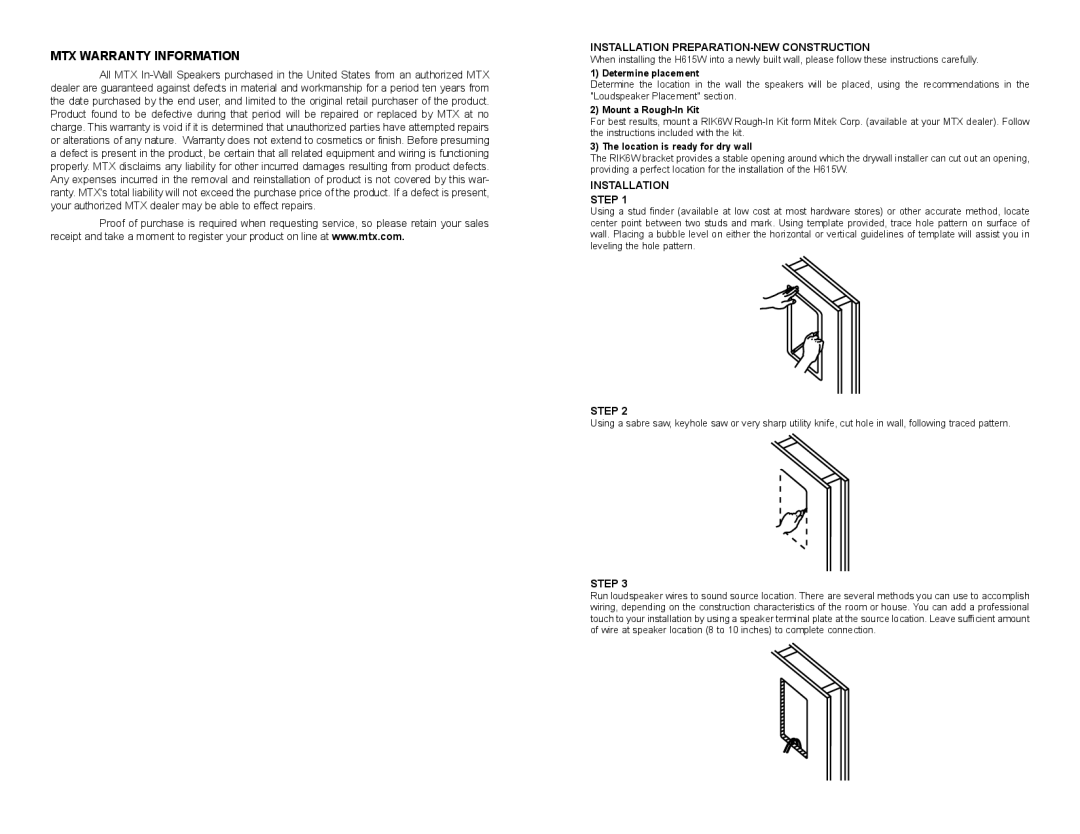
STEP 1
Using a stud finder (available at low cost at most hardware stores) or other accurate method, locate center point between two studs and mark. Using template provided, trace hole pattern on surface of wall. Placing a bubble level on either the horizontal or vertical guidelines of template will assist you in leveling the hole pattern.
STEP 2
Using a sabre saw, keyhole saw or very sharp utility knife, cut hole in wall, following traced pattern.
STEP 3
Run loudspeaker wires to sound source location. There are several methods you can use to accomplish wiring, depending on the construction characteristics of the room or house. You can add a professional touch to your installation by using a speaker terminal plate at the source location. Leave sufficient amount of wire at speaker location (8 to 10 inches) to complete connection.