set-up/sawing guides
Connecting the Power
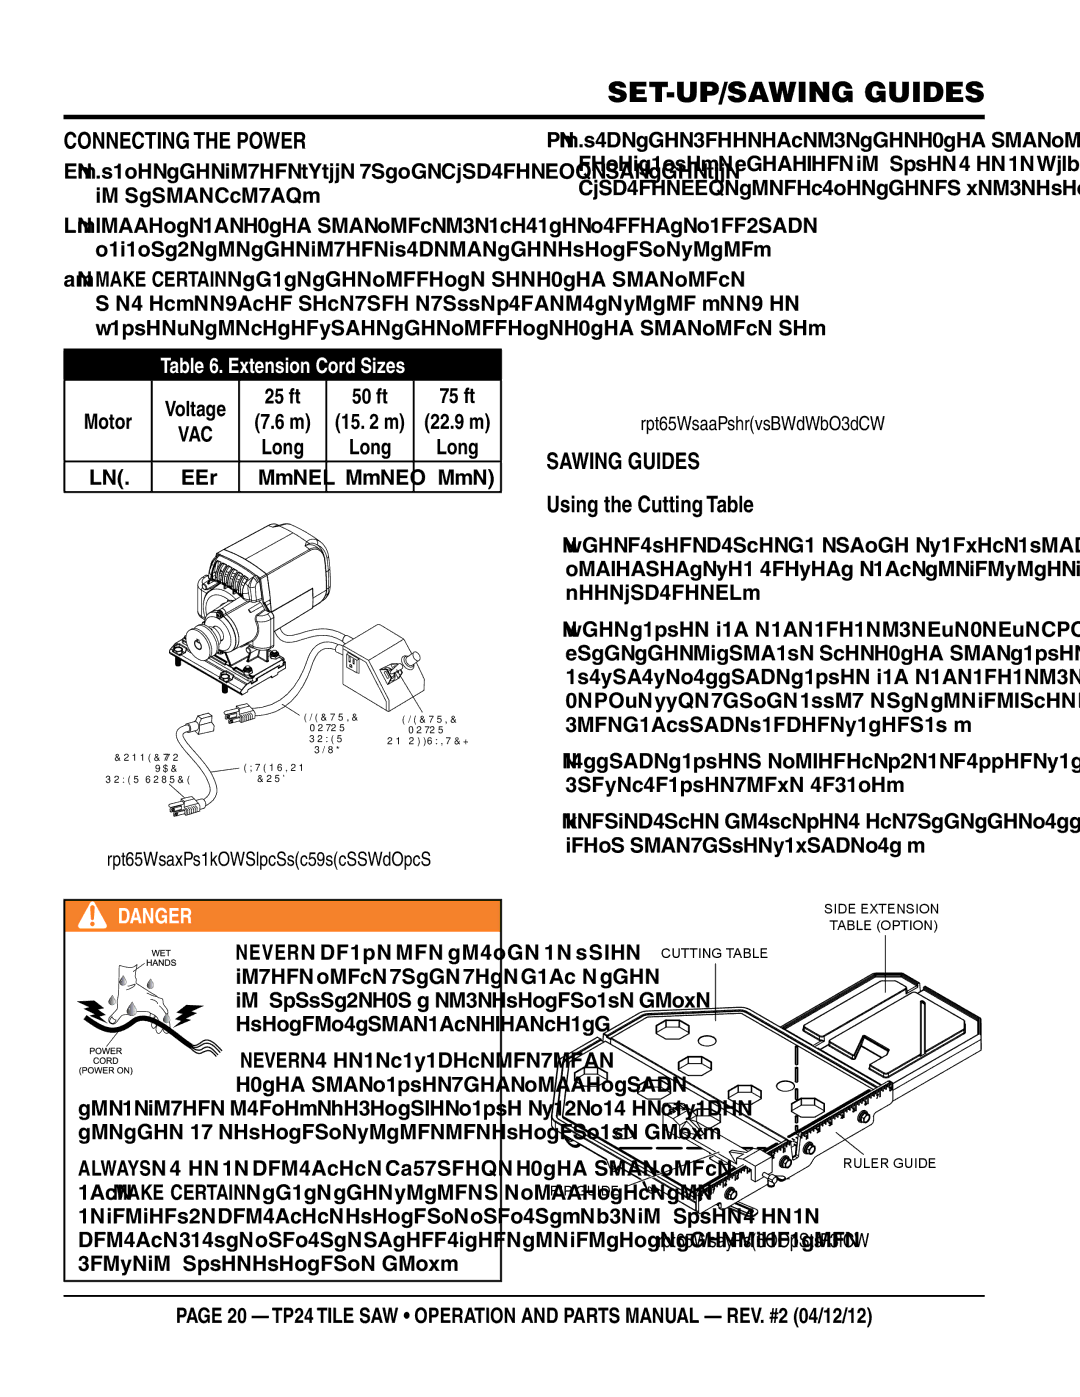
1.Place the power ON/OFF switch (Figure 10) in the OFF position (down).
2.Connect an extension cord of adequate current carrying capacity to the power plug on the electric motor.
3.MAKE CERTAIN that the correct size extension cord is used. Undersized wires will burn out motors. Use Table 6 to determine the correct extension cord size.
Table 6. Extension Cord Sizes
| Voltage | 25 ft | 50 ft | 75 ft | |
Motor | (7.6 m) | (15. 2 m) | (22.9 m) | ||
VAC | |||||
| Long | Long | Long | ||
|
| ||||
2 HP | 115 | No. 12 | No. 10 | No. 8 |
| ELECTRIC | ELECTRIC |
| MOTOR | MOTOR |
| POWER | ON/OFF SWITCH |
CONNECT TO | PLUG |
|
EXTENSION |
| |
115/230 VAC |
| |
POWER SOURCE | CORD |
|
Figure 10. Extension Cord Connection
DANGER
NEVER grab or touch a live
power cord with wet hands, the
possibility exists of electrical shock,
electrocution, and even death!
![]()
![]()
![]()
![]()
![]() NEVER use a damaged or worn extension cable when connecting to a power source. Defective cables may cause damage
NEVER use a damaged or worn extension cable when connecting to a power source. Defective cables may cause damage
to the saw’s electric motor or electrical shock.
ALWAYS use a grounded
4.Plug the free end of the extension cord into an AC power receptacle. Whenever possible use a GFCI receptacle (Figure 11) to reduce the risk of electrical shock.
Figure 11. GFCI Receptacle
Sawing Guides
Using the Cutting Table
The ruler guide has inches marked along the top to allow convenient measurements and to promote precision cuts. See Figure 12.
The table spans an area of 16" x 16" (406 x 406 mm). With the optional side extension table equipped, the cast aluminum cutting table spans an area of 25" x 16" (635 x 406 mm), which allows it to provide greater support for handling larger materials.
Cutting table is covered by a rubber mat that provides a firm, durable work surface.
A rip guide should be used with the cutting table to ensure precision while making cuts.
SIDE EXTENSION
TABLE (OPTION)
CUTTING TABLE
RULER GUIDE
RIP GUIDE
Figure 12. Cutting Table
page 20 — TP24 TILE SAW • operation and parts manual — rev. #2 (04/12/12)
