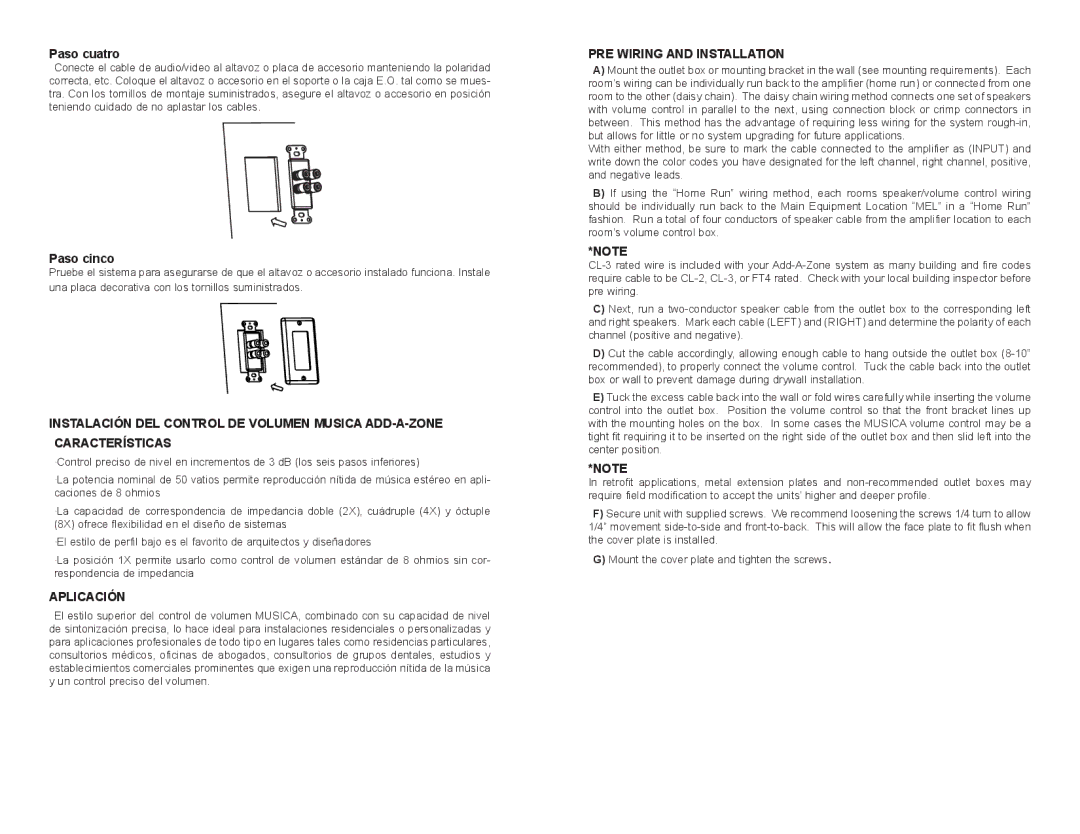
Paso cuatro
Conecte el cable de audio/video al altavoz o placa de accesorio manteniendo la polaridad correcta, etc. Coloque el altavoz o accesorio en el soporte o la caja E.O. tal como se mues- tra. Con los tornillos de montaje suministrados, asegure el altavoz o accesorio en posición teniendo cuidado de no aplastar los cables.
Paso cinco
Pruebe el sistema para asegurarse de que el altavoz o accesorio instalado funciona. Instale una placa decorativa con los tornillos suministrados.
INSTALACIÓN DEL CONTROL DE VOLUMEN MUSICA
·Control preciso de nivel en incrementos de 3 dB (los seis pasos inferiores)
·La potencia nominal de 50 vatios permite reproducción nítida de música estéreo en apli- caciones de 8 ohmios
·La capacidad de correspondencia de impedancia doble (2X), cuádruple (4X) y óctuple (8X) ofrece flexibilidad en el diseño de sistemas
·El estilo de perfil bajo es el favorito de arquitectos y diseñadores
·La posición 1X permite usarlo como control de volumen estándar de 8 ohmios sin cor- respondencia de impedancia
APLICACIÓN
El estilo superior del control de volumen MUSICA, combinado con su capacidad de nivel de sintonización precisa, lo hace ideal para instalaciones residenciales o personalizadas y para aplicaciones profesionales de todo tipo en lugares tales como residencias particulares, consultorios médicos, oficinas de abogados, consultorios de grupos dentales, estudios y establecimientos comerciales prominentes que exigen una reproducción nítida de la música y un control preciso del volumen.
PRE WIRING AND INSTALLATION
A)Mount the outlet box or mounting bracket in the wall (see mounting requirements). Each room’s wiring can be individually run back to the amplifier (home run) or connected from one room to the other (daisy chain). The daisy chain wiring method connects one set of speakers with volume control in parallel to the next, using connection block or crimp connectors in between. This method has the advantage of requiring less wiring for the system
With either method, be sure to mark the cable connected to the amplifier as (INPUT) and write down the color codes you have designated for the left channel, right channel, positive, and negative leads.
B)If using the “Home Run” wiring method, each rooms speaker/volume control wiring should be individually run back to the Main Equipment Location “MEL” in a “Home Run” fashion. Run a total of four conductors of speaker cable from the amplifier location to each room’s volume control box.
*NOTE
C)Next, run a
D)Cut the cable accordingly, allowing enough cable to hang outside the outlet box
E)Tuck the excess cable back into the wall or fold wires carefully while inserting the volume control into the outlet box. Position the volume control so that the front bracket lines up with the mounting holes on the box. In some cases the MUSICA volume control may be a tight fit requiring it to be inserted on the right side of the outlet box and then slid left into the center position.
*NOTE
In retrofit applications, metal extension plates and
F)Secure unit with supplied screws. We recommend loosening the screws 1/4 turn to allow 1/4” movement
G)Mount the cover plate and tighten the screws.
