Quick User Controls Guide
W-1KU Receiver: Front View
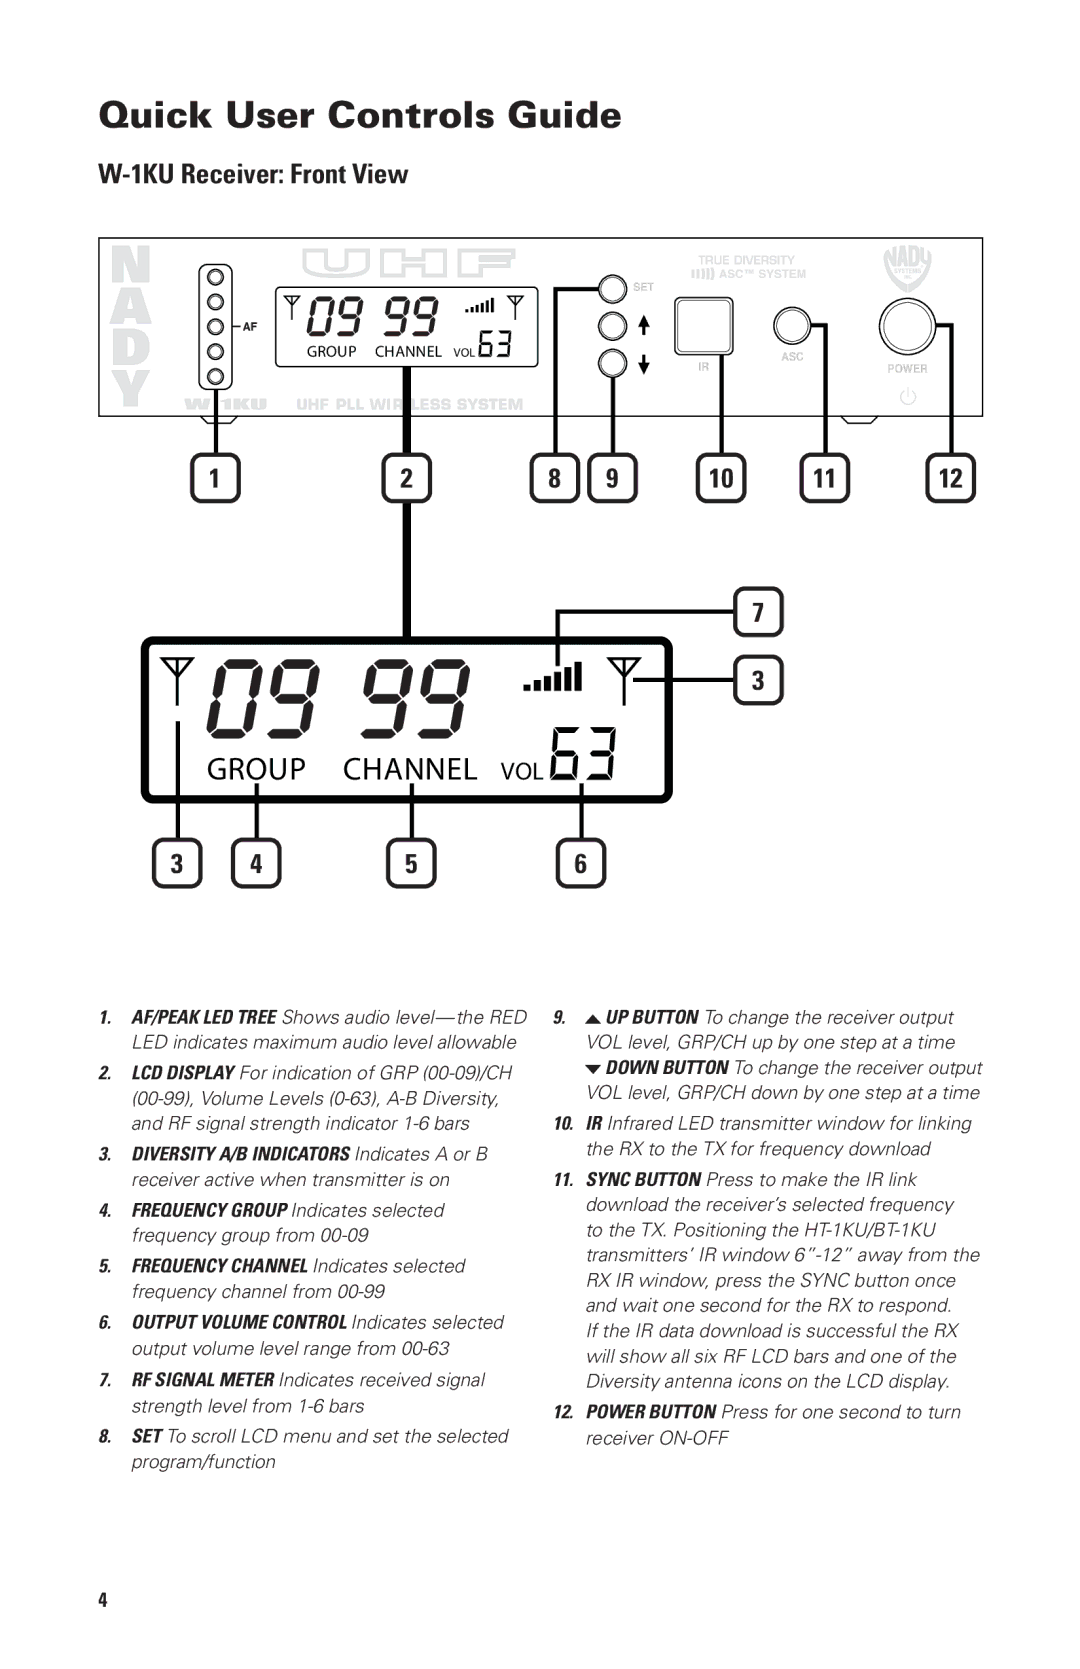
GROUP CHANNEL VOL![]()
1 | 2 | 8 | 9 | 10 | 11 | 12 |
7
3
GROUP CHANNEL VOL
3 | 4 | 5 | 6 |
1.AF/PEAK LED TREE Shows audio
2.LCD DISPLAY For indication of GRP
3.DIVERSITY A/B INDICATORS Indicates A or B receiver active when transmitter is on
4.FREQUENCY GROUP Indicates selected frequency group from
5.FREQUENCY CHANNEL Indicates selected frequency channel from
6.OUTPUT VOLUME CONTROL Indicates selected output volume level range from
7.RF SIGNAL METER Indicates received signal strength level from
8.SET To scroll LCD menu and set the selected program/function
9.![]() UP BUTTON To change the receiver output VOL level, GRP/CH up by one step at a time
UP BUTTON To change the receiver output VOL level, GRP/CH up by one step at a time ![]() DOWN BUTTON To change the receiver output VOL level, GRP/CH down by one step at a time
DOWN BUTTON To change the receiver output VOL level, GRP/CH down by one step at a time
10.IR Infrared LED transmitter window for linking the RX to the TX for frequency download
11.SYNC BUTTON Press to make the IR link download the receiver’s selected frequency to the TX. Positioning the
If the IR data download is successful the RX will show all six RF LCD bars and one of the Diversity antenna icons on the LCD display.
12.POWER BUTTON Press for one second to turn receiver
4