Chimney connection
Adding chimney sections
A 6” diameter single wall stove pipe, used to connect the stove to the chimney, must be installed with the crimped end toward the stove. This will ensure that the moisture which condenses from the burning wood will flow back into the fire chamber. Each joint in the stove pipe must be secured with at least three sheet metal screws.
This room heater must be connected to:
1) A chimney complying with the requirements for Type HT |
chimneys in the Standard for Chimneys, |
Residential Type and Building Heating Appliance UL 103, |
or |
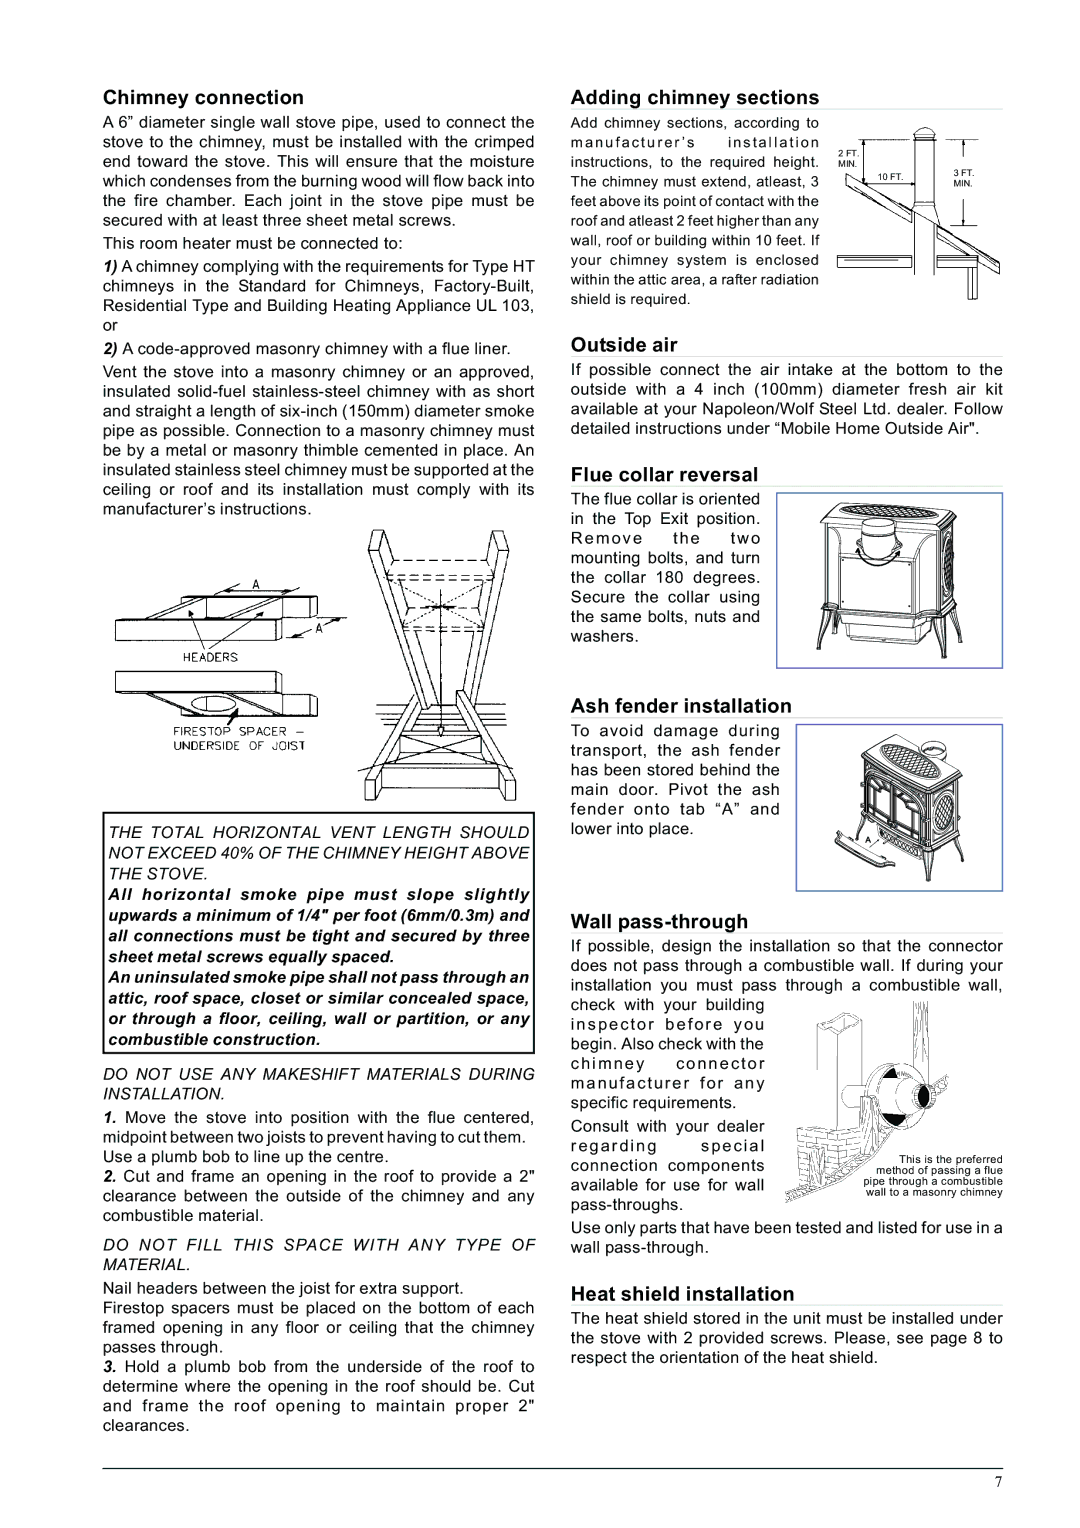
Add chimney sections, according to
m a n u f a c t u r e r ’ s i n s t a l l a t i o n instructions, to the required height. The chimney must extend, atleast, 3 feet above its point of contact with the roof and atleast 2 feet higher than any wall, roof or building within 10 feet. If your chimney system is enclosed within the attic area, a rafter radiation shield is required.
2FT. MIN.
10FT. 3FT. MIN.
2) A |
Vent the stove into a masonry chimney or an approved, insulated
Outside air
If possible connect the air intake at the bottom to the outside with a 4 inch (100mm) diameter fresh air kit available at your Napoleon/Wolf Steel Ltd. dealer. Follow detailed instructions under “Mobile Home Outside Air".
Flue collar reversal
The flue collar is oriented in the Top Exit position. R e m o v e t h e t w o mounting bolts, and turn the collar 180 degrees. Secure the collar using the same bolts, nuts and washers.
Ash fender installation
THE TOTAL HORIZONTAL VENT LENGTH SHOULD NOT EXCEED 40% OF THE CHIMNEY HEIGHT ABOVE THE STOVE.
All horizontal smoke pipe must slope slightly
To avoid damage during transport, the ash fender has been stored behind the main door. Pivot the ash fender onto tab “A” and lower into place.
A |
upwards a minimum of 1/4" per foot (6mm/0.3m) and all connections must be tight and secured by three sheet metal screws equally spaced.
An uninsulated smoke pipe shall not pass through an attic, roof space, closet or similar concealed space, or through a floor, ceiling, wall or partition, or any combustible construction.
DO NOT USE ANY MAKESHIFT MATERIALS DURING INSTALLATION.
1.Move the stove into position with the flue centered, midpoint between two joists to prevent having to cut them. Use a plumb bob to line up the centre.
2.Cut and frame an opening in the roof to provide a 2" clearance between the outside of the chimney and any combustible material.
DO NOT FILL THIS SPACE WITH ANY TYPE OF MATERIAL.
Nail headers between the joist for extra support.
Firestop spacers must be placed on the bottom of each framed opening in any floor or ceiling that the chimney passes through.
3.Hold a plumb bob from the underside of the roof to determine where the opening in the roof should be. Cut and frame the roof opening to maintain proper 2" clearances.
Wall pass-through
If possible, design the installation so that the connector does not pass through a combustible wall. If during your installation you must pass through a combustible wall,
check with | your building |
i n s p e c t o r b e f o r e y o u | |
begin. Also check with the | |
c h i m n e y | c o n n e c t o r |
m a n u f a c t u r e r f o r a n y | |
specific requirements. | |
Consult with your dealer | |
r e g a r d i n g | s p e c i a l |
connection components | This is the preferred | |
method of passing a flue | ||
available for use for wall | pipe through a combustible | |
wall to a masonry chimney | ||
| ||
|
Use only parts that have been tested and listed for use in a wall
Heat shield installation
The heat shield stored in the unit must be installed under the stove with 2 provided screws. Please, see page 8 to respect the orientation of the heat shield.
7