13
FINISHING
LOG PLACEMENT
PHAZERTM logs, glowing and charcoal embers, exclusive to Napoleon fireplaces, provide a unique and realistic glow- ing effect that is different in every installation. Take the time to carefully position the embers for a maximum glowing effect. Figures 21 A - H.
A | LOCATING PINS | #1 | LOCATING PINS |
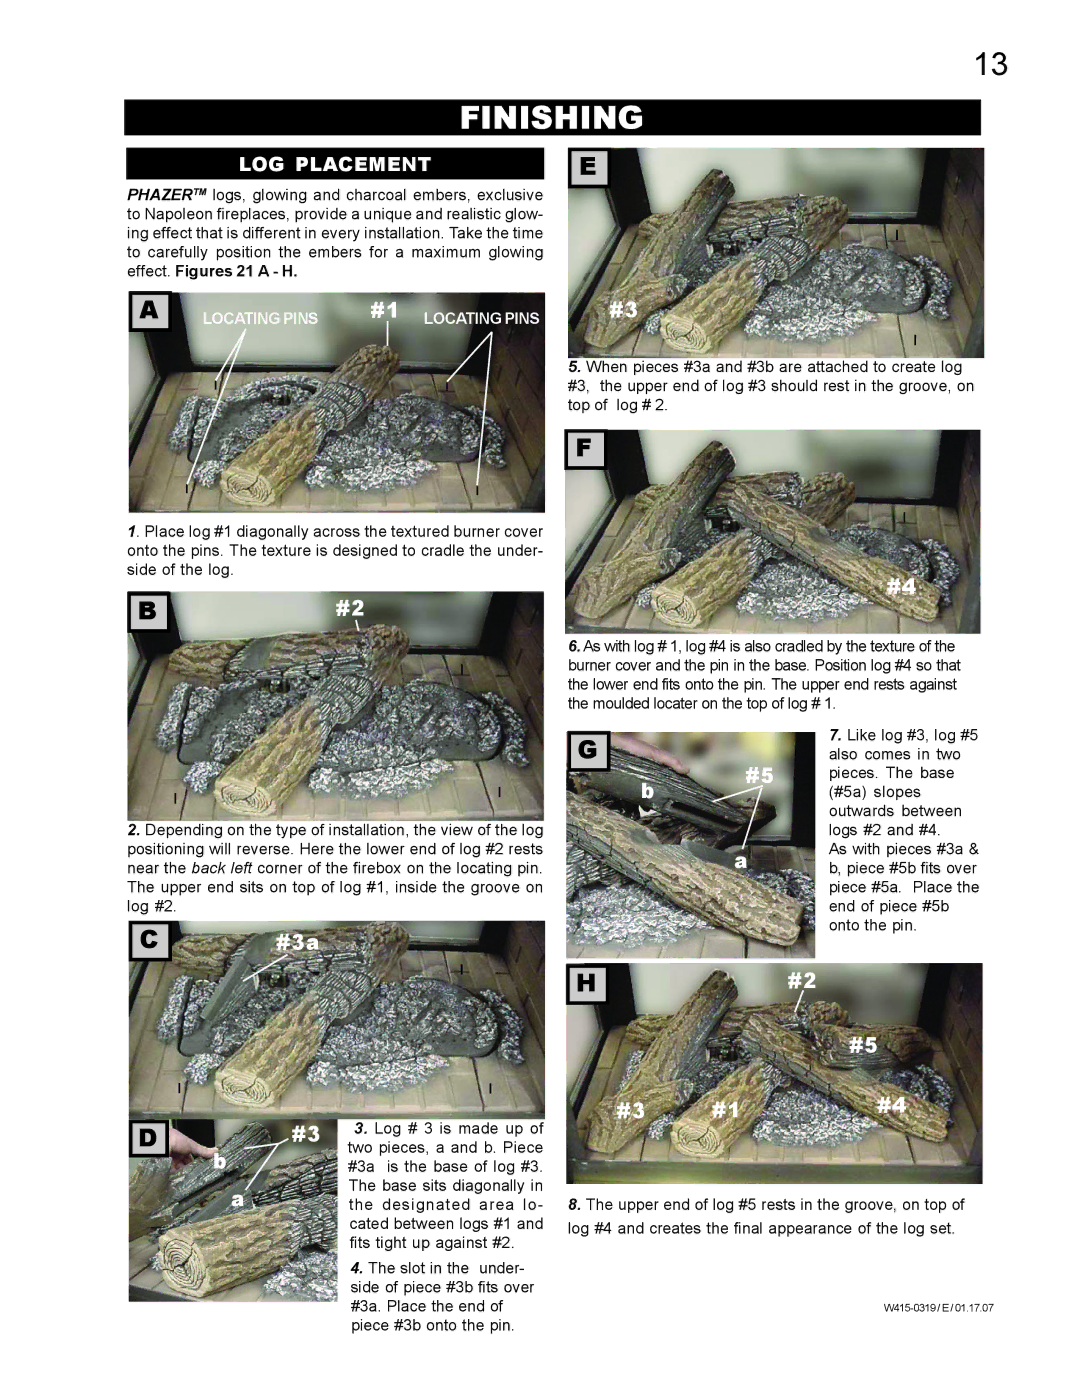
E |
#3
5.When pieces #3a and #3b are attached to create log #3, the upper end of log #3 should rest in the groove, on top of log # 2.
F |
1. Place log #1 diagonally across the textured burner cover onto the pins. The texture is designed to cradle the under- side of the log.
B | #2 |
#4
6.As with log # 1, log #4 is also cradled by the texture of the burner cover and the pin in the base. Position log #4 so that the lower end fits onto the pin. The upper end rests against the moulded locater on the top of log # 1.
2.Depending on the type of installation, the view of the log positioning will reverse. Here the lower end of log #2 rests near the back left corner of the firebox on the locating pin. The upper end sits on top of log #1, inside the groove on log #2.
C | #3a |
G |
b#5 a
7.Like log #3, log #5 also comes in two pieces. The base (#5a) slopes outwards between logs #2 and #4.
As with pieces #3a & b, piece #5b fits over piece #5a. Place the end of piece #5b onto the pin.
H | #2 |
#5
D |
#3 | 3. Log # 3 is made up of |
two pieces, a and b. Piece | |
b | #3a is the base of log #3. |
a | The base sits diagonally in |
the designated area lo- | |
| cated between logs #1 and |
| fits tight up against #2. |
| 4. The slot in the under- |
| side of piece #3b fits over |
| #3a. Place the end of |
| piece #3b onto the pin. |
#3 | #1 | #4 |
8.The upper end of log #5 rests in the groove, on top of log #4 and creates the final appearance of the log set.