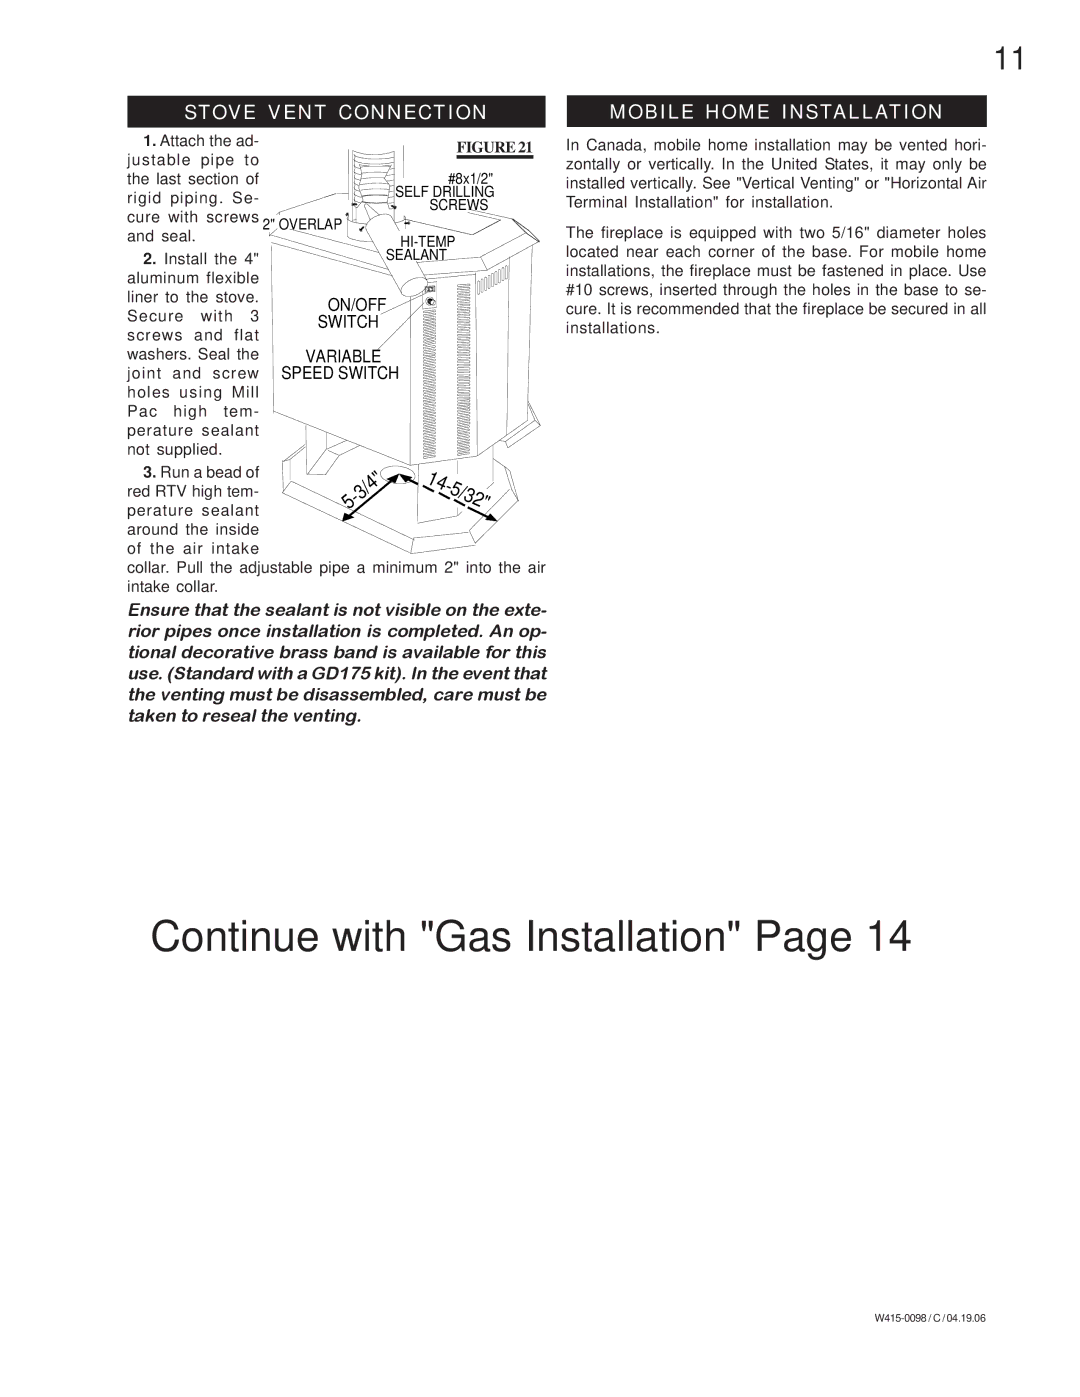
STOVE VENT CONNECTION
1. Attach the ad- | FIGURE 21 | |||||
justable | pipe | to | ||||
| ||||||
the last section of | #8x1/2" | |||||
rigid | piping. Se- | SELF DRILLING | ||||
SCREWS | ||||||
cure with screws | ||||||
2" OVERLAP | ||||||
and seal. |
|
| ||||
2. Install the 4" | SEALANT | |||||
aluminum flexible |
| |||||
liner to the stove. | ON/OFF | |||||
Secure | with | 3 | ||||
SWITCH | ||||||
screws | and |
| flat |
| ||
washers. Seal the | VARIABLE | |||||
joint | and screw | SPEED SWITCH | ||||
holes | using | Mill |
| |||
Pac | high | tem- |
| |||
perature sealant not supplied.
11
MOBILE HOME INSTALLATION
In Canada, mobile home installation may be vented hori- zontally or vertically. In the United States, it may only be installed vertically. See "Vertical Venting" or "Horizontal Air Terminal Installation" for installation.
The fireplace is equipped with two 5/16" diameter holes located near each corner of the base. For mobile home installations, the fireplace must be fastened in place. Use #10 screws, inserted through the holes in the base to se- cure. It is recommended that the fireplace be secured in all installations.
3.Run a bead of red RTV high tem- perature sealant around the inside of the air intake
collar. Pull the adjustable pipe intake collar.
1 | 4 |
|
|
|
| - |
|
| |
|
| 5/ |
| |
|
|
| 3 |
|
|
|
| 2 | |
|
|
|
| " |
a minimum 2" into the air
Ensure that the sealant is not visible on the exte- rior pipes once installation is completed. An op- tional decorative brass band is available for this use. (Standard with a GD175 kit). In the event that the venting must be disassembled, care must be taken to reseal the venting.