12
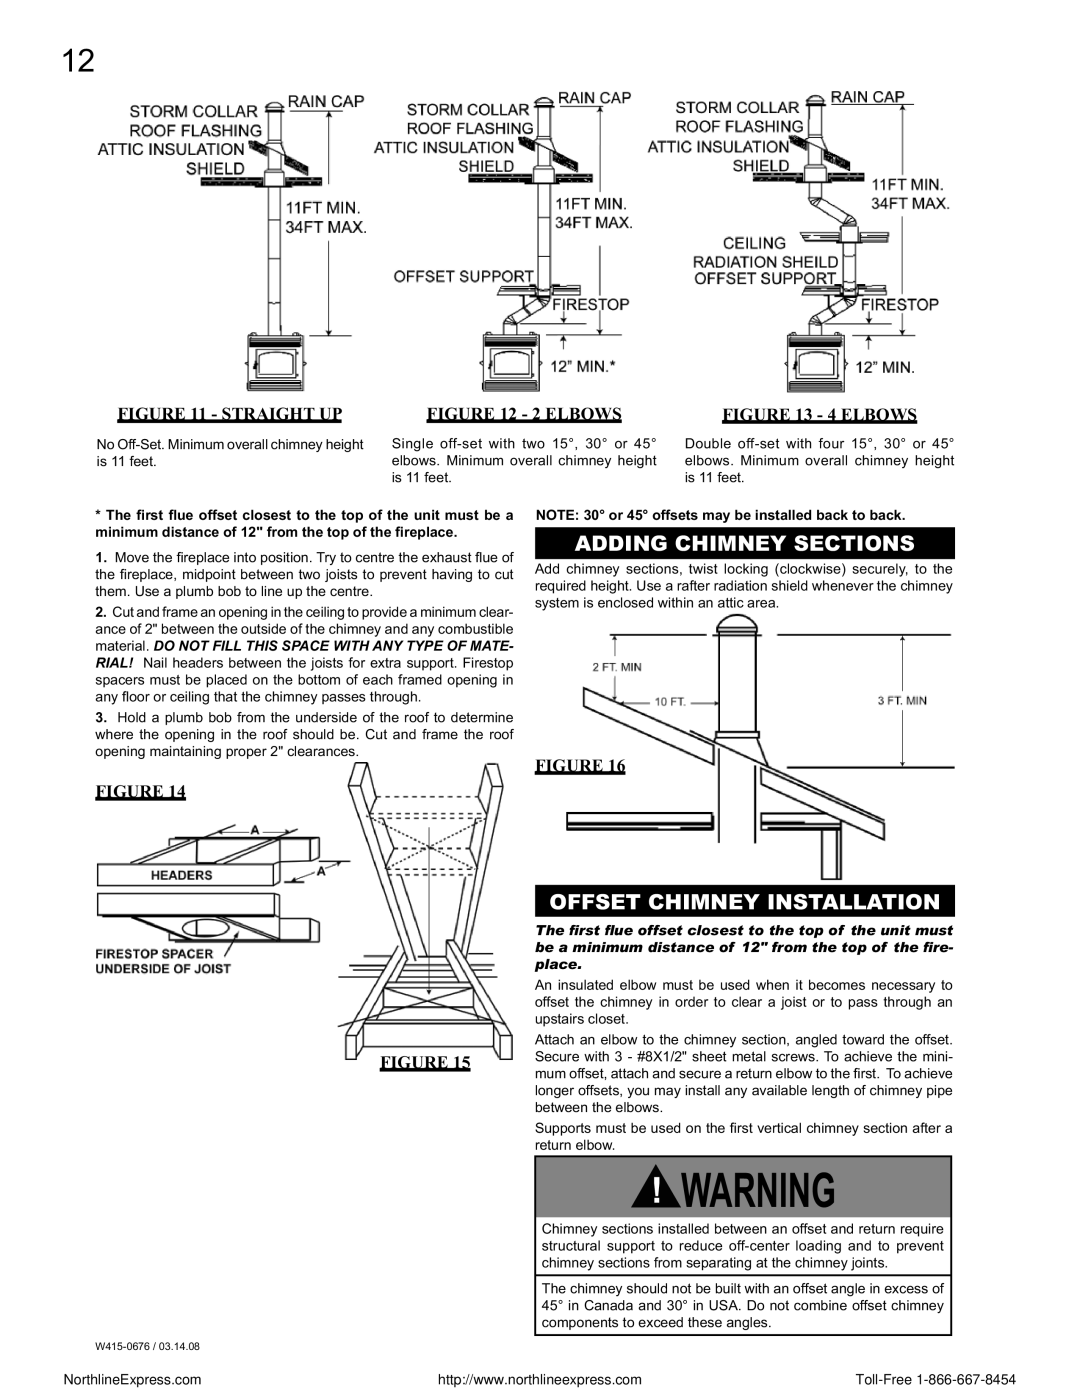
FIGURE 11 - STRAIGHT UP | FIGURE 12 - 2 ELBOWS |
No | Single |
is 11 feet. | elbows. Minimum overall chimney height |
| is 11 feet. |
FIGURE 13 - 4 ELBOWS
Double
*The first flue offset closest to the top of the unit must be a minimum distance of 12" from the top of the fireplace.
1.Move the fi replace into position. Try to centre the exhaust fl ue of the fi replace, midpoint between two joists to prevent having to cut them. Use a plumb bob to line up the centre.
2.Cut and frame an opening in the ceiling to provide a minimum clear- ance of 2" between the outside of the chimney and any combustible material. DO NOT FILL THIS SPACE WITH ANY TYPE OF MATE- RIAL! Nail headers between the joists for extra support. Firestop spacers must be placed on the bottom of each framed opening in any fl oor or ceiling that the chimney passes through.
3.Hold a plumb bob from the underside of the roof to determine where the opening in the roof should be. Cut and frame the roof opening maintaining proper 2" clearances.
FIGURE 14
NOTE: 30° or 45° offsets may be installed back to back.
ADDING CHIMNEY SECTIONS
Add chimney sections, twist locking (clockwise) securely, to the required height. Use a rafter radiation shield whenever the chimney system is enclosed within an attic area.
FIGURE 16
OFFSET CHIMNEY INSTALLATION
FIGURE 15
The first flue offset closest to the top of the unit must be a minimum distance of 12" from the top of the fire- place.
An insulated elbow must be used when it becomes necessary to offset the chimney in order to clear a joist or to pass through an upstairs closet.
Attach an elbow to the chimney section, angled toward the offset. Secure with 3 - #8X1/2" sheet metal screws. To achieve the mini- mum offset, attach and secure a return elbow to the fi rst. To achieve longer offsets, you may install any available length of chimney pipe between the elbows.
Supports must be used on the fi rst vertical chimney section after a return elbow.
! WARNING
Chimney sections installed between an offset and return require structural support to reduce
The chimney should not be built with an offset angle in excess of 45° in Canada and 30° in USA. Do not combine offset chimney components to exceed these angles.
NorthlineExpress.com | http://www.northlineexpress.com |