13
Maintenance Instructions
We recommend this gas grill be thoroughly inspected and serviced annually by a qualified service person.
At all times keep the gas grill area free from combustible materials, gasoline and other flammable vapors and liquids. Do not obstruct the flow of ventilation and combustion air. Keep the cylinder enclosure ventilation openings (located on the cart sides and at the front and back of the bottom shelf) free and clear from debris.
WARNING! Always wear protective gloves and safety glasses when cleaning your grill.
WARNING! Turn off the gas at the source and disconnect the unit before servicing. To avoid the possibility of burns, maintenance should be done only when the grill is cool. A leak test must be performed annually and whenever any component of the gas train is replaced or gas smell is present.
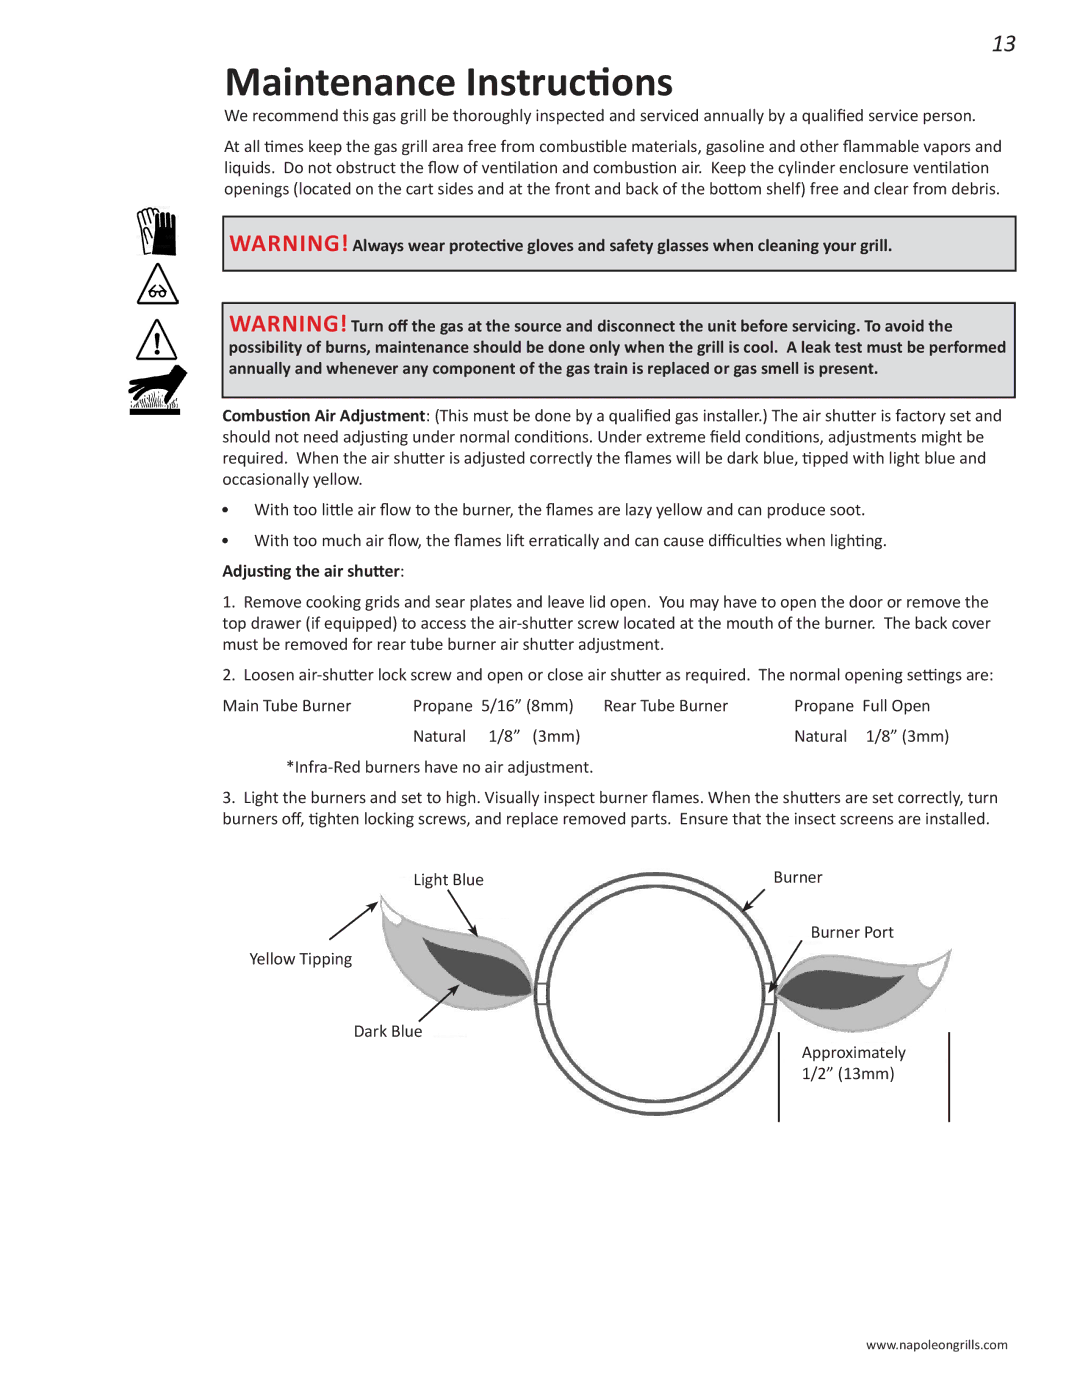
Combustion Air Adjustment: (This must be done by a qualified gas installer.) The air shutter is factory set and should not need adjusting under normal conditions. Under extreme field conditions, adjustments might be required. When the air shutter is adjusted correctly the flames will be dark blue, tipped with light blue and occasionally yellow.
•With too little air flow to the burner, the flames are lazy yellow and can produce soot.
•With too much air flow, the flames lift erratically and can cause difficulties when lighting. Adjusting the air shutter:
1.Remove cooking grids and sear plates and leave lid open. You may have to open the door or remove the top drawer (if equipped) to access the
2.Loosen
Main Tube Burner | Propane 5/16” (8mm) | Rear Tube Burner | Propane Full Open |
| Natural 1/8” (3mm) |
| Natural 1/8” (3mm) |
3.Light the burners and set to high. Visually inspect burner flames. When the shutters are set correctly, turn burners off, tighten locking screws, and replace removed parts. Ensure that the insect screens are installed.
Light Blue | Burner |
Yellow Tipping
Dark Blue
Burner Port
Approximately 1/2” (13mm)
www.napoleongrills.com
