BED KNIFE REPLACEMENT
When the bed knife becomes damaged or too worn to keep sharp, it must be replaced. Design improvements have made bed knife replacement easier with
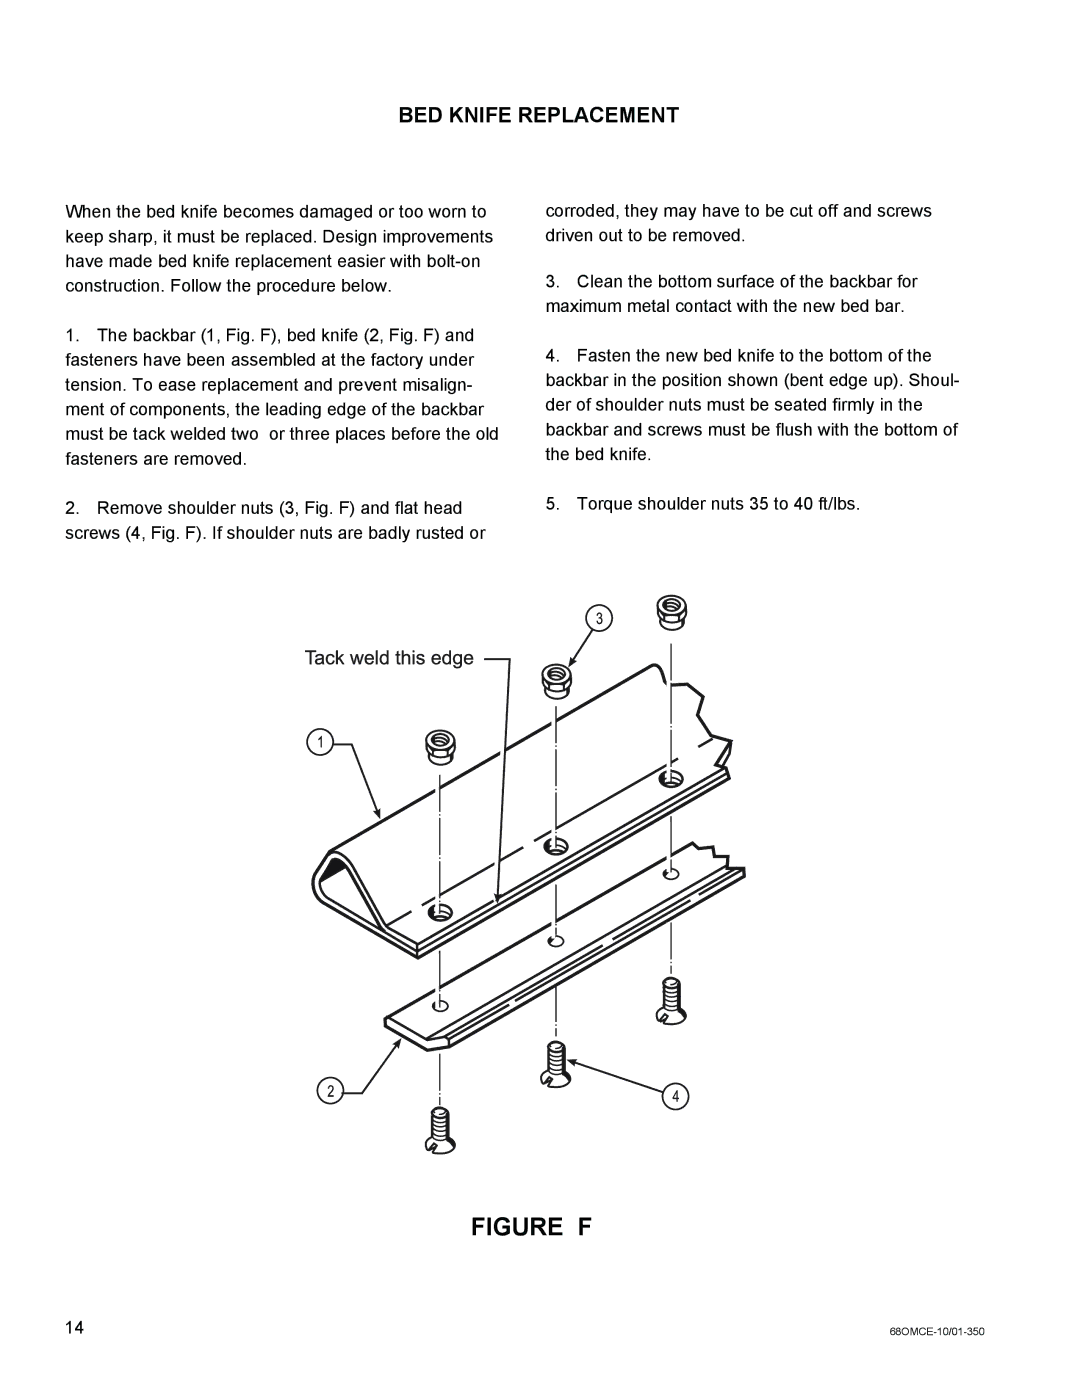
1.The backbar (1, Fig. F), bed knife (2, Fig. F) and fasteners have been assembled at the factory under tension. To ease replacement and prevent misalign- ment of components, the leading edge of the backbar must be tack welded two or three places before the old fasteners are removed.
2.Remove shoulder nuts (3, Fig. F) and flat head screws (4, Fig. F). If shoulder nuts are badly rusted or
corroded, they may have to be cut off and screws driven out to be removed.
3.Clean the bottom surface of the backbar for maximum metal contact with the new bed bar.
4.Fasten the new bed knife to the bottom of the backbar in the position shown (bent edge up). Shoul- der of shoulder nuts must be seated firmly in the backbar and screws must be flush with the bottom of the bed knife.
5.Torque shoulder nuts 35 to 40 ft/lbs.
FIGURE F
14 |
